Monday, May 31, 2021

finished the painting (almost)

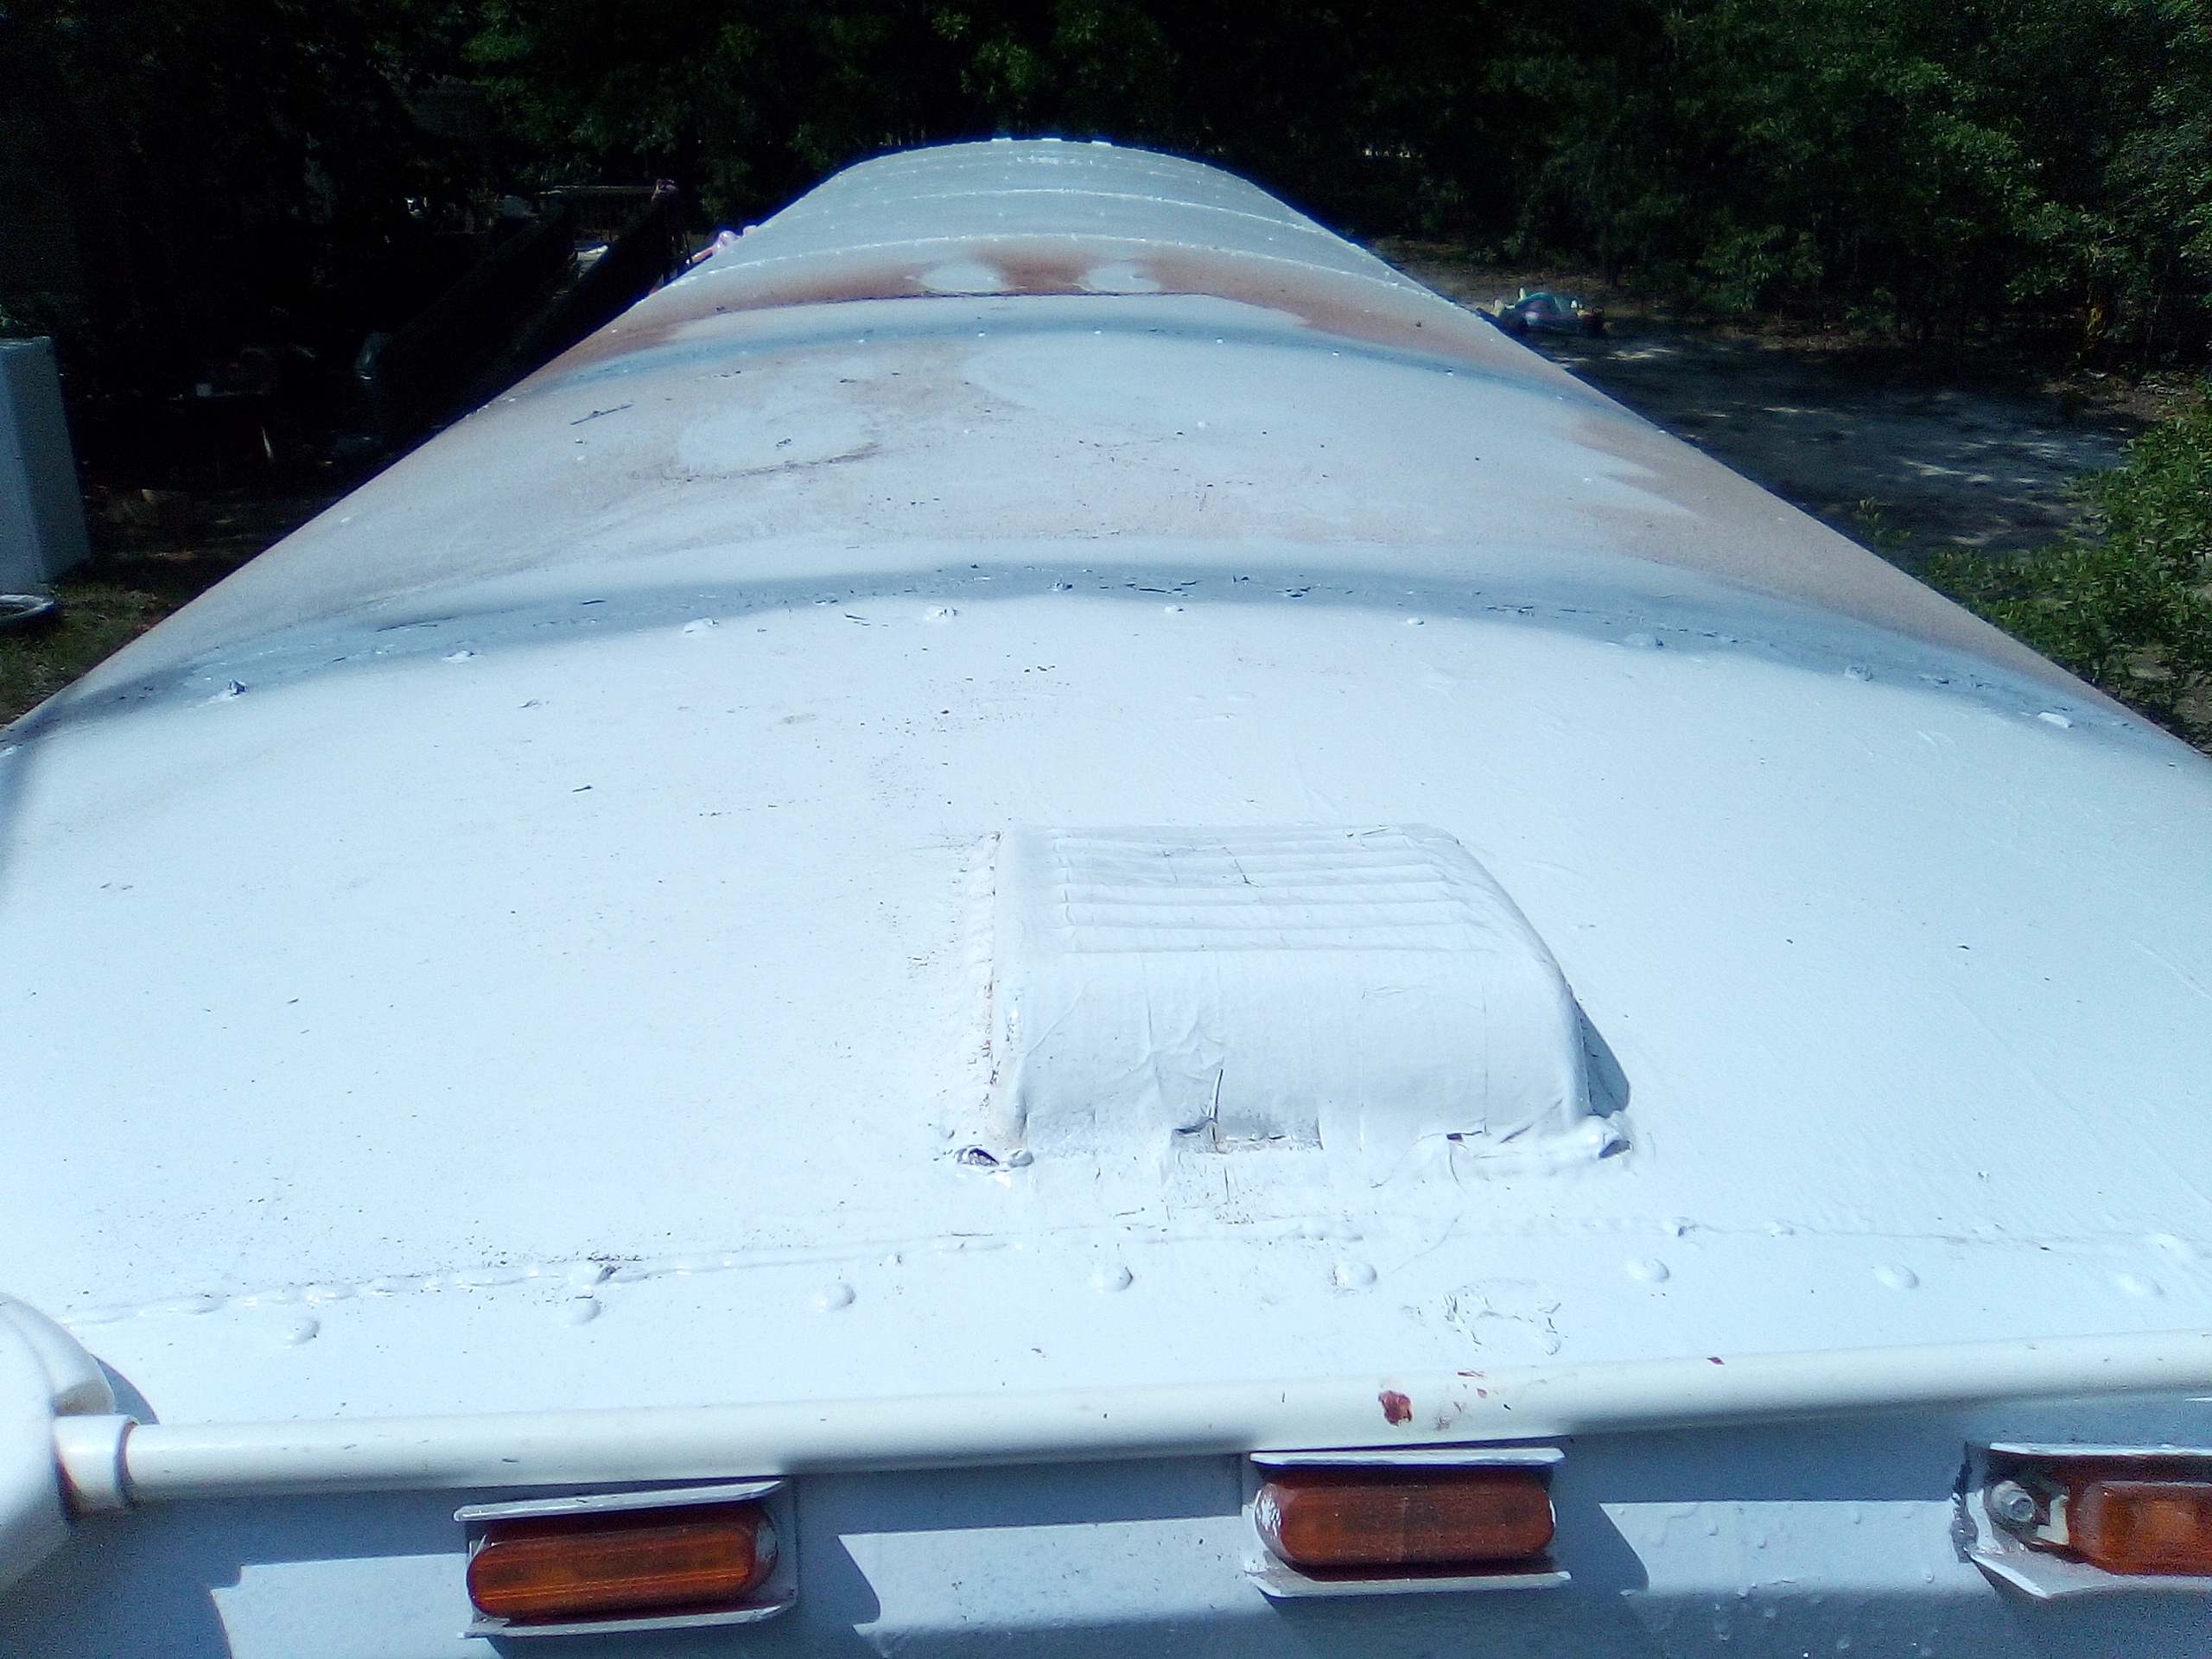
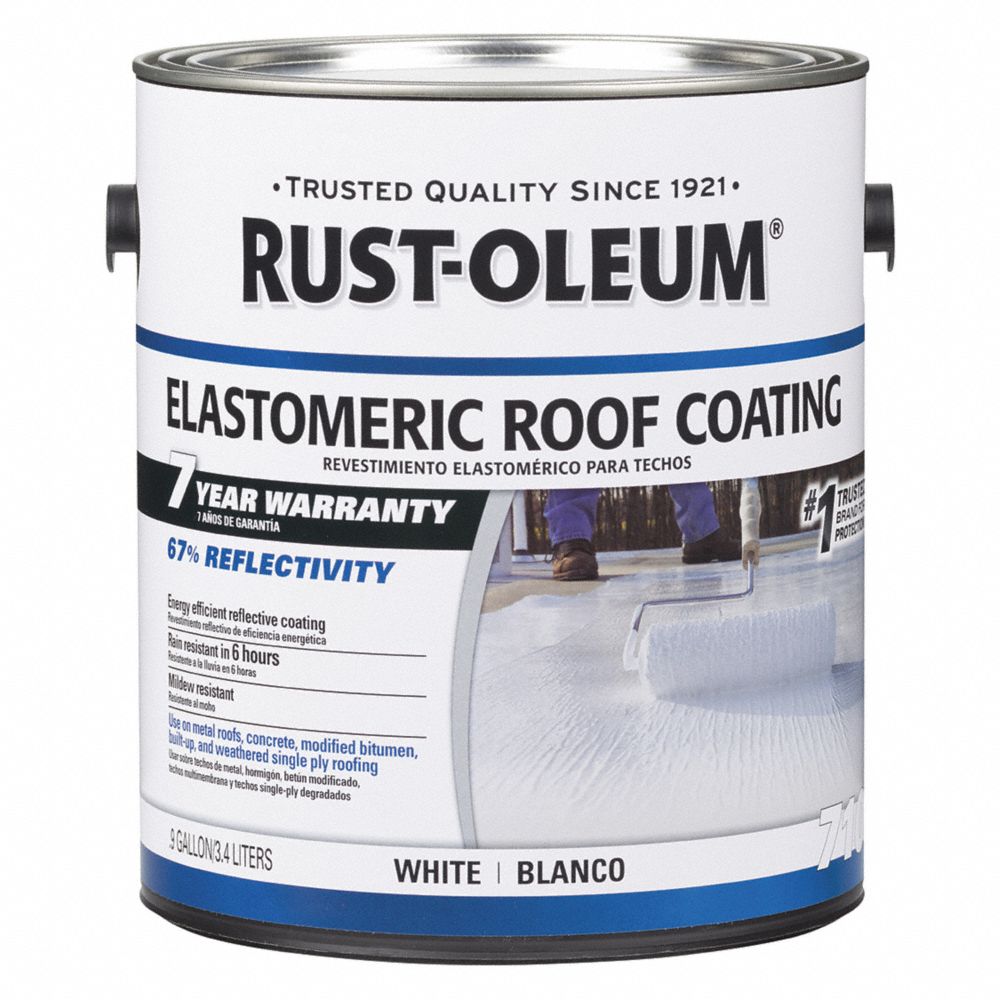
Today I had a lot of plans but achieved not very many of them. I had intended to switch out the roof vent but realised that as the paint was relatively fresh, it wouldn't stand up to much wear. Rustoleum takes a month to achieve full hardness. Thus I finished the painting on the front with one bit missed - the bit behind the right front wheel and I still haven't done the surround to the emergency exit window. 
Meanwhile I did find my reflective tape. I had some not quite amber tape that was sold as red. That's the thinner tape. I also had 25 feet of two inch red tape. I spent quite a while sticking that into place. The thinner tape was unsticking itself at one point so I'm assuming that if it stays on a week, it'll stay on for life. The older 50mm amber tape I had applied, I just couldn't peel off so I stuck red tape over it. I guess I'll have to go over it and press the tape every few days. The heat should bake it into place. At least that's what seemed to happen with the amber tape.

I do have white and amber tape left but I just ran out of time to put more tape in place. I wanted to do all my marker lights today but ended up doing just the corner markers. 


Looking at the red markers, the old ones had become rather abraded and opaque so it was definitely time to replace them. Now they look quite smart.
It was exactly the same story with the amber markers. Once the lenses were replaced the markers looked smarter. One corner marker seemed to have a dead bulb so I'll have to see about replacing that bulb. I might have a spare bulb in my pile of supplies.

I did replace two of the amber turn signal lenses. When I got to the third, I dropped a screw and could not find it - even with my magnet. Fortunately I know it's an 8-32 screw a bit between 3/4" and 1/2" so I'll probably have to trim my 3/4 screws or put a nut on them before I put the screw into the hole. Some of the screws are so rusty that I had to break one of the old lenses in order to get it off and undo the screw.

I simply ran out of time today. Tomorrow I have a crack of dawn start for work. Remaining to do...

  • Complete the application of reflective tape
  • Complete changing the light lenses/units as needed
  • Apply the "Keep back 300 feet" sticker when that arrives. 
  • Complete the couple of extra bits of painting needed.
  • Rework the right wiper mount
  • Complete installation of the second house battery.
  • Some small internal stuff
I had not mentioned the 300 feet sign before. It transpires that one is available on eBay so I bought one. I could do my own with paint and cardboard letter cutouts but this is just easier. Meanwhile I have been investigating signage for the sides. My current hot favorite is "Ft Mildred Prison Lunatic Asylum".


Sunday, May 30, 2021

Busy weekend

Yesterday I went back to the bus roof and spent all day clearing, priming and caulking two roof seams. It was about 100F (38C) and pretty well unbearable but it had to be done. I did have a few breaks that involved hurriedly taping over the seams when unforecast rain fell.

Really and truly I did not do much yesterday. I did find the silicone caulk that I'd put into the seams about 6 years ago was coming off easily and revealing rust. The wire brush in the angle grinder got worn out yesterday. That's the second Harbor Freight cupped wire brush I've worn out.

The silicone caulk which was clear, produced a nasty looking brown and slightly gooey dust that took a long time to sweep off the roof. While I was up there, I noticed the whole roof needed a second coat of white paint. The first had some thin patches. 

Speaking of silicone caulk. I found a tube of caulk that I'd tried to use a few weeks ago and been unable to make work. Out of curiosity I put it on the ground and ran over it with the pickup truck. The case split and it was possible to extract the silicone as a big block. I'm not entirely sure what use this is but it might work as ballistics gel.

Today I got to the roof and painted the entire roof using a roller. I did not climb on the roof today as I'd had quite enough of that yesterday. I did, however climb onto the hood to redo the paintwork around the windshield. At one point I managed to slip and was heading toward the ground. I grabbed the mirror bracket and it supported me without bending. That's a plus. I used it to swing onto the stepladder from where it was a little easier to descend but facing the wrong way with the wrong foot on the wrong side of the stepladder, it was still a bit challenging.

The end result of the day is the paintwork done today needs a second coat. I still have to do the roof vent, the lights and the reflective tape. With luck, I might manage to get it all done by the end of tomorrow, tomorrow being Memorial Day and hence a day off.

At this point, perhaps I should mention my ancestors. My great uncles were in the Territorial Army. The American edition of that would be the National Guard. They went off for their two weeks annual camp in 1914 and came back 5 years later as war broke out while they were at camp. They fought in France and survived. One came back twisted to one side from loading the shells into the guns shelling Paris.

My late aunty was an anti-aircraft gunner during the second world war and was responsible for downing Nazi planes that were trying to bomb the nearby docks or rail depot. My father was in the British army Germany in the 1950s, chasing terrorists.

Things left to do on the bus...

  • The roof vent
  • Finish the painting (not much left)
  • Change lights where needed.
  • Clean the glass of paint dribbles
  • Fix the tilt on the right windscreen wiper.
  • New tyres all around.
  • Reflective tape all around.
  • Put the new flame shield over the second battery and install the second battery.
  • A little interior wiring
  • Remove the back door buzzer.
  • Cladding over the unused windows and the windows I've already put aluminium plate over on the inside. 
I might put some text on the back of the bus again saying something along the lines of "Keep back 300 feet". I'm also toying with the idea of something on the sides to the effect "Lincoln Asylum for the Criminally Insane".

Sunday, May 23, 2021

A hundred and one degrees farenheit and I was on the roof!

Yesterday I had to take a break from work on the bus because I had to take my car in to the dealer for a repair. One of the cam shaft sensors had gone out. That meant that it was prone to stalling while I was driving - decidedly inconvenient and potentially dangerous.

While I was waiting for my car to be repaired I chanced upon an interior-exterior thermometer in Tractor Supply. Today I remembered I'd bought it and put it to use. High temperatures had been forecast and here they are - a hundred and one degrees Fahrenheit or 38 centigrade. Now you can see why I painted the roof white the other day!
Yesterday I'd been along the sides of the bus, removing old silicone caulk from two seams. I had wanted to do all four of the seams that I knew needed work but yesterday I was tired from spending hours at the dealership so all I did were both ends of two seams.
Today though, in 101F I climbed on the roof. It needs another coat of white paint as some of the grey is showing through. That's no problem though. But I went along one seam and removed the loose caulk, most of which was sitting on rust and so pulled up very easily. It might have been faster if I'd pulled the caulk off both seams and wire brushed both seams them brushed the copious dust off, sprayed rust reforming primer (love that stuff) on both and done the whole thing near twice as fast.

Being very hot it was probably best that I cleaned one seam, sprayed with rust reformer then went inside for half an hour before coming out to put Dynatron caulk in place then going inside for half an hour then spraying grey primer on the now paintable caulk. I went through that process twice - once for each seam before sweeping all the dust off the roof and spraying white paint over the grey primer. 

Having done all that I went around the edges again, sweeping them clear then spraying the ends of the seams that I had done yesterday. 

Next weekend is a three day weekend so I'll try to get both of the other seams completed. There are two further seams after that - one is already treated from a week or two back. The other doesn't leak. So the plan is to hit the two that leak then the next day to replace the roof vent. Whether that will need a collar or not, I do not know. I hope the rivet holes will line up nicely. Having done and caulked that it will be time to wipe the whole roof down with mineral spirits and put a final coat of white paint.

If there's any time left after that lot then the front and rear marker lights will be worked on - maybe the top side markers too. Following that, the other lights will need attention and then the high-visibility marker tape will be applied. Again, the area where the tape will go will have to be wiped down with mineral spirits to make sure it's really clean. 

The next stage after that will be fixing the rest of the brake lines. The tires are down to 75-85psi so they all need air. They all need replacement too since they're 11 years old. Then there's the wiper mount that needs to be redone and the horn needs a proper diagnosis. Other than that there are the window covers. I have two already and I need to order more. Those should cut down greatly on heat.

Plenty distance to go.

Saturday, May 15, 2021

The roof is primed

Today was another day spent on the roof of the bus. It wasn't an early start because of condensation but once the sun had dried all that up, I could get up there again. As this bus has no roof hatch, getting on the rood is a case of putting a stepladder up as far as the bonnet then putting a small stepladder on the bonnet to climb onto the roof. This is pretty tiring and when one has a leg cramp on top of the roof, getting down again can be interesting.
The elastometric paint on the roof came up in big flakes. It was not well attached for the most part. Some was well enough attached that it would not come up with a wire brush in an angle grinder. The grey paint underneath was so well attached that wouldn't come up with heavy brushing. 

The flake in the picture is pretty typical - it's full of cracks and holes. Exactly the kind of thing that is not required in a roof coating. I am very disappointed in this Rustoleum Elastometric paint. 
There wasn't much left of the elastometric paint when I went on the roof - it seemed to have flaked and peeled off quite well all on its own. Still I removed a lot more and worked on one of the seams with the new vehicle seam caulk. This stuff is phenomenal. It smells like an epoxy, squirts like a caulk from a caulk gun and can be worked with a putty knife. I have to say this is probably a good move. 
After treating one seam and finding the grey roof was painfully hot to work on, treating the other seams was abandoned for this weekend. The new plan after priming the roof with a rust-killing primer is to paint the roof white then tape over the seams with duct tape about 8 hours later. Then it will be left for next weekend to remove all the silicone caulk and put the new caulk in place. I've heard of people using Eternabond tape but my understanding is that's inferior because it's too easy to get ripples in the tape that will let water in.

Well, tomorrow is white day. Once the roof is white - if there's time - I might also paint white the last bit of the front of the bus.


Sunday, May 9, 2021

More unpleasant discoveries on the roof

Today I worked along the edges of the roof where I'd primed and painted the other day. That had a coat of topcoat and now looks pretty good.

Then I got on the roof. The roof vent is pretty rusty which it should not be. There is also rust on the roof where there should not be. It seems that the Rustoleum elastometric paint has actively damaged the roof by trapping moisture. I'm seeing rust on the flat areas, not just the joins in the metal. That is not welcome.

When I put the Rustoleum elastometric paint on, it was supposed to last 7 years. It had not even lasted two years, let alone 7.

After application, it cut the interior temperature of the bus down to outside temperatures. That was welcome. That only lasted for one summer though.

Mold and mildew grew quickly on the elastometric paint - so much so that it was definitely black in places. That should have been my cue to remove it.

Standing outside the other day after a heavy rain it was possible to see bags formed in the elastometric paint which when poked with a yardstick, burst releasing water. 

Going onto the roof today it was possible to see that the whole elastometric coating has broken up badly and is trapping water underneath. It's so bad that there are big patches of rust on the roof that were not previously there. The good news is the paint just lifts up with my fingers. A paint scraper should see a fast end to the elastometric paint. Whether I now have to redo the areas I've just painted remains to be seen. 

The elastometric paint has trapped moisture in the seams on the roof, which is not good. I might have to pull up all the seam sealants and redo them. The good news is I did buy a gallon of rusty metal primer and a gallon of white paint. 

What I'll have to do is to scrape the nasty elastometric nightmare off the roof, wire brush the rusty areas then brush the roof free of debris, wipe down with thinner and then spray on primer. I say spray because painting - even with a roller - doesn't get into the crevices and doesn't give an even coating. I can see a trip to Harbor Freight coming soon as they have a better electric sprayer than the one I used on the sides of the bus. It has a small high volume, low pressure compressor. That should be very helpful.

As for roof caulking, I'll stick with silicone caulk but I'll go over to the more expensive paintable caulk. That should solve all the problems though it does leave a huge bead. I'll have to figure out some way to reduce the bead side. Maybe there's some kind of non-stick spatula I can use to apply the caulk.

Looking for caulk I found some I'd bought not long ago. Trying to open it, I found the same issue that I'd had with the caulk the other day. It was rock solid in the container. Fortunately it was so rock solid that I didn't break the new caulk gun trying to squeeze it out.

The Rustoleum elastometric paint should not have cracked, peeled, formed bags full of water, caused rust or attracted mold/mildew. There should be a class action against Rustoleum for this kind of fraud. Before any cleverdick says I didn't prepare the surface correctly, it was brushed free of debris, washed with an industrial cleaner then rinsed and dried. That surface was as clean as it's possible to get.


Saturday, May 8, 2021

An unpleasant discovery on the roof

A year or two ago there was an unpleasant incident when a vandal made their way onto the hood of the bus. It seems they also made it to the roof as the roof vent has clearly been stamped on. No wonder there's a leak! Fortunately I have a new roof vent.

Today I set to, wire brushing the sides of the roof of the bus and the gutters. The elastometric paint just flew off in great big sheets for the most part. In some places the wire brush couldn't shift it. After a while though it was time to retire the much used Harbor Freight wire brush.

It had a good life and was used on both sides of the bus, the back wall and the hood. The new one should easily be capable of completing the roof and the front parts of the bus.

So, after scraping one side with the brush, during which it was discovered that rust had formed beneath the silicone caulk that had been applied 6 years ago in order to stop leaks. Maybe that's why there's still a bit of dampness inside?  Pulling off the loose silicone caulk, the rust was treated and then when the rust-killing spray had dried, the whole side of the roof and gutter that had just been brushed with the wire brush was brushed free of debris. Having done that, the whole area was wiped down with a rag soaked in mineral spirits.  Finally some fairly well thinned white primer was painted on using a roller.

Having done the one side, it was time for a repeat performance on the other side. That went fine until it was time to put on the primer. There was insufficient white primer to complete the operation. Thus a trip to the store was needed.
Well, at the store the white primer shelf was vacant. It seems there has been a massive run on primer. In the end I got some brown primer. It'll do the same job and even works on rusty metal though it'll probably mean I need more than one coat of topcoat. Thus I got a second can of white topcoat. As daylight was rapidly receding I also picked up a big spray can of primer.

The sum of today was that I did get time to spray the new primer onto the unprimed area of the roof but did not have time to put any topcoat. Tomorrow is going to be topcoat day. With any luck the topcoat should dry fairly swiftly, allowing me to climb onto the roof and treat the areas that still need to be treated with the wire brush, ordinary brush, thinner, primer and paint. Meanwhile it is imperative that more caulk be applied in order to keep the forecast rain next week out. If I can get all that done then I shall be ahead of schedule.

While I am up on the roof, I'll see about taping over the damaged vent in the hope of stopping more water ingress. Maybe the summer heat will dry the bus out a bit more. Replacing the vent will happen but not this weekend - perhaps next. 

One of the things to be achieved on the back end of the roof will be to make sure the paint on the back end of the roof is very stable. That way if I want to I can tape a flexible solar panel down. A single 10W panel generating power at 10W most of the day should provide ample power on its own. 


Sunday, May 2, 2021

Part 2 of the end - a job unfinished

Having been up and down the stepladder multiple times yesterday, my leg muscles were really quite sore. I did get the camera installed and correctly aimed. That took quite some running up and down the ladder to get the camera aimed right. I'd like to have had it aimed slightly further away from the bus but I couldn't achieve that. The camera wouldn't adjust that far.
The picture is really clear and without the ridiculous lines that so many cameras have. I do have a third version of this camera that I might use to replace the front camera. The picture is really quite decent. As can be seen in the picture, the ladder is visible and a paint pot I put on the ground.
That camera really does show how close the bus is to something. With this I can get to within a few inches when backing up, which is very useful.
I did want a skirt around the lens as a lens hood that would redirect water away from the lens. The last backup camera was ruined by water ingress into an allegedly waterproof camera.

I was unable to get a piece of aluminium tubing as big as needed and had to expand a square tube to take a round camera. Yes - you read that right - I did fit a round peg into a smaller square hole. I just modified the squareness to accommodate it. Thus, as I'd used the largest aluminium tube available, various ideas came to mind for a lens hood. In the end, the cheapest, simplest option seems to be working well.

Aluminium duct tape sprayed with primer then topcoat. after the paint was dry, it was a case of folding a quarter of the tape over itself lengthwise. Then it was simply attached to the camera mount. The end result - a skirt that will direct rain away from the camera.

The camera itself is push fit and the cable is caulked into place inside the bus. If the camera did wiggle loose then it wouldn't drop but as the camera was also hot glued, it should never work loose. 

I had intended to put lenses and lights into place today. Aside from running out of time, there just weren't enough blue male spade connectors to connect the three clearance lights. I also had misgivings about doing those or the conspicuty tape until the roof is also painted. 

Next weekend the plan is to paint the gutters and as far up the curve of the roof as I can get. Again, the paint will be white. The center of the roof is something for another day. At some point the roof vent will get switched out but probably after the painting has been completed.

Well, it's progress but not quite as much progress as I would like. 
 

Saturday, May 1, 2021

Part 1 of the end

The back end of the bus that is! Today was a day when not as much was achieved as I would have liked. I'd anticipated completing the back end of the bus but it's going to roll into two days. The heat was horrible! It is exactly why I am painting the bus a lighter color. That grey attracted heat!

The roof is in a sad state. The white Rustoleum elastometric paint is flaking and doing what Rustoleum paint generally does best - coming off as fast as it went on. Given that I prepped the roof - which had already been painted with an industrial grease removing cleaner before application of the paint (which is water based), I'm rather disappointed. They grey paint that I simply slapped on over the original yellow with no preparation seems to be hanging on quite well. 
Long term readers will recall that I was quite upset to see how the red lens on the corner marker had disintegrated. Today I had a good look at it and the bulb is not a BA15 under there. It's probably a 168 bulb. Just a single screw holds the lens on which surprised me. I do have spare lenses for the corner markers. They'll go on tomorrow. I'll also replace the three rear marker lights tomorrow.
Aside from updating the paintwork - which I'll have to touch up with a spray can, I did install the camera mount that I'd welded out of aluminium. That went on relatively easily and is lined up with the hole for the previous camera. In order to facilitate easier installation of the camera, I'll probably pass a line down from inside the bus and pull the camera cable upwards.
As the two plates I'd welded together as the back of my camera mount had not been perfectly flat I decided to put some caulk behind it. That would also seal leaks. So, having decided to do that I found my only available caulk was a white polyurethane caulk that I'd bought in Lowes (hiss, spit). Well, after cutting the end off the applicator, it proved darned hard to squeeze. Ok, the spike was used to poke the caulk. It was still hard to squeeze - so hard in fact that the caulk gun broke under the pressure.

The caulk was necessary so out came the machete. A few chops later and the tube was opened and became an expensive single use tube. Heaven knows how much that stuff cost. Anyway on chopping it open, the reason for the stiffness became apparent - it had been sold already half set in the tube. I did get enough for the task at hand though.

Tomorrow the plan is to install the new camera and put a foil tape lens hood around it to protect it from rain. While working up there, the lenses will be replaced on both the wedge marker lights and the three top markers will be replaced totally.

Coming down, the two reversing lights will be replaced and the turn and brake lenses will be replaced. While still working on the back, the red conspicuity tape will be installed. There is now no more painting to be done on the back. The rest of the paint is the roof, the front and the gutters.

I had hoped to do far more this weekend but what with the incredible heat, work was restricted to short dashes out to do the work and short dashes back into the air conditioning. Still, things were achieved. The back of the bus where I couldn't reach without a stepladder was prepped, primed and painted. The camera was installed. The new light lens was tried in place and found to be what was needed. At the end of tomorrow, the back of the bus will be completed as far as it'd going to go (though one tail light still needs replacing though I don't yet have the parts). There also needs to be a sign (which I might paint) along the lines of "Danger - Keep back 300 feet".