Sunday, February 23, 2020

More progress and a few issues

The first thing I did today was to continue the work of yesterday. After spending an age drilling holes in the second aluminium angle strip, I drilled one hole each into the solar panel mounts. I would have put three holes and three rivets per panel but I'm not yet certain that everything will be square. Better to have three holes and then there's flexibility in the system.
Next I cut the other angle, having been up on the hood of the bus several times using my DIY ladder. I had thought about installing the panels today but while I was up on the hood measuring, everything was just a little bit off and I really need to go back up there another day and measure again. I did put a spirit level on the bus and found it's not sitting quite level. That doesn't surprise me at all.
That's how the solar panels currently look. They're going to be a shade wider than my current panel and a little shorter - even with the two 3/4 angles. Actually the whole thing came to something like 14 3/4" tall. I checked the bolt holes for the old panel and they will be well hidden by the new panels. I can stuff them with sealant and forget about them.
While I was on the hood, I looked at the roof. There are a few sections where the elastometric paint is peeling. I'll have to put a thicker coat on. I also need to wash the roof thoroughly. The anti-fungal claims of Rustoleum Elastometric paint are null and void. There's plenty fungus growing on that. Actually the bus needs some road time. There's green fungus growing where there shouldn't be any.
That's the roof vent. It's losing rusty water. That means it definitely needs replacement. Fortunately I already have a brand new roof vent. I'd realised ages ago that it likely needed replacement and had ordered one. I have to say it's more solidly built than Carpenter's cheaply pressed vent.
Although the roof looks white here, it's covered in twigs, black mold and peeling elastometric paint. I'll have to go over the roof with industrial cleaner and then recoat with maybe several coats of elastometric paint. I know the paint is thicker at the back than it is at the front and that's probably why it doesn't appear to be peeling at the back.
I would have (probably) kept measuring and marking out where the panels will go. Unfortunately my sharpie had other ideas and died on the job. Measuring up that Carpenter's workmanship left a little to be desired. The mirror mounts are not symmetrical. I've noticed a lot of Carpenter's measurements seem to have been done by eye rather than by measure. I'm not certain that the roof line is completely symmetrical.

I'm still no closer to finding out what the solvent smell in the bus cockpit is. There's nothing in there that could possibly have tipped over. There's nothing inside the rest of the bus that's obviously spilt either. It's rather much of a mystery right now.

You're absolutely right about my not doing too much at the weekends. The problem is I need to rest at the weekends. My work week is crazy. Until Tuesday this week coming, I will have been driving schoolbusses from...
5:45am - 8am
9:15am - 10am
10:45am - 11:30am
1:45pm - 4:45pm

From Tuesday I'll have two extra runs...
8:00am - 9:00am
10:00am - 10:45am

Basically, aside from dropping my aide at 8am, I'll be on the road constantly from 5:45am til 11:30am. That's 6 hours of solid driving! Thank heavens for my long lunchbreak. It all takes a toll so for me, not doing anything and not driving on the weekend is luxury. I am afraid to say I just veg as much as possible.

Next weekend, assuming the weather is fine, should see the new panels finally installed. I might (being anal) test them again before installation. It will be interesting to see how the system works with just the installed panels. That'll be a grand total of 50W. I have a further 115W of extra panels.

There's a lot of talk about solar panels being only any good if you have them flat or aimed straight at the sun. That's a load of bunk in my experience. I can get plenty out of my vertically inclined panels. The only reason I have portable panels on the end of a cable is so that I can place them in optimum sunlight when the vehicle is in shade. That and I feel I might well end up powering my extraction fans exclusively from solar power and bypassing the battery.

When I was up on the hood measuring, I found the panel to which I will be fastening the solar panels is not actually flat. It's flat in the horizontal but slightly curved in the vertical. I will have to see how that affects or not, installing my new panels.


Saturday, February 22, 2020

Cold but dry

Last time I tested the three 10W Aleko solar panels. This time I have rivetted them to a strip of aluminium angle, ready to install on the bus. These, when installed will bring my permanently installed onboard power up to 50W.

Today got off to a slow start for two reasons. First my stomach decided I should spend most of the time very close to the bathroom. I must have picked up some crappy bug or other which, given my job working with minors, is not unexpected.

After the hole drilling got off to a rocky start last time, I pulled out a 10 year old Harbor Freight drill press that had never been out of its box. There was a little rust but I got it all together fairly swiftly. Needless to say it had no vise so that was the end of my plan to use that today. If I could have got to the local hardware store to get a vise then I would have but my stomach kept me close to the bathroom all morning and the middle of the day. By the time I dared risk going out, the local hardware store would have been closed for an hour or so. While a trip to Lowes (hiss. spit) or Harbor Freight was not inconceivable, it was impractical. Thus I stuck with drilling pilot holes then enlarging them. That worked a lot better.

When I went into the bus I smelt a strong smell of solvent. I couldn't identify it so after a good hunt around and still being mystified as I had not smelt it earlier, I cleaned up a bit, disposing of a large quantity of cardboard boxes. That cardboard stuff really builds up quickly. While I was at it, I got shot of the foam board I'd bought to make shapes representing my solar panels. I seem to have done OK by simply measuring and estimating.

The anti-fungal elastometric paint I put on the roof seems to be covered in black mold and is cracking in places. The plain white paint I put on years ago never had that issue. I'll have to get back up there and wash the whole roof then scrub where the paint is cracking before reapplying my elastometric paint. There are quite a few places where my grey paint applied in December 2014 is beginning to flake too. That will have to be gently sanded or sand blasted then repainted.

A few days ago I bought more 8-32 bolts but an inch long. That will do well at securing my front access panel. I'll give the rear access panel the same treatment. My 10-24 steel rivnuts arrived from wherever a few days ago. Those will be used to secure the MPPT charge controller.

So after I'd drilled all the holes to mount the solar panels and drilled holes in the solar panel frames, it was time to rivet them. That's where a problem arose. My short handled Harbor Freight riveter had a rivet mandrel stuck in the jaws. That led to my having to disassemble the whole riveter during which a spring I didn't know existed shot over my shoulder and hit the bus ceiling. Fortunately it was pretty easy to locate. It turned out that the operating part of the riveter comprised two jaws, a spring, a funky bit and a tube with a narrow end. After a few false starts I got it all back together whereupon the riveter seemed to work perfectly.

When I say it seemed to work perfectly I had another jam. It was then I realised I had not replaced the chromed nozzle at the end of the riveter. Looking around I couldn't find it either. Finally after moving a pair of wirecutters I found I'd put them on top of the nozzle.  So, having had to disassemble the thing again, I finally got it back together and started work. It worked pretty well most of the time. There were a few mandrels that broke off half way rather than coming all the way out. I'll have to cut them off with an angle grinder. I'm not sure whether it's the riveter because it doesn't happen all the time or the rivets from Lowes (hiss, spit).

The combined weight of the panels and the aluminium angle is appreciable. I'm happy to use aluminium rivets to rivet the panels to the angle but I might well use steel rivets to fasten the angle to the bus. In fact I have some wide head steel rivets that I bought several years ago that would be perfect for the task. I'll have to find them.

Jobs still waiting to be done...
Fixing the broken wire in the conduit
Installing the MPPT charge controller
Installing the three solar panels (and completing putting them together).
The mount for the right hand wiper pivor needs to be re-engineered.
The roof vent needs to be switched
The roof paint needs attention
Some of the body paint needs attention
The panel on the back door that I welded needs to come off and be rewelded.
There need to be panels over the other 3 windows at the back.
The rear view camera needs to be switched out and the high-level rear-view camera needs to be replaced and given a protective hood.
One of both of the batteries needs replacement.
The old charge controller from the back needs to be re-employed as the front charge controller in combination with extra wiring to keep the driving batteries topped up.

Saturday, February 15, 2020

Tested and A OK

The sun appeared suddenly and the sky went blue. That's the first time in ages so I zipped out to take full advantage of it. My Walmart Aleko 10W panels had all arrived so I have 3 to play with. As there were screw connectors on the contact plates I'd bought some ring connectors with the idea of using them. I'd forgotten after I bought them and had subsequently bought another set too. While I was at it, I bought some low amperage twin cable. Each of those panels is less than an amp at full blast so the wiring doesn't have to be super heavy. Just plain old speaker cable will do. 

As somebody is going to move into the trailer next door, I'm having to contemplate moving my 20A power supply. I'd been tapped into that breaker box for a couple of years for the 20A I need for welding. I'll pull the breaker out and pick up my cables. It's no biggie. I can transfer to the breaker box on one of the other mobile homes here. They're all owned by the same people. 
Without the customary power supply, rather than laying a long extension lead I tried using my gas soldering iron. I'd bought a gas soldering iron from Harbor Freight a long time ago. It fell apart before I had opportunity to use it. I'd kept the tools and since they fit my Walmart butane torch I thought I'd try the soldering iron adapter. The short story is it did melt solder but did not work at all well. On a warmer day perhaps it might have worked better.  I gave up on that, laid out a long extension cord (in fact two end on end) and soldered wires to my solar panels with my Walmart electric soldering iron.
My soldered joints are at the bottom and I think they look a lot neater than the Chinese solder joints at the top. At this point I still need to put some diodes into the circuit. Having said that, I could now test each panel as I added wires to it.

Testing was straightforward or not, perhaps. I started by putting my blue watt meter on the panel to measure watts passing through. For that I needed a load so I connected a car tyre pump. Whoops - too much drain and the meter blanked out. A webcam attached to a USB converter - too little. Then I plugged the panel into the bus system using my external solar input. Angling the panel perfectly I got a reading of 9.1 watts on each panel. Given that there was a tree branch almost in the way and that I probably didn't have perfect sunlight as well as the watt meter using some power, 9.1 watts was perfectly respectable. It looks as though these panels really do produce 10A each.
One of the day's tasks was to work on the non-functioning SAE inlet. That involved removing the access panel. Seeing as the screws had worn out what little thread that can be put into sheet metal it was time to put rivnuts in place and switch out the self-drilling screws with machine screws. Fortunately I had a packet of 8-32 rivnuts. It didn't take too long with a step bit to drill out the holes to accept my rivnuts. I actually ran almost out of 8-32 rivnuts. I'll have to order more.
With the rivnuts in place (there are 8 around the access hole) I can easily open and close that access panel. While it was open I got on with the next phase - investigating the problem with the SAE connector. The logical place to start was with the connection between the twin wire and the red/black wire that came from the SAE connector. I cut the connectors out and put new connectors then tried it again. Nope! That didn't work.

Next I cut the new connectors off and put my voltmeter set for resistance on the SAE inlet. I had a lovely connection on the negative side and none at all on the positive side. I have a dead SAE inlet. Well, fortunately I bought 4 so it wasn't an absolute catastrophe. I switched the SAE connector over but tested it as OK before anything else. Then I put new connectors on the twin cable and the SAE connector and tested. Nope! That didn't work either.
There's nothing clearly wrong with the connector from the back.
There's nothing clearly wrong with the connector from the front.

So, having ascertained the problem likely lay in the twin cable which was brand new on a spool from Lowes (hiss, spit), I tested the cable. It turned out that one side of the cable didn't work. That means I'll have to open up my cable wrap and replace the twin cable with single cables. This is not the first time I've had to throw out a reel of bad wire.

The biggest reason why progress on the bus has been so damned slow is that a goodly percentage of the products I've bought have been worthless garbage and everything has to be tested before use. I didn't test that SAE connector nor that cable and look where that got me! It's not possible to lay the blame for these failures on price, on a particular retailer, a particular manufacturer or a particular country. I've bought from various places and still get failures. It's just the way things seem to be - non existent quality control across the board.

One thing I need to do is to get some short (3/4 inch) 8-32 machine screws. While I have some machine screws, they're all way too long and I just don't feel like shortening them. I did buy some 10-32 bolts the other day and I have 10-32 rivnuts arriving. They're for use at the back of the bus though. I need to secure the rear access panel and the new charge controller. The top of the control console is pretty loose - the screws have all come through the steel so that could be a candidate for rivnuts too.

I started work on the bottom bracket to hold my three solar panels. Drilling is taking quite some time as I started by drilling 5 rivet holes for the first panel and 4 securing holes below each panel into a single length of aluminium angle. Using my Harbor Freight battery drill took forever and I exhausted both batteries before I'd drilled many holes. I switched to the Harbor Freight power drill and drilled the holes a lot faster. This is, of course, the time when one wishes one had a drill press. Not having one and having got most of the way through one set of holes, I'm not that enthused about spending money or time on getting a drill press.

A gentleman came and removed all the scrap fridges and other scrap domestic appliances today. While he was doing that I realised I'd missed a trick. If I cut the fridge steel that I removed from the fridge etc to fit over the lip where the glass goes in the window I could drill and rivet. Then I could smooth over the rivetted area with Bondo to make it look really good. I could even put a thin layer of Bondo between the two surfaces waiting to be riveted. As long as I riveted quickly there should be no problem.

While I was doing that, a rather suspicious individual turned up in an unmarked truck with no business cards and a clipboard that didn't seem to have anything relevant clipped to it. He was trying to pedal roof repairs. He was very insistent about wanting to get on top of the roof and was told politely that the services he offered were covered. I'll have to get on with installing the security camera. I figure since the security camera unit I bought will take 4 cameras, I can at least put three. One looking to the right with the other two cameras in view, one looking to the left with the other two cameras in view and one looking down the driveway. That way I can capture anybody tampering with the cameras.

Tomorrow I hope to make more progress on drilling the aluminium and possibly drill the second piece of aluminium. I'm not sure that I'll have time given how slow all this drilling is, this weekend to remove the old solar panel and install the new ones. Each single step on the road adds up to a great journey though.

Sunday, February 9, 2020

A lot of work and no visible change

Today I did a lot but nothing really noticeable changed. On Friday on my way home from work, I popped into Lowes (hiss, spit) and bought four reels of wire - red, green, white and black. I also had some leftover twin wire from my last project which was to install a car dashcam as a security camera for the premises here.

Today the plan was to build up a cable, install that cable and some SAE power sockets. Then I was going to find the solar power cable and run that to the built-in front and rear cameras to power them 24x7 as a security camera setup. I didn't quite get that far though.
Making up the cable took plenty time. I ended up duct taping all the cable ends to the mirror bracket on the bus then taping them all together in a little bundle every 8 inches or so. That didn't take too long though I'd have liked to have done it faster.
As the cables came off the spool, they tried to tie themselves into knots. Were I doing this a lot more, I'd have a workflow set up with the spools all on a single spindle, combining through a funnel and I would be pulling a bit and taping, pulling a bit and taping. 
It is a fairly hefty cable bundle. When eventually I ran it down through Carpenter's cable conduit I noticed my bundles (there are several) are about as bit as Carpenter's original cable bundle.
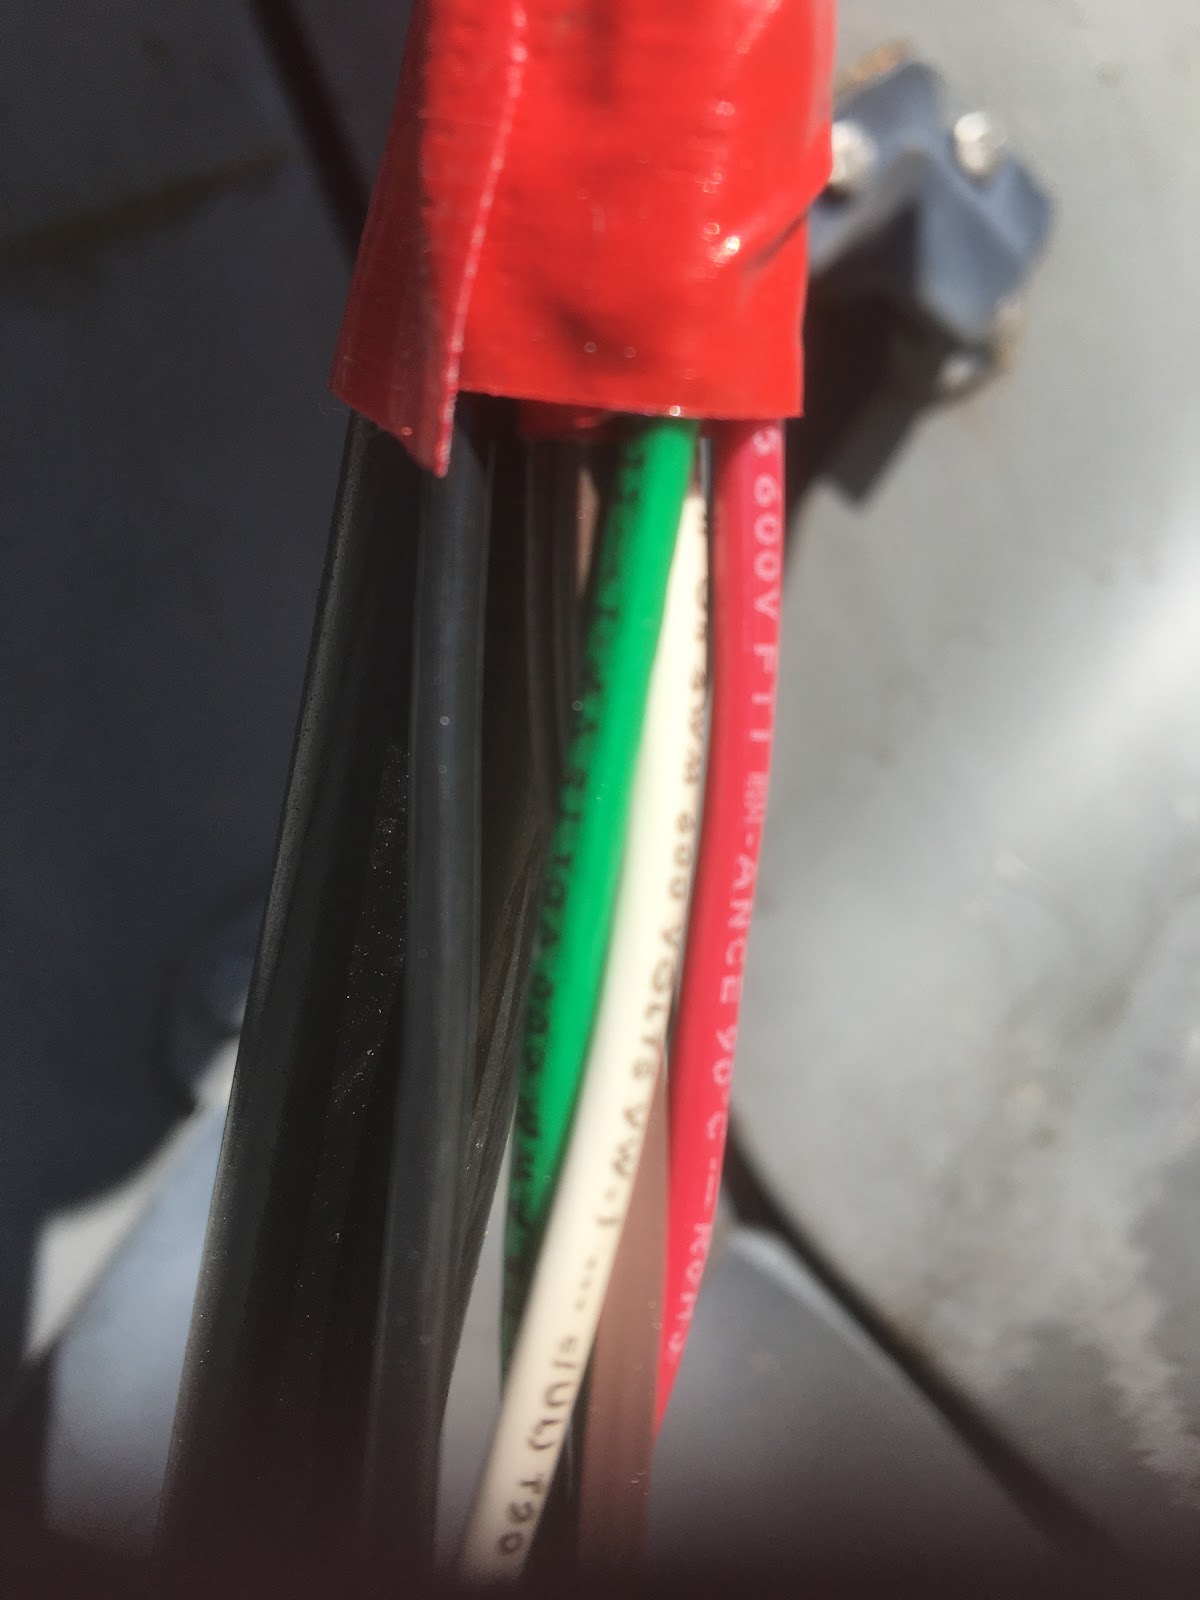
The length I needed was not massive. There you are, around 6-8 feet of 14 gauge cables. The twin cable will carry power from an SAE connector to a subsidiary charge controller that will keep the driving batteries topped up. The red and black cables will take power from two solar panels placed inside the windshield to the main conduit under the bus. That feeds into the charge controller for the house batteries. The white and green cables take power from the front solar panel and feed it into the conduit for the house batteries. Both sets of panels feed into bridge rectifiers just in case bizarrely there's something amiss with the wiring though I check, check and triple check everything before I make a final connection. If I so much as turn my head away, I check again just to make sure nothing has moved and that I've not forgotten anything. It is this meticulous approach that has probably saved me from burning out solar panels etc.
I had a look at the Aleko solar panels I'll be mounting on the front of the bus. I have three (one is on the way). As can be seen, they're all 10w panels. I put my little blue wattmeter on one and got over 22 volts. That's welcome! I didn't put a load on it because I need to buy some spade connectors in order to connect to the panel. I could probably do with some flex core speaker cable to take power from the panels too.
Popping the cover off the connector site displayed some Chinese wickedness. There is no blocking diode on these panels. I must check the 20W panels to see if there's a diode on those too and while I'm at it, the 30W though I believe there is. 
Fortunately, before Radio Shack jumped into the deep dark abyss that failed retail stores vanish into never to be heard from again, I picked up some diodes. In fact I have quite a lot of diodes. I picked up diodes, switches, fuse holders etc by the armful in their closing sale. Since then I have seen a lot of Radio Shack merchandise being sold for profit on eBay by opportunistic scalawags. 
While I was working in the bus - which took most of the afternoon - and didn't seem to achieve much, I noticed the plastic string holding my beaded seat cushion in place had broken. The real string that I put on to held the top of the back in place seems to have been unaffected. I'm assuming the heat and light from outside had a detrimental affect on the plastic.
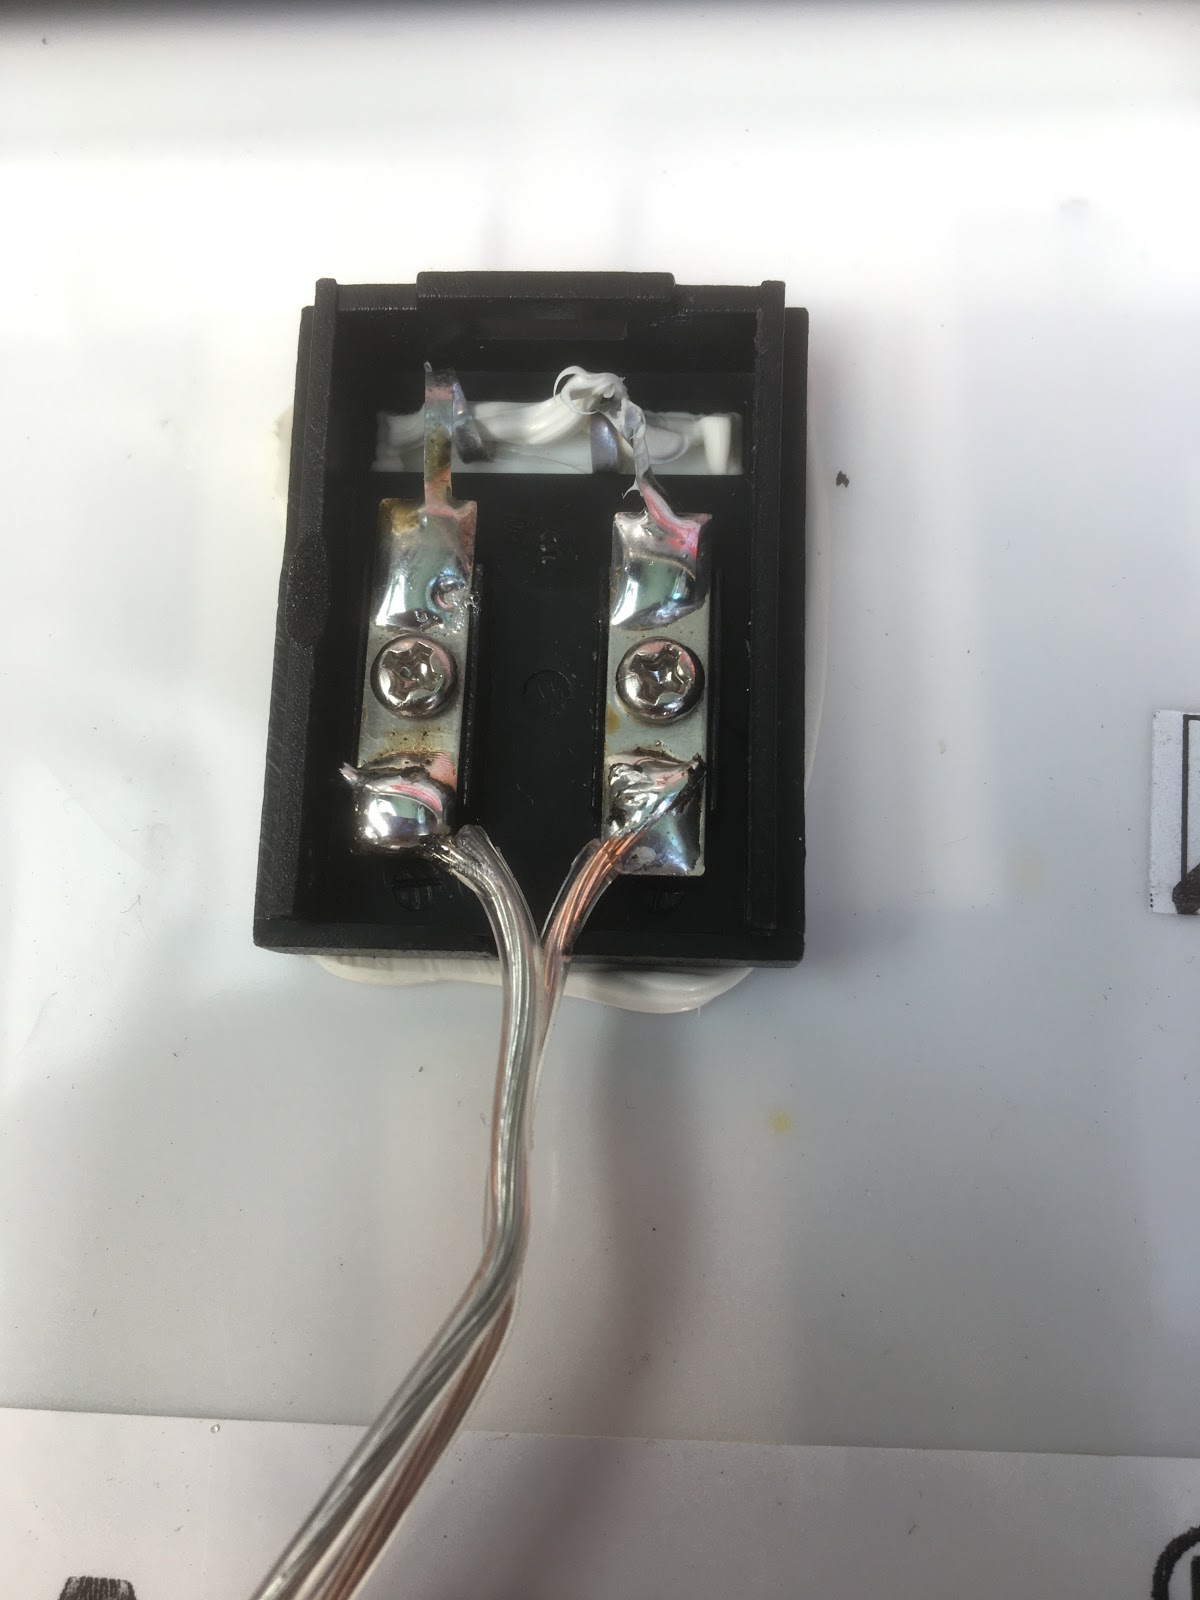
This is probably the best picture of today's operations. The three black disks are SAE connectors. The two on the left are connected to each other and they feed through to a bridge rectifier, taking power from the dashboard mounted solar panel (I can put two) to the charge controller for the house batteries. The SAE connector on the right takes power from an extra windscreen mounted solar panel and will feed that to a subsidiary charge controller to keep the driving batteries fresh. Now that's the one thing I couldn't walk away with and say it was working. I connected a panel and could get nothing out of it at the other end.

I've been trying out some push-fit cable connectors. So far they seem to have worked well. I'm not so sure that this is where the problem might not lie. I do have some screw terminal connectors and since this just connects one device to one cable, I could replace the push fit with screw down. That would eliminate one likely problem area. The other is there's a chance that the cable was damaged when I was tightening the steel conduit. I didn't inspect it but did notice the cable wrap was not damaged so the cable should be fine.

While I was removing the access panel I put in the front of the bulkhead above the windscreen, I noticed some of the screws were just pushing into place rather than actually tightening. I'll probably have to redrill all the holes and install rivnuts. That'll sort that lot out! I have ordered some steel rivnuts but eBay claimed they were coming from the USA but I found after I'd ordered that they were really coming from China. That's a let down! That'll also take forever since imports from China are all being screened for the Chinese supervirus. I do have some aluminium rivnuts which are fine for things like my panel. Not so fine for anything heavy though the current front mounted solar panel is fastened on using four aluminium rivnuts.

Looking inside the bulkheads I noticed that the screws for the existing solar panel are visible inside the central partition of the bulkhead. That's welcome news! The three new panels will be fitted to an aluminium frame and installed on the front, replacing the damaged panel. The damaged panel still produces power - it's just mechanically unsound.

Once the new cable to the subsidiary charge controller is working the plan is to identify the cable for the solar power supply. I'll tap into that and feed power to the front and rear cameras. That'll add an extra layer of security. The step after that is to change the front solar panel to the three 10W panels. That'll give me 30W instead of the current 15W for not much extra space used.

All the work done today was pretty much tidying things up to make them more user friendly. The only new feature was the connector to charge the driving battery. I did remove a diode setup I'd been using and replaced it with a very nice bridge rectifier block. The block just looks tidier but adds no extra functionality or anything else for that matter.

I did run into every problem known to man on the way. I'm definitely going to have to hit the stores for blue female spade connectors, blue fork connectors, red fork connectors and so on. I'm also going to have to order some 8-32 rivnuts. I do have some 4mm rivnuts on order but since they're coming from China and not California as claimed on the eBay advert, God alone knows if they'll arrive, when they'll arrive and what viruses they'll bring with them.

The one reason I ordered the third solar panel was because it was likely already in the country before the latest Chinese virus came out. I can see the price of stuff from China rising rapidly as the world restricts movements of goods from Red China. I'll solder wires to the panels and spray inside the connector boxes with insulation. Then I'll solder diodes to the wires once they're inside the main bulkhead.

A few days ago I bought a 10-24 tap and some 10-24 security screws. I'll drill the brackets the solar panels will mount to and will tap the panels so that I can just screw them in place. The security screws I've chosen are Torx with the central nodule. That'll make it very hard for anybody to remove the panels as bits that will fit that kind of Torx screw are few and far between. The aluminium angle I'll just rivet to the bus.

Well, that's about all I have time for. I started about midday - after the sun began to shine and it warmed up a little. I finished when darkness fell. Nothing can be done with solar after dark, strangely enough. I wonder if I write a strongly enough worded letter to Mother Nature whether I could get 24 hour sun? 

Thursday, February 6, 2020

There we go...

This is the specification from the archived Harbor Freight website for the vandalised solar panel.
Name15 Watt Solar Panel
SKU96418
BrandThunderbolt Magnum Solar
Amperage (amps)1
ApplicationRV Or Marine 12v Batteries
MaterialABS
Quantity1
Wattage (watts)15
Product Height1 in.
Product Length36-1/2 in.
Product Width12-1/2 in.
Shipping Weight13.80 lb.
Accessories IncludedCigarette lighter adapter, battery terminal clamps and bare wire pigtail
Of the specifications, the interesting bit is the dimension. 36.5" x 12.5". I'm not that keen on the height of the panel and never was - it always seemed a little overbearing. The newer panels are of the following specifications...
Brand
ALEKO
Model
PP10W12V-WM
Manufacturer Part Number
PP10W12V-WM
Assembled Product Dimensions (L x W x H)
12.00 x 15.00 x 2.00 Inches
They're slightly narrower. In fact I don't really believe the published dimensions of either. In fact I went and checked the dimensions of the solar panels that arrived at 9 3/4 x 14 1/2 inches. It's close but whoever did the measurements must have had a crooked ruler.
I've been unable to test the new panels so far but since they came from Walmart, I can at least return them if they don't fulfill requirements. Those from eBay are - well eBay sellers don't have a staggering reputation for honesty - a lost cause I'm afraid.

I did order some rivnuts from China a few days ago but I gather that since the Coronavirus is causing such consternation, nothing is being allowed into the USA from China. Thus I started to reorder from a USA supplier then decided against since eBay is such a crook's palace anyway. I'll have to go to Grainger, the other side of town instead.

Meanwhile today I popped into Lowes (hiss, spit) and bought some colored wires and cable connectors. I'd forgotten I'd ordered cable connectors so when I got home, there they were in the mailbox. That's all good - I can always use cable connectors!

The plan afoot here is to remove the vandalized solar panel and to replace it with three of the new smaller panels. I still have to test them but if they produce the 10W each that they promise then I will have 30W on the front of the bus instead of 15W and they will be much more securely mounted.

While I'm working inside, I'll put a pair of SAE surface mount connectors over the windshield so that I can just connect the portable panels by looping cables upwards. That way there are no cables over the driver's seat thus allowing me to work on whatever at the driver's seat. This is why I have 4 wires. Two for the permanent panels and two for the portable panels.

Using the cable connectors (of which all are capable of connecting three cables together) I shall tap into the solar power supply for the door lock and power my cameras and C-DVRs. That will in turn mean 24x7 surveillance is available.

While I was ordering the extra panel I also ordered a bigger surveillance camera and a recording unit. That, I gather, needs a hard drive but they're as cheap as chips. The goal of that is to provide 24x7 surveillance of the yard since there have been unseemly goings on recently. If that unit works out well then I might replace the two C-DVR units with a single recording unit and record from all three cameras as well as a 4th that will look down the steps.

I looked at the back door of the bus and there appears to be no new water ingress. The roof vent does not appear to be leaking but it is very rusty and in dire need of replacement. The leak at the front over the transmission shroud continues and I still have no idea where the water is coming from.

This weekend I can definitely do the internal wiring for the panels and to solar power the cameras/recorders. None of that should take long and it should all be doable without reference to the weather. The roof vent and switching out solar panels is something that will need a long dry period. While I have thought of building a little roof over the bus I really don't want to spend the money on something I'll not need for that long. I'll just wait for a dry day.

In other news, there was a scrapyard down the road that had some worthwhile steel. Sadly they have now closed. It seems all the local scrapyards, one by one, as I get more interested in welding, have closed. Somebody did advertise they had 10 tons of scrap and didn't want anybody to come and get the bits they wanted. They just wanted the whole lot hauled off en masse which was a bit pathetic. I bet nobody came. I could have done with some scrap steel!