Tuesday, December 29, 2020

3 months working on brake lines

It's hard to believe but I've been working on my brake lines for 3 months. I have all the bits I need and the tools too. The big problem is that I've been doing other things and usually when the weather for working on the brake lines is good but when the weather is bad I'm not doing anything.

Anyway, the lines at the front are almost completed. There's one line that has to be put on, going from the chassis to the blended line from the brake booster. Getting the original brake line off is somewhat of a challenge as there's so little room in which to work.  I did get an air cut-off tool to cut the old brake line but an air chisel would probably have been a better choice. It's definitely getting to the stage where I have enough air tools that it'll be worth putting an air tank on the bus with a 12v pump that can be powered from solar panels to inflate it.

It was impossible to remove the old front cross chassis brake line because it had been put on in one piece before the radiator and turbo intercooler had been installed. Thus I had no line to work from as an example. The new line has had to be made in 4 pieces as opposed to one. One piece I'm not happy with. I'm glad I bought a lot of brake line because I'll definitely use a lot. I am not shy of remaking lines when I'm not 110% happy with what I've done. I have a thing about brakes - they have to work. The work mechanic will testify to my fussiness over brakes, steering, air tanks, lights, tyres etc.

On a fairly cold and miserable day I switched out the old semi-circular Busboy mirrors for some circular convex mirrors. These are about half the size, unfortunately but they're more the kind of mirror I like because I can see the roofline. That's important to me because I can see how close I am to overhanging branches etc. The tubular mounts that the mirrors are attached to had no end cap so I ended up filling the end with Bondo. Probably about the only worthwhile use for Bondo!

The lighting problem continues. I tried one of the LED spotlight bulbs in the bathroom light but because of where I mounted the bathroom light, it'll have to be moved. In order to get better light I've put a white paper reflector above it. That worked really well.

Replacing the existing lights is something that's definitely going to happen. I bought some bulb holders for standard E26/E27 bulbs but they have yet to arrive. According to the tracking I bought them on November 30th. They arrived in the USA on December 12th and they're supposed to arrive on February 18th. This is why I dislike ordering from China. Fortunately there is no rush. I do have some bulb holders for standard car turn signal bulbs and converters to use my existing G4 bulbs. If the bulb holders I've ordered arrive, I can put just about any adapter in them. I'm thus holding off on building new light fixtures until they arrive. Only then can I decide which way I'm going with the bulbs.

A few days ago I found the lights were out in the bus. It seems that there just hasn't been enough light to recharge the battery. In the end I had to put a 15W panel on the ground to collect extra light. It took about 3 days but with the power off, the battery did get to 100%.  That had me thinking of alternative ways of powering the battery. 

On YouTube there are several videos by people that have taken standard nitro glow-plug model aircraft engines and used them to turn 150W 12v motors with a 1:1 conversion ratio. One even had theirs set up with an electric start. That's the kind of thing that would be invaluable. Not only are they very small - the whole thing would fit in the space taken up by a can of baked beans - but they're going to produce enough power to fill - from flat - a 30AH battery in about 2 1/2 hours. Very handy as a get-you-out-of-trouble device. With an electric start and a decent muffler those could be mounted under the bus as emergency generators.

Meanwhile there was another YouTube video that showed how the horn button on my bus works. I was baffled as to how to access it. It seems that the plastic on the steering wheel unscrews from the back. That means I now know more about the horn button. Apparently pressing the button fires a relay. I have heard a relay clicking when I have pressed the horn button. I have no idea where that relay is, however. One of my tasks will be to trace the horn wire back to the relay and from the relay to the horn. I would much rather the horn worked from its original button than the hillbilly wire connected to my momentary action switch. I bet the actual problem with the horn will be pretty simple when I find it.

Some LED sidelights arrived. I know some of my clearance lights are out so I'll go up there to check if the new lights will fit. If they do then I shall be very happy. Though the whole unit will need replacing as opposed to just a bulb, I gather they last reasonably well and are much more visible. For the turn signals etc I might replace the bulbs with LED bulbs as they might be brighter.

The immediate goal is to complete replacing the brake lines. Reading around, the torque specifications very from 23psi to 30psi. I don't think there is a standard. Some say as tight as you can or until it won't tighten any more. 

When the new lines are installed I'll have to test them. That's just going to be a case of putting cotton wool around each joint, filling the lines with brake fluid, evacuating air from the lines and then pressing the brake pedal hard with the brake booster turned on. That should bring the pressure up to 1200psi. Any leakage should show fairly readily. I thank my lucky stars that the brake line failed when stationary and on level ground. Then it'll be a case of using the brakes and driving the bus to see if the fluid level goes down.

The paint on the bus seems to be peeling off the outside, I will have to go over it with a grit blaster and go over it in sections, repainting. Though I do like my grey paint I might just paint it all white. This time I'll bring it back to bare metal and paint a primer then a topcoat. At least with it all white, it should be cooler inside. Finally I'll redo the roof coating with something better than the Rustoleum elastometric paint. That seems to do nothing but peel. In fact that's something I find about every can of Rustoleum - it does nothing but peel. Time to use a different brand. I have had plenty cans of Rustoleum spray just go lumpy then clog on me. I've tried different nozzles but the clog has been inside. I've given up counting how many refund checks I've had from Rustoleum for their lousy paint. They need to start giving their product away - that's about all it's worth!


Sunday, December 13, 2020

An interesting problem working with the front brake line.

The other day I went underneath the front of the bus and loosened the front brake line. That is a very long, very complex line covered with armor. Having several bends, it goes from one side of the chassis to the other, fastened to the radiator/intercooler rail. Having had a good look at it a few days before, it looked like it just dropped down and pulled forward. Sadly, that was not the case. It seems to have been installed when the bus was just a chassis and that to remove it involves pulling the radiator and intercooler. Well that's a big nope! 


The lines run inside of the C section chassis members but in one place on each side the chassis had been boxed - there are opposing C sections attached to the chassis so the only way to pull the brake lines is forward. To remove and replace will involve cutting the existing brake line into three pieces. That is an awkward maneuver that cannot be achieved with a tube cutter because of the armor. The angle grinder is too big and the hacksaw is also too big. Thus I concluded I needed an air-cut-off tool.


Going online to order the tool, the immediate thought since it was daylight was - a quick run to Walmart. One showed up on their website and the store I'd set as my local store was indeed not 10 miles away. The price was a bit high at $20 whereas Harbor Freight had one for $10. I duly ordered and paid online for the cutter and was astounded to discover that it had been ordered from a store 20 miles away. Needless to say, if I was going any further than 10 miles, I might as well go 30 and visit Harbor Freight, giving up on daylight for the day.


The journey to Harbor Freight was made. The cut-off drill was located, the cut-off-drill disks located, some disks for my angle-grinder were located. The only thing missing was the disk for my 6" Harbor Freight chop saw. I bought that many moons ago and have never found blades for it.


From there, as I would need to join brake lines and wasn't sure how many flare nuts I had, it made sense to find some flare nuts. That took me to the next stop, Napa. That was a disappointment. The fellow pulled out a bunch of 3/16 flare nuts, looked up on the computer and told me my brake lines were 3/16th. Somebody clearly needs to update Napa's computer system. Then they denied knowledge of 1/4inch flare nuts. 


Moving on from Napa, the next call was O'Reilly's. That was much more welcoming. The salesman took me behind the counter and showed me a set of plastic drawers to find my flare nuts. Though looking without my glasses was definitely a fuzzy experience though not of the warm and fuzzy kind, it was possible to see there was just an empty drawer where there should have been 1/4 inch flare nuts.


Moving on, the next stop was Autozone. There, amazingly, I did find flare nuts. I already knew I had couplings. It was on! Sadly, not so fast... With half a dozen flare nuts in my sweaty little palm I got home to pitch blackness. The sun had escaped!


In the mail, however, was a set of BA15s to G4 adaptors. The plan is to replace my current lighting fixtures. I have G4 fixtures throughout but as they're too close to the woodwork for a halogen lamp I shall have to remodel. The aim is to replace the lighting fixtures with BA15s which are the same as my turn signal bulb mounts. That gives the opportunity to share bulbs that can also work in the bus in the same manner that the house fuse box uses the same kind of fuses the bus uses. The BA15s are still in the post however. Those should arrive next week. Meanwhile the E26 sockets ordered from China are still somewhere in China though the E26 to G4 adaptors are on my desk.

A few days ago, thinking of the lighting issue and wanting to use halogen bulbs, I'd thought a candle lantern would be ideal because I already have one and use it for a tea-light candle. Thus I had a good browse around Hobby Lobby and came up with precisely nothing. They ranged from about $4 to an astounding $30 - even more astounding considering how badly made they were. Clearly the produce of some Chinese forced labor prison camp!


Having drawn a blank on lanterns I did some thinking. Taking the plastic garden lantern cover off one of my LED lights and replacing it with a much more powerful but directional LED light I noticed the light was not phenomenal. Pulling out a sheet of paper I placed that over the bulb as a reflector to angle the light back into the room rather than straight up to the ceiling. The difference was stunning!


Following on the reflector line of thought, it's probably going to be cheaper than buying lanterns and easier than making them if I put two white reflectors. One to reflect light into the room and one to shield me from the direct light of the bulb but to concentrate that light on the secondary reflector. That would allow me to use both halogen and to avoid buying lanterns.


Today, being the 13th got off to an odd start. I woke feeling a bit off color and that only got worse the more interaction with people and animals that I had. In the end I went outside but didn't want to do brakes because those have to be right that probably wouldn't have happened today.


As it was a straightforward task, I pulled out some predrilled, soft steel strip and commenced to make brackets for the new crossview mirrors. The old crossview mirrors though bigger had been used to death. The reflective backing was gone in many places and as they were BusBoy mirrors and not Eclipse they showed the ground only but not the entire front of the bus - which is my preference.

The brackets were relatively easy to make. it was just a vase of bending the steel around a socket of the same diameter as the mirror tubing on the bus. The fun bit came when it was time to paint the brackets. 
Some time ago I'd found both my cans of Rustoleum rust reforming primer were refusing to spray paint. Rustoleum offered a refund and suggested that the problem could be clogged nozzles. Well, I tried a nozzle off an old paint can and it quickly clogged, proving that the problem was inside the can. The paint must have large lumps in it. This is something Rustoleum admits can happen but denies ever happening with their paint.
Having removed the two cross-view mirrors, the bus looks a bit weird. Some nincompoops remove the cross-view mirrors thinking it clever to do so. The actual fact is those mirrors are more used in regular driving than one would imagine. Even articulated trucks are now beginning to add front cross view mirrors.
As the tubing under the mirrors was open and I had some Bondo to hand, I donned rubber gloves and mixed hardener into the Bondo, kneeding by hand. Then I pressed the mixture thickly into both mirror stems in the hope it will stick and seal the hole. If need be I could always fill those holes using my welder.
After working slowly but diligently, both mirrors were eventually installed. They're 8 inch diameter as opposed to the 14 inches width of the BusBoy mirrors but that's not a problem. I should not be having to scrutinize these mirrors for stray children. 
Looking at the mirror, it's clearly quite small but the image is very clear indeed. I had to buy several mirrors like this on eBay before I found a pair that was just right. The other two that weren't right ended up on the back steps of a mobile home so that it's possible to see whether the dogs are at the door.
Though I did not get anything done with the brakes this weekend, perhaps I will next weekend. I just need a good session under the hood to get the front brake lines finished. The back brake lines - aside from one curve should be straight all the way to the differential. That should be lightning fast. Well, perhaps not quite lightening fast because the brake line under the front gave me another as yet unmentioned issue. Try as I might I could not get one bracket loose that held the line. I had to squirt it with PB Blaster and wait an hour. Then it came free easily.

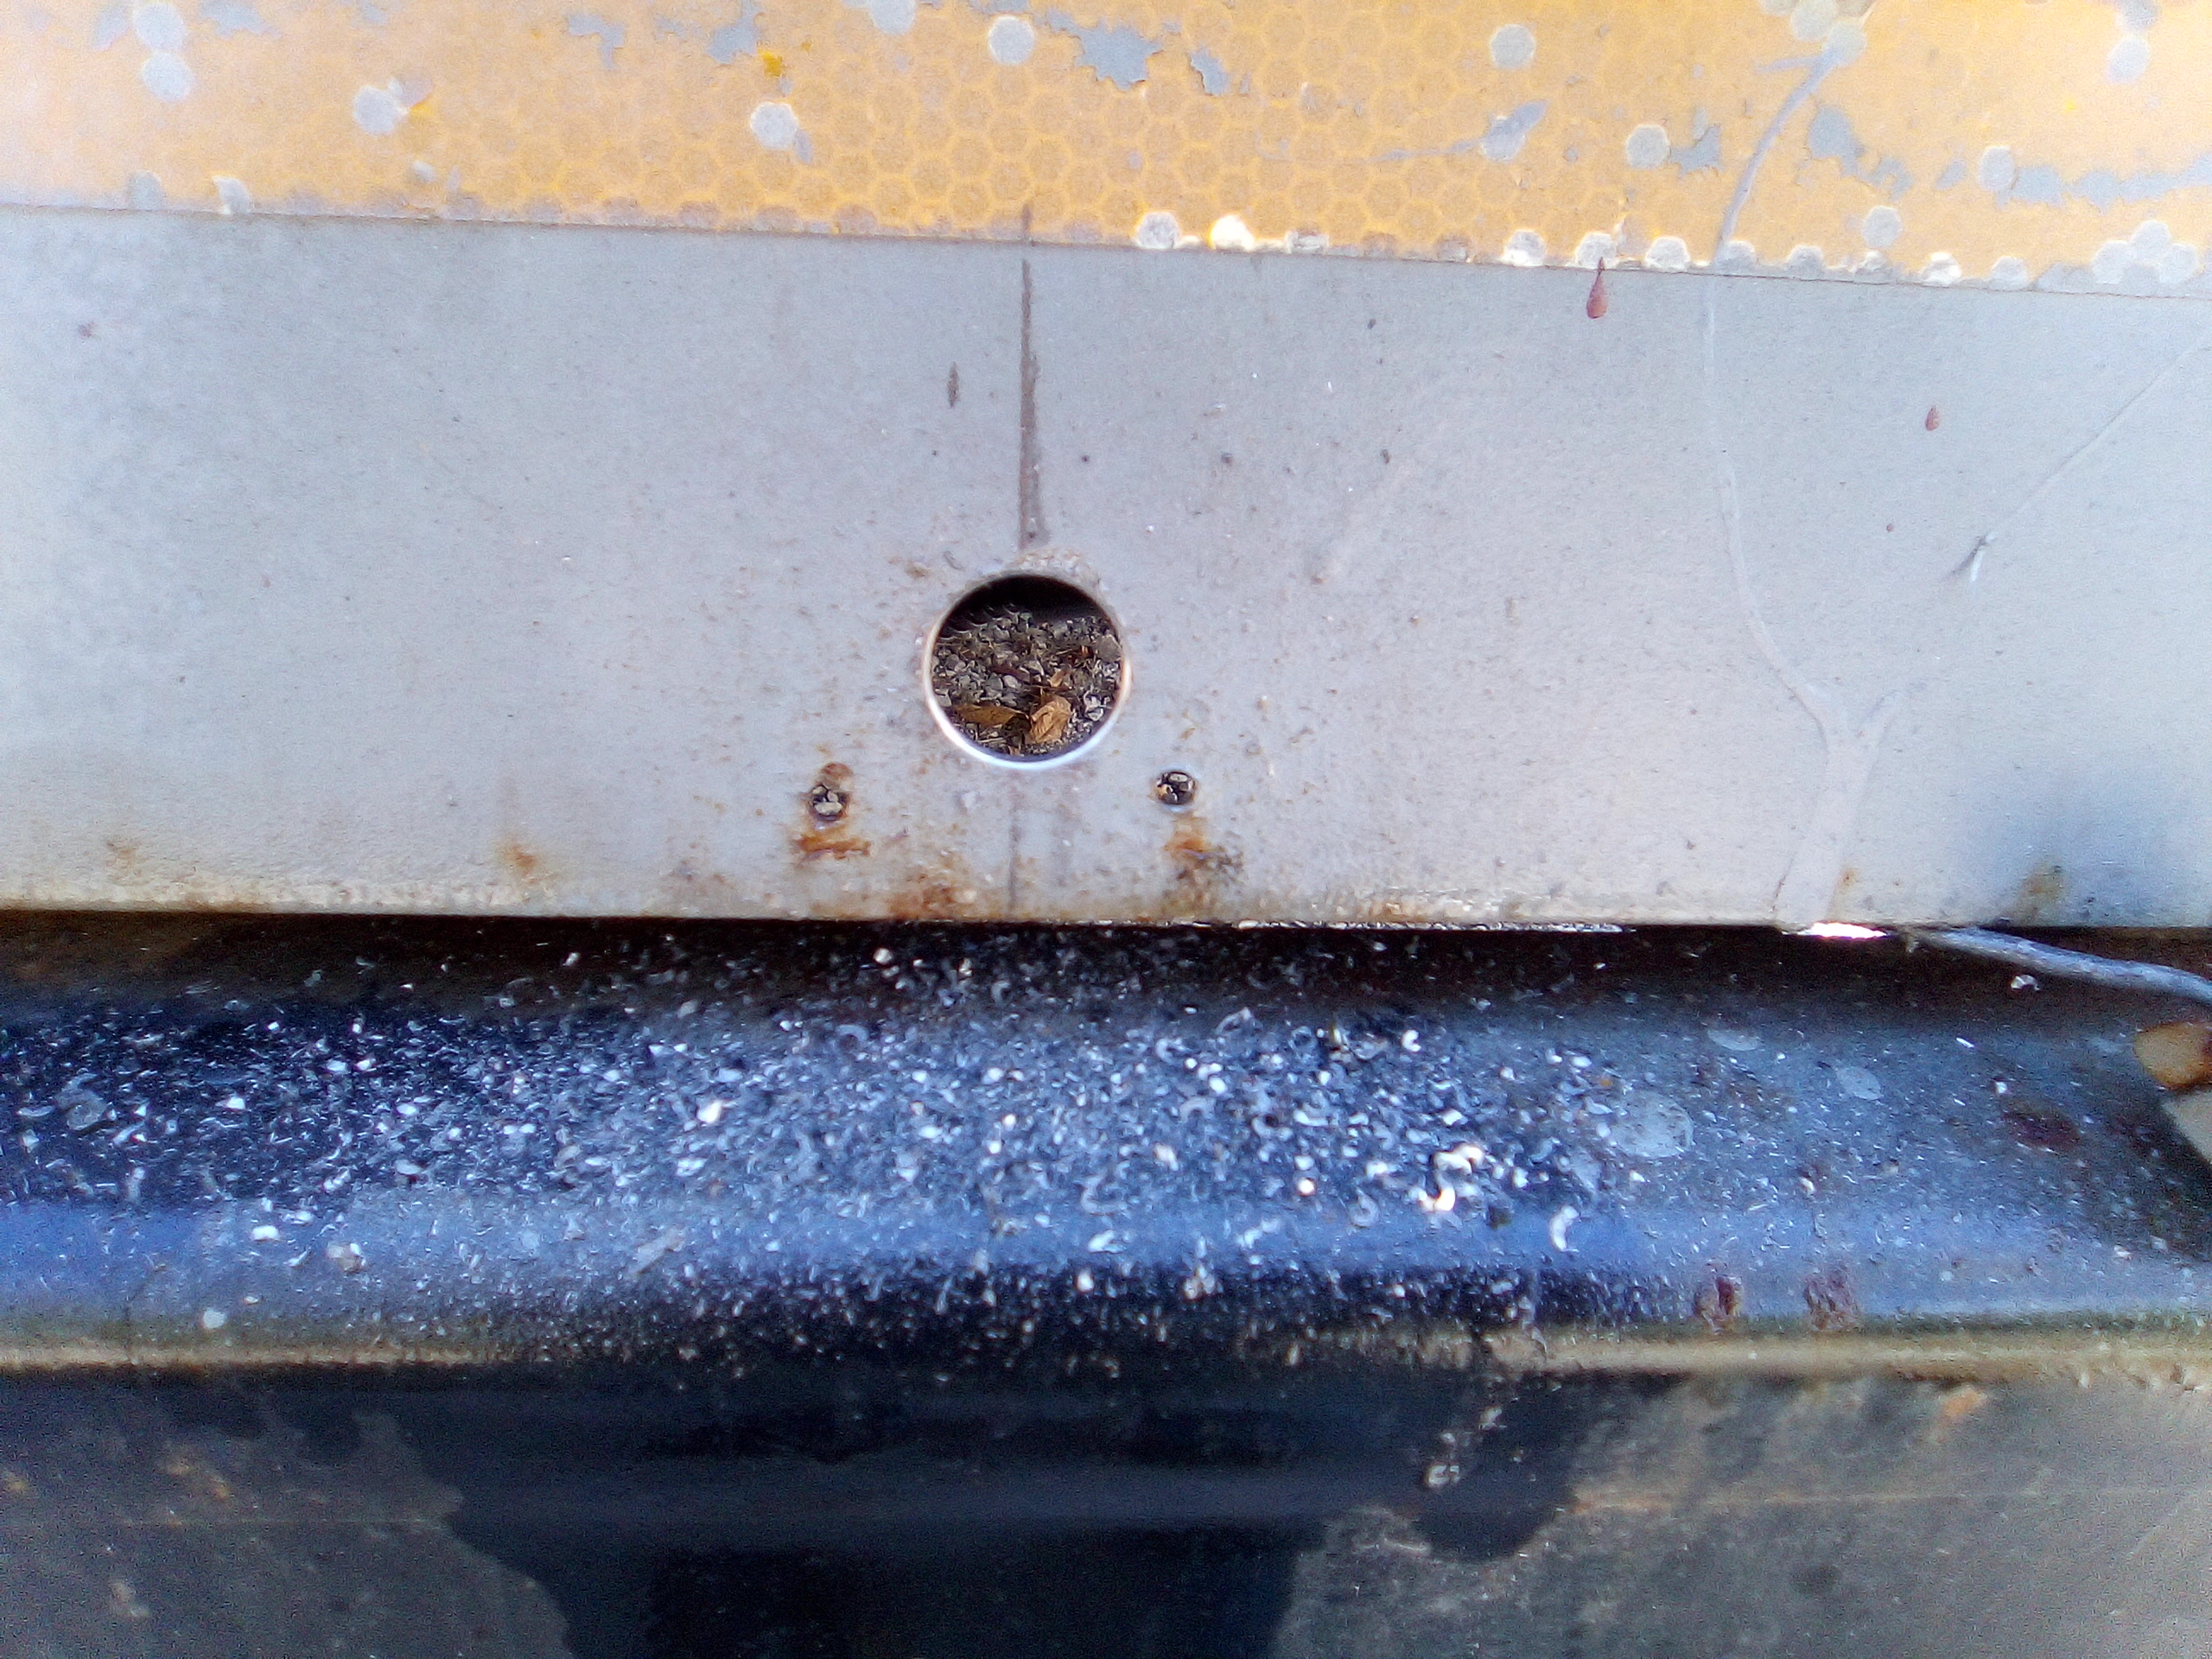
When a garage says they need to keep your car another day, they just found a nut they couldn't shift and had to spray it with PB Blaster and wait a few hours for the stuff to do its work. That's an aside though - the picture is of the roof. There was grey paint on top of the yellow paint then white paint on top of the grey paint. Finally I put elastometric paint on top of the whole lot. The elastometric paint was Rustoleum and doesn't seem to have been worth a hoot. It seems to be pulling the Rustoleum white paint off though not the Rustoleum grey paint. Wonder what's up with that?

Monday, December 7, 2020

Why I am going away from LEDs

Since time immemorial, before dinosaurs roamed the earth my bus has been lit by 12v LED lighting. It was understood from the propaganda that the green mob put out that LED lighting was in some way better than incandescent lighting.  Apparently it uses less energy and puts less greenhouse gasses into the environment due to less fossil fuels being needed to power them. Well, since my entire lighting system is solar powered, that is nonsense.

So, what about LEDs using less power? Sure - they do use less power than the halogen lamps I am going over to. By my calculation, a 10W halogen will use 10W of power or a bit less than an amp. I can run one halogen lamp for at least 12 hours from my 30ah battery. That's all fine and dandy but I'm not likely to want to use electric lighting for 12 hours non stop. My LED light will use quarter of the power for allegedly the same light.

Why allegedly? Well, LED lighting is a massive fail. In fact I'd say it's one of the greatest frauds of all time. It doesn't save all that much electricity nor does it save on pollution. In fact quite the opposite - it's a great source of pollution.

Let's look at LED technology - it's a great big chunk of plastic with phosphorous and goodness knows what else. They're pollution intensive to make and will not be recycled - even if they can be. They'll just get chucked into a trash can and go into landfill. Compare that with incandescent bulbs. Those were around way before the dawn of plastic. The average T3 halogen bulb is made of glass, halogen gas and metal (usually tungsten). None of that is toxic. The glass will break down by mechanical action and the metals and gasses will absorb without pollution. 

The light fixtures in the bus are very simple - a G4 base glued to a steel bracket. Those would work well for the halogen bulbs save for the fact they're too close to woodwork and paintwork. Halogen bulbs give off heat. Thus in order to replace the LED bulbs with halogen it's necessary to adjust the bulb sockets. This is not a major issue - it's really straightforward.

But why, you may ask, am I changing over from LED? Three reasons:
  1. LED bulbs do not last anywhere near as long as claimed. In the bus I have two currently that are exhibiting signs of future failure. The claims on the packet are for thousands of hours of usage. The actual usage time is somewhere around 12 hours. Failure starts with having to flick the light switch on and off several times before the bulb lights. Eventually this gets quite tiresome then finally the bulb starts blowing fuses. Then, it's dead. 
  2. LED bulbs to not have a wide enough spectrum. The other day, trying to distinguish between the silver and gold screws on an electrical socket I was wiring elsewhere was impossible by the light of an LED lamp. I had to take it outside to daylight to see. If colors cannot be distinguished under LED light then LED light is worthless.
  3. Cost - for the price of a pair of LED bulbs (around $5) I can buy ten halogen bulbs. 
I've experimented with different LED bulbs - not just one variety. They're universally dreadfully expensive. The cone shaped LED bulb above is heavy and unidirectional. In fact most LED bulbs are unidirectional as opposed to the unidirectional light of halogen bulbs.

The new game plan is to install E26/E27 screw light bulb sockets (like those in most American homes) but then to use an adapter to convert that to G4 sockets. Using the ordinary household bulb socket with its wide variety of available adapters gives rise to a wide range of 12v bulbs that can be used. 
One of my ideas had been to use candle lanterns to house the halogen bulb. Frosted with a Valspar frosting spray the light is softer and much less glaring. That, however, is an idea that might or might not come to fruition. 

LED lighting has many brainwashed supporters but my personal experience has been extremely poor. LED flashlights that dazzle but do not produce much worthwhile light, LED household bulbs that fail rapidly, LED 12v bulbs that fail rapidly and LED stop light/turn signal on vehicles that cease to function and need whole unit replacement rather than just a simple, cheap bulb. The way LEDs come over is as a half-baked idea that sounds good on paper but which in reality is an unmitigated disaster as well as horrendously expensive.


Friday, November 27, 2020

Probably two more days under the hood

Today I put aside the Autozone tube bender and pulled out the cheaper Harbor Freight bender. Within minutes - literally I had bent a piece of tubing to exactly the shape I had failed on multiple times yesterday to do using the Autozone tool.

The goal today was to do the two small pieces of tube that go from the 45 degree bracket bolted to the chassis to the block on the chassis leading to the line that loops around underneath the radiator and turbo intercooler. Looking at the line that goes underneath, it looks very daunting, almost as if I'll have to become some kind of monkey to be able to install it!

So, both sides at the front now have brand new flexible brake lines to the wheels and brand new solid lines with brand new coil armor.
Making the solid lines was pretty easy using the Harbor Freight tool. It was just a case of bending the tube where the other tube was bent and trimming to length. As I had yet to put the flare on the other end, the unflared line was left 1/4 an inch longer. That allowed enough extra to create the flare.
Having flared and armored the line, I have to say it looks pretty good. It fitted easily in place and screwed in nicely. The trick to making brake lines play nicely is to put a tiny bit of grease behind the flare. Just a pinhead worth of grease is sufficient to lubricate the nut while also providing anti-rust protection for the scuffed area that was held by the flaring tool
For the flaring tool, after the debacle of the Autozone tool (does Autozone sell anything that actually works), the O'Reilly's tool came up trumps. It does a really nice job of the flare. In fact it's not possible to tell a difference between the flare on the tubes as they arrive and the flare I made.
It was a pretty simple matter. As there's no vice here I just used a G Clamp to fasten my flaring tool to the bench I welded together a few years ago. Incidentally, people online looked at photos of the bench I'd made and cried that it would fall apart and that the welds are worthless. Well, it has stood up to 250lbs weight and years of use and abuse with no degradation.

So, making the brake lines was pretty straightforward. I didn't want to dive in and do too much because that just tempts fate. Thinking about that front line, It probably only has a couple of fastenings under the radiator and then goes straight to the chassis connections. I bet it just lifts down and forward in one piece. That's a job for tomorrow perhaps. 

What I'm doing right now is the front brake lines. I want to make sure I get them right before I work on the back brakes. I still need to look at the brake pistons. I have no idea how those work or how I maintain those. That's a job for another day however. The goal is to replace all the brake lines. Those I have replaced so far (bar the one that exploded) have all looked pretty decent. I'm pretty sure the little shop of horrors will be at the back because those connections look very rusty.

The one brake line that will be challenging is the curved line over the differential. I have a feeling that won't be curved but more hexagonal. Keeping it simple never hurt. None of the brake line at the back seems to be armored. That will change. Every line I install will have armor even if there have to be gaps in the armor where I fasten the line to the chassis.

Meanwhile the wonderful Rustoleum elastometric paint is peeling off the roof. I can see great hunks of it blowing in the breeze. That's despite the fact the original paint I put on is Rustoleum and that's holding on well. I even washed the roof with an industrial cleaner. This is the problem with Rustoleum - it doesn't matter how good your surface preparation is, it doesn't hold on consistently. Sadly, they're about the only game in town.


Wednesday, November 25, 2020

Getting somewhere - just not quite sure where!

Having decided to replace all the brake lines on the bus, I made a start. Yesterday I tried to undo the driver's side front brake line. I failed so I took a photo of the area I couldn't see clearly and found there was a spring clip holding the flexible line to a bracket attached to the chassis. 

That made life a lot easier. It was easy enough to undo the connection. Even the spring clip came out fairly easily. When it came to the flexible line going to the wheel, that was barely attached. It wasn't even finger tight. I was not at all surprised when no brake fluid came from that line. It must have been thoroughly air locked.

The new line is installed. That was probably the simplest thing I did today. Going from below the bracket is a C shaped line. That didn't look in bad condition but I said I was going to replace every single brake line and so I will. 

After having several attempts at making a line and not getting one that slipped into place nicely, I gave up for the day. The line on the left is my own creation and the line on the right is the original. They're close but no cigar.
If my readers remember, I bought a brake line flaring tool from Autozone and it was utter trash and had to be returned. I must have bought this brake line bending tool from Autozone too. It won't bend lines to 90 degrees. It bends to 85 degrees maximum so I have to complete the bending manually.

In the end, temporarily I put the old solid line back. I'll replace it when I can do a better one. I have plenty brake tubing to work with. I have to say the new flaring tool is excellent. That, I got in O'Reilly's. The one tubing bending tool I have that works well is the one I bought from Harbor Freight. The Autozone tool is not helpful even though it's easier to use.

The aim this week is to get the brake lines under the hood done. After this I'll work on the back brakes. Currently, despite spraying the line liberally with PB Blaster, the flexible line and the spring clip are hard to separate at the front on the door side of the bus. I shall visit that again tomorrow.

Speaking of tomorrow, it's Thanksgiving and likely to be another superspreader event for the Coronavirus that's rampaging at the moment. I'm not going anywhere so it's just going to be a regular work on the bus day. By the end of tomorrow I want to have the other flexible brake line done and the two small C shaped lines too. Perhaps if I'm very lucky I can get the line done that goes along the frame rails from one side to the other. 

One question I have is whether the bleed screws should be replaced. They are clearly missing their little rubber caps. Mind, Schroeder valves on the tyres are also missing their dust caps. Mechanics are awful for losing dust caps and protective caps off everything. Mind, having seen how loose that one brake line was and how airlocked it was, I'm betting the money I paid to have the bus maintained last time never got used on that brake line. It is absolutely not beyond mechanics to claim they have done a full job when it has been half-arsed. The rest of the time paid for working was probably used for viewing porn in the break room.


Sunday, November 15, 2020

Woohoo Tax time

Yesterday the tax bill for my bus arrived. It was a whopping $26.52 which by the time they had charged me extra for the luxury of paying online was $27.97. One would have thought that payment online would have been encouraged rather than penalized due to the Covid situation. On the other hand America seems quite happy for 6% of the population to be killed off by the population's intransigence and hatred of anybody not seen as perfect. Yikes - that sounds a bit... Aryan!

So, throwing my trusty bedroll on the ground, I lay under the bus and disconnected the old camera. Fortunately the connections on the old camera mirrored those on the new camera so it was almost a case of plug and play. I did have to release the cables from tied down cable conduit but that was no big deal.
Popping the camera into place was a pretty simple affair. I will definitely have to replace the rather sad looking reflective tape on the back of the bus. Indeed there's a plan afoot for that since so much paint is now beginning to peel after 6 years in the South Carolina sun.
One of the important things was to install a bracket above the camera to protect it from rain and from falling objects. The last camera protruded a long way. This one is almost flush with the body. The last one was broken by a sheet of steel being dropped on it.
The camera really isn't that visible. It'd have been nice to have it mounted somewhere black but I'm not about to spend a day drilling by hand through a 1/4 inch thick steel bumper to install a camera.
Upon testing, the corners seem a little blurry but this is not a big problem. The whole point of a rear camera is so that I can see if I'm about to mow anything down. With the C-DVR that I have, attached to that camera, I can record when I'm driving. In an accident even the worst possible video evidence can be invaluable. That's why both front and rear cameras record.

One of the things I like about this camera is there are none of the annoying and misleading lines that many cameras have built in. Perhaps there's a case for replacing both the front and upper reversing cameras with similar cameras of which, oddly enough, I have two. If both lack the irksome lines then that really will be a step forward. For some reason, this camera also looks to have a wider angle of view which is very welcome.

I still need to work on brakes. I'm not a huge fan of lying underneath a vehicle - even though there's plenty room under my bus. I'm not a fan of walking underneath aeroplanes and there's plenty room underneath them! Perhaps I have a touch of claustrophobia?

The new top camera probably needs a waterproof enclosure. I'm thinking something with a sloping roof that will prohibit water collecting on top. I'm also thinking of including an Anderson recepticle as I still feel a roof mounted 10W flexible solar panel might be an interesting experiment. While I'm up there, one of my marker lights has gone out so I might just replace the whole marker light unit. I've been fighting against these LED things but I might just try one to see how long it lasts. One thing's for sure - if it's a sealed unit, it won't suffer from bulbs jogging loose as happens with other units.


Saturday, November 14, 2020

Friday the thirteenth arrived

 It was only a day late. I went to work on the bus today and if it could cause a problem it did cause a problem. In hindsight it was all rather comical really. 

The goal today was to replace the broken camera that's currently dangling due to my own ineptitude. On the first time around covering the back windows with fridge steel I had a case of butterfingers and dropped a sheet of fridge steel on the camera, breaking the mount. Well that had a few curses floating around afterward and it embarrassed the bird on the tree next to me so much that it turned bright red and flew away only to be mistaken for a cardinal by a nearby hunter who shot it and had it for dinner.
The camera to be installed is a bit different in that it's flush-mounted and circular. It came supplied with a little cutting tool which I put in my Walmart power drill. Well, that didn't seem to want to start cutting so I had to drill a pilot hole. The pilot hole didn't achieve much because the bit didn't cut the steel. That was probably because it was designed to be installed in the plastic bumper on a car. It certainly would not have done anything with the 1/4 inch thick steel bumper on my bus!
So, I tried to enlarge the pilot hole with a step bit. The cordless Walmart HyperTough drill crapped out immediately - the battery never holds a good charge - not even from new. I switched back to the corded Walmart HyperTough drill and the chuck siezed on me immediately, refusing to tighten on the drill bit.

Hunting around I found my new Harbor Freight cordless drill but all three batteries were out of charge. That led on to a long hunt for my Harbor Freight corded drill - the one I bought by accident. Eventually I did find it and put the step bit into it.
Having cut the hole to size, I sprayed it with primer and then half an hour later with grey topcoat.
Holding the camera up to the hole I discovered that the cutting tool supplied with the camera had been hopelessly undersized. Imagine somebody less capable buying the camera kit and carefully drilling the hole then finding it too small. It might even turn them away from DIY.
The drill bit being clearly undersized I pulled out the step bit again and enlarged the hole fairly swiftly. 

After cutting the hole near enough to size I used a grinding bit in the drill to enlarge the hole slowly. Well after an hour of that I went back to the step bit and cut the hole big enough.
When I left the project due to darkness falling with a thud, I'd cut a piece of aluminium bracket to rivet above the camera in order to protect it from as much precipitation as possible. Having cut and drilled and primed the bracket I went inside for the night.

This was a simple two hour project that turned into an all day project due to Walmart's wonderful HyperTough tools turning out to be HyperCrap. In fact I think the frequently derided Harbor Freight tools are of much higher quality that the Walmart tools. Having seen Walmart customers, perhaps their tools are intended for people that would spend left over money on tools after supporting their meth habit.

Tomorrow maybe I'll finish painting the bracket and install the camera as well as the bracket. It's a good job I didn't do anything with brakes!

Speaking of brakes, Carolina International never got in touch to say they had the flexible brake lines I'd ordered. At the moment I have a working brake flaring tool having returned the Autozone tool that had clearly been manufactured by a drunkard. This one I bought from O'Reilly. 

In order to replace the broken front brake pipe I have to remove the pipe for the back brakes. That means I have to empty the whole braking system so I might as well install all the brake lines while the system is dry. As I don't see the point of draining the system, installing a couple of pipes, bleeding it and then having to repeat the process to install the next batch of pipes when they arrive, I held off on brakes for the day. At the moment the main brakes (the back brakes) still work.


Saturday, November 7, 2020

A small advance.

Continuing on the brake saga I have learned a lot. To sum it up... Brakes need to be double-flared, not single flared. Finding the double-flare tool in Harbor Freight is impossible even though the website claims it's in stock. OEM flexible hoses are terribly expensive. The back of brake flares can be lubricated with grease. I'm using brake caliper grease.

I called Carolina International and was told there are 5 additional hoses in the brake system. One for each wheel and one from the main brake supply line to the arch over the differential. The two from the master cylinder were $68 each. The other 5 hoses come in for a grand total of $350 approximately. That's about $500 of brake hoses all told. While I *could* have gone cheaper and got very different hoses and so on, I want to get back to manufacturer spec. That way I know I have the best for the bus. To my mind there are two things one should never ever compromise on. The first is brakes and the second is tyres. Those are what will save your ass every time.

The Harbor Freight tool kinda-sorta worked but needed 6mm regular bolts rather than the weird crank things that were supplied. Even then it still didn't work all that well.
I managed to get some very nice looking single flares from the Harbor Freight thing but as I discovered I needed double flares I had to get a double-flare tool so I went to Autozone. Well, Autozone will not feature in supplying any more parts or tools. Having created a nice-looking flare, I noticed the flare was cock-eyed. 
Looking at the Autozone tool it's possible to see exactly why the thing was cock-eyed - the tool looks like it has been made by a meth head. It's nowhere near square. That put the kaibosh on doing anything with brakes this weekend. Having said that, I need brake armor and none of the local chains seem to sell it so I had to go to eBay. All told, replacing all the brake lines plus tools will probably end up costing me somewhere in the region of $600. Had I paid somebody to do this I'd be paying $100 per hour so it'd probably be an extra 5 hours pay at least.

This weekend, the back door got my attention. While I like having a window, the window was way oversized for what I need. It was a pretty big security risk so today was the day it got skinned over. Back in the summer I bought some sheet steel. That was all undersized so I had to pony up and buy the right sizes. Today the last of the last set of 4 sheets got used. 

Last week I painted the sheet after drilling holes in it. There it is, placed standing on the door handle surround and the hinge. Checking, I found it was half an inch too tall for the space provided. Thus I trimmed the area that would foul the hinge and handle surround then mounted the plate in place using a big magnet attached to the door to stop it sliding down. With that in place I drilled a couple of locating holes and after putting silicone seal all the way around, pressed the plate down over the seal, slipped two screws in the two locating holes and then went for my air riveter.
Using a combination of my air drill and my electric drill, I drilled all the needed holes then riveted the panel in place over the window. Just because I know you're curious, there were 86 rivets involved. The mandrels all landed on the ground pretty close to where I was working.
That's how it looked all riveted down and painted. The thing dangling from the door handle is my Harbor Freight magnetic picker-upper. That was useful for picking up all the rivet mandrels and pieces of rivet mandrel. Only one it refused to pick up and I'd imagine somehow that was anti-magnetic.

This panel I did not remove the glass first. There was no actual need since nothing will be on the inside liable to swing against the glass. Checking the edges of the doors there was a small light leak by the upper hinge. I can put some extra sealant on the door frame there. Otherwise it looked like nothing has warped so there should be no water ingress. I'll have to check after a rainstorm on that though.

After disappointments and problems, it's nice to have accomplished something. Speaking of problems - I bought shorter 5/16x24 bolts to attach my new circular convex mirrors. They're still a shade on the long side so I'll see if I can get shorter or I'll trim them. With the back window out of the way, that's one less big-sounding project to do. Projects like this take plenty time because there's so much involved.

The next projects at the back of the bus - fill the screw heads with Bondo and replace both of the malfunctioning upper camera and the broken lower camera. The upper camera has water issues fogging the image. The lower camera had a sheet of steel dropped on it inadvertently. Those can now be replaced since there's no heavy construction happening at the back. While I'm at it, I'll install a solar power inlet at the roofline just in case I want to install the flexible solar panel. In fact I might install that anyway since I have all the supplies to do so.

The roof vent has been waiting for ages and I'm pretty sure it's leaking, causing rust and destroying things. I've been tied up doing other stuff and haven't been keen on climbing on the roof anyway. The brake components should be available in a week or two so that's another big project. That might take several weekends to be honest but once it's done I shall feel happier. Tyres will be a big expense and they're due sometime too.

At some point I do need to reprogram the charge controller to make better use of the battery and complete the flame shield for the other battery holder - which will be more complex due to the way I've built the battery holder. Eventually the aim is to install a second battery.

The winscreen wiper pivot I installed is very slightly crooked so I'll have to look at that again. That's a job for the future. It's an important job too. The roof needs a good scrub and the elastomatric paint needs to be beefed up as it's coming off in too many places. 

There is other stuff needing to be done like the crossview mirrors and the rear clearance lights. I'm getting there though.


Sunday, November 1, 2020

Thwarted at every turn!

There are two big projects at the moment. One is the brakes and the other is the sheet of steel over the back window. Both were thwarted today by different problems.

The primary plan was to install or to work toward installing the sheet of steel over the last back window. The plan was to drill locating holes and then trim the steel before final painting. Looking at the sky rain was clearly not far away. Today was therefore a day for at least slapping a coat of paint onto the sheet of steel - which I did. The paint came out lumpy being at the end of the can of paint. That didn't matter though. The biggest lumps got flicked away but plenty more remain. The best that can be said is that the panel is both painted and textured. At the end of the day there are so many imperfections in my paintwork on the bus that it's clearly done by somebody that just wanted to change the color of the bus without throwing money at fancy prep work or anything else. All I care about is that the bus looks decent from 20 feet away. Nearer, I just don't care. The law says it cannot be yellow so it's grey.

Having slapped paint on the panel I turned to the brake lines. In contrast to the paintwork, these I am extremely fussy about. They have to be right and there is no half-way, quarter way or most of the way. They have to be spot on. Doing it myself I'm learning a lot and will be able to do this kind of maintenance on the road.
The brake line I did the other day looks pretty good though the line did slip a little. Today I made up the second line to go from the flexible hose to the chassis since I seem to have to replace both lines simultaneously. The line slipped and did very little else. Thus it was time to practice a little. 
Having cut several practice pieces and had them all slip in the flaring tool it was time to re-evaluate the flaring tool. That's where all the fun began!
The flaring tool (from Harbor Freight) looked to have a 5/16 bolt. The problem with the existing bolts is that despite the T bar on them it's impossible to get them tight enough by hand. As there's no hex head on the bolt, they cannot be tightened with a wrench. Trying a 5/16 bolt found it was a tight fit and met resistance after the first half turn which is the tell-tale sign that the thread pitch is wrong.
Out came the Russian thread gauge and the thread came up as being a 20 TPI thread. That was pretty useful information.
Next I grabbed a digital caliper and found the bolt diameter was 7.6mm. That's where things began not to make much sense. There is no 20 thread per inch Imperial bolt of 5/16th. The 7.6mm was a very sloppy size for 5/16. That was a big puzzle.
Grabbing a micrometer and setting it to inches, the bolt came up at 0.3047 inches. Trying it again in metric came up with 7.67mm. The puzzle continued. 

Eventually after taking a thought break I pulled out the thread gauge again but instead of measuring with the threads per inch side, I used the metric side and came up with 1.25 threads. That's when the penny dropped. This was likely a metric thread.

Heading indoors I looked up the metric and imperial thread sizes and bolt gauges. It turned out that what I have is very likely a sloppy 8mm bolt since 8mm is very close to 7.67 mm and the thread pitch of 1.25 is exactly what an 8mm bolt should have. It's so handy having standards!

So the paint is still wet and drying on my sheet of steel, the sun has come out and the sky has cleared to deep blue but I can't work on the brake lines until I get some 8mm metric bolts to tighten the thing down firmly in order to prevent slippage.

As I work tomorrow and there's a covid epidemic I'm limiting my trips out so today is going to be a day of relaxation. The next time I work on the brakes will likely be Tuesday as there's an election and I have the day off due to the election.  
Rather than including caustic comments about any of the candidates for election, here's a picture of the brake line I made earlier today. This, I'm sure would make a much better President than any of those currently standing for election. Indeed, that simple brake line could easily replace every single politician in the world, costing less to keep while providing far more value.


Friday, October 30, 2020

A pause in progress

The first bus thing to happen today was that I painted primer on the back side of the sheet of steel intended for use over the back door window. That went on just fine but probably won't be dry until tomorrow. Thus, no photo as the color is the same as the last posting and it's just the other side of the sheet of steel.

The next thing done was to cut and form the new brake line. That, of course, was where all the fun began!

The intent was to remove the front brake line by undoing the nuts on the bolts between the two brake lines. That plan came to a screeching halt when I discovered both front and rear brake lines have to be removed simultaneously. This is not made for easy maintenance! That gave pause for thought. 
Clearly the back brakes cannot be rendered non-functional without a temporary brake in place hence these two concrete blocks. How well they'll stop a bus from rolling I don't know but I'm certainly glad to be parked on flat ground!
Still not moving the bus, I cut the brake tube I'd bought the other day, using my tube cutter. That worked pretty well to be honest. I even got the tube cut to just a shade over the length it needed to be which was fine as it allows for errors. Bending using the Harbor Freight tube bender was really straightforward though it does have a tendency to scratch the protective coating. Perhaps a roll of tape might help there. I just sprayed the scratched areas with Rustoleum rust-killing black primer.
Having cut and bent the tube I put the tube armor on the tube. This is a length of coiled stainless steel spring by the look of it. That came from eBay while the tubing came from O'Reilly's. This, of course is where I made a rookie mistake. Compare the pictures to see the mistake!
I forgot to put the flare nut on the tube before I flared the tube. Speaking of flaring, I'm not happy with the flare that I did. It looks a little lop-sided so I want to revisit that another day. This is a project I do not want to rush as there is zero tolerance for errors,
Meanwhile, nosing around under the hood I found the fuel filter. Looking behind it there's a blue cylinder hanging down. It would not surprise me to discover that this is where the manual priming pump is located. I believe that unscrews to reveal a rubber bulb that can be squeezed to pump diesel into the engine. Why it's on the driver's side baffles me because the fuel tank is on the passenger side. Somebody didn't know what they were doing when they came up with the design!

So, what I can get on with next is the new crossview mirrors. For the moment the other two projects are on a brief hold.

Brakes have to be 100% right or they're 100% wrong. Thus even if I end up making an absolute duplicate of the line I just made, I might make it better. I was not 100% happy with the flange I made. That's one thing I might do after posting my blog entry. The paint, of course, I have no control over - that'll dry when it dries and it was still tacky when I last touched it. None of this is stuff that can be rushed. It may seem that progress is glacial but I'd rather be glacial and get it right than rush it and get it wrong. I also value learning and doing it myself over paying somebody else to do it.

The mechanical things remaining to do...
1. Complete replacing all the brake lines. This is under way.
2. Put the panel over the back window.
3. Fix the backup cameras.
4. Replace the roof vent,
5. Re-work the passenger side windscreen wiper as it's not straight from my last efforts.
6. Possibly install a 10W flexible solar panel on the roof at the back as an experiment.
7. Complete installing the flame shield over battery holder 2 and ready that for a second battery.

Other than that, the rest is all electrical and inside the bus.