Today brought out the French Maid in me. Somewhat dubiously, I'd bought a bottle of some urine-colored cleaning spray in a dollar store that called itself "Awesome". Now normally I would just bypass anything with such a stupendously silly name. I figure that if something has to call itself "the best" or "better than anything else" then it has to be complete and utter garbage and the name and possibly a pretty packet are there to lure the guillable into parting with their money. It had been recommended by somebody I knew so I thought I'd give it a shot.
So, in the best tradition of French Maids, clad in their delectable white apron and their black minidress, heels and fishnets, I rolled up my sleeves and began scrubbing away. Had I actually worn a French Maid's outfit, I'd imagine I'd have looked like Brenda in the Plenty advert! (Brenda & Audrey - Bounty/Plenty paper towels advert.) In all truth though, the French are slightly less clean than my bus before I cleaned it. Back in 2001 I took a night train from Oostende in Belgium to Berlin. The French carriages were added to the train at Dijon. I was already having to sleep on the floor in the corridor because the train was overcrowded. The French when they got on, used the toilet and left the door open and didn't bother flushing nor washing their hands. One at least used the connecting corridor as a urinal. At least one pulled the window down and tried to stick their backside out in order to take a poo!
Well, the good news is it did actually clean some of the grime from the inside of the cockpit though not all of it. Stuff that looked caked on, came off easily but that looked more like tobacco residue than anything else. Need I mention this school bus came from Louisiana? Anyway, it cleaned the easier grime and residue fairly swiftly. The downside was that it didn't clear the stuff I wanted to clear - just the stuff I didn't much care about. It also had me choking on the fumes. Nowhere on the bottle does it say "use a respirator" or at least, if it does, the text is so small as to be worthless. The other downside is it removed some of the paint from my first aid box.
To be honest, this stuff does not deserve a name such as "Awesome". It should have a label that says "Average". If It had said "Average" then I might not have walked past it so much. The really stupid thing is while it removed the painted label from my first aid box, it did not remove dripped paint off my stainless steel handbasin.
My decision to use the bus body as the negative connection for the battery side of my power system seems to be good. I connected the front fan to my new fuse set up. I had hoped to use blade fuses but they don't seem to be available in values as low as 0.5A which for a 0.5A fan with fine wires is rather important. Radio Shack's bankruptcy sale helped out with fuse holders. As I said, I picked out things that would be useful like switches, fuse holders etc. I dodn't bother with the rubbish like relays, resistors, transistors, capacities etc. They're all well and good but by the time you've bought all the bits and got your device to work, I've bought something that does the job and was cheaper and been using it for a few weeks.
The bedroom fan I connected to one of my 7ah batteries (which was fully charged) and it does a wonderful job. I really do need to get under the bus as soon as practical to get the underbus wiring done. Somebody suggested spraying the area with some form of insecticide but I'm not sure I'd get all the hostiles in one go. The only way of doing it would be to drive North and spend a while in sub zero temperatures or just wait for winter and do everything that's doable inside until then.
I tried the unfortunately misnamed cleaner on my PVC planking floor in the bathroom. It didn't do a bad job though it's not perfect. I think it's just going to take time and elbow grease. I'm constantly amazed at the quantity of sand that gets into the bus. I swept the floor beforehand and though it's not been long since I last swept, a lot of sand was present.
Today I had all three fans going at the same time. The recorded temperature was 95F inside when I started but though I hadn't had the front fan going long, it was noticeable that the bedroom where I sat was hot and muggy while the galley was cooler. When the system is working fully, I think I might have something!
Meanwhile, in an email discussion with my dad, I mentioned that I seemed to have encountered a brick wall with heat; that I'd painted the roof white but that I figured I was into diminuishing returns without splurging on air conditioning. He mentioned that the flat rooves in Britain are usually painted with a silver reflective paint. That had me looking online for similar products. The only one I could see that was fairly similar was a $25 pot of Black Jack elastometric reflective roof coating. That has a silicone base so I never can put anything on top of it and expect it to stay on. That seems to be the one everybody is putting on RV rooves. There is a tar-based coating that people also use. I think I might try the Black Jack. A 3.6 quart can should do my entire roof. I recall using about half a gallon of white Rustoleum last time. This time I will get better masking tape. The last stuff I used looked like masking tape but was the Devil to get off as it probably wasn't.
That's how my fuse panel looks now. The fuse is actually 8A but I'll order some 0.5A fuses and some 2.5A fuses. I'll also have to order fuses for other things like my USB charging panel. That needs a box to mount it in too unless I just go and buy a USB charging panel that I can just screw into place. That wouldn't have the benefit of a voltmeter built in but that's not strictly essential. There are some very nice USB sockets that connect to 12V sold in the car stores for not that much money.
I went to the shed and found some wood with the idea of making a mount for the USB socket/voltage meter gizmo I ordered from China. After marking it out and getting tired of the mosquitoes outside, I went for a cup of tea. Returning, I found my hole saw needed adjustment so I completed the adjustments just in time for a torrential downpour.
I'd been thinking while I was indoors about whether I should install USB power sockets and whether perhaps I should install straight 12v power sockets instead. The pro of a straight 12v power socket is that I can use a great many other 12v things such as my 12v to 120v inverter. Sure, it only produces at most 200W but it might be good for something though quite what I'm not sure. Perhaps running a 120v lamp? The downside of a 12V socket is that if a spider crept in and caused a short circuit there could be a fire. I'd also have to get 12V to USB adaptors to instal in my 12v sockets. Equally, I could get a 12V USB dual socket and install more USB if I needed to. In the end, I think convenience wins and despite already having the stuff I bought from China, it looks like a better idea to install a read made dual or quad USB socket that has a mounting built into it - something I don't have to build into a panel. When I bought the stuff I did, I did so because the plan was to build them into my ammunition box battery packs.
I'm all for simplicity. I generally start with the most fiendishly complicated ideas and designs then end up building things far less complicated and lavish. Now that I took out the other two charge controllers, that looks a lot better! The wiring is clearer too.
When I first started the bus project, the first thing I installed was a 12V power socket and a USB socket. This was because I use GPS navigation and liked to keep my cellphone charged. It also now powers my GPS speedometer.
While these are most definitely not the prettiest objects in the galaxy, they are practical. With straight forward USB sockets, if I had 4 sockets at 2.1A each then I'd be able to say I'd need an 8.5A fuse though in all likelihood, I could get away with just an 8A fuse as not all would be in use simultaneously. I could mount those sockets on a cross beam, aimed down to keep dust and debris out. That looks quite promising!
One of the things I hate is not using stuff that I've bought. The problem is, for me, because I buy stuff on ebay it can't be returned. I don't return things just because I change my mind about using them either because to be frank, that's not the seller's fault.
My afternoon's work was curtailed by a sudden thunderstorm. I'd been out to put the now wet wood back in the shed when thunder began to roll and I heard the crackle of lightning. Thus I decided to sit out the storm in the nearest shelter which happened to be my bus. Knowing how South Carolina storms like to rumble on for hours, despite it being only 5pm, I called it a day.
I'd have liked to dash out to get a pair or more under dash USB connectors but given the storm and the fact I have to go on a training course tomorrow (which means I'll be out of the house anyway), I decided to save the fuel and wait until tomorrow. I have to hassle Walmart about my prints too - I've not heard a word about those yet despite the fact they were supposed to be in Walmart on Friday.
Motorhome self build project. Built and designed by one person over the course of about 36 months. The base is a 1994 Carpenter school bus. The end result will be a low energy consumption motorhome.
Sunday, August 6, 2017
Friday, August 4, 2017
Real air conditioning and running water?
Last night as I read one of those internet groups that I so rarely participate in, there was a discussion about poertable AC units being ideal for bus conversions. Thus, intreagued, I read up on them. It seems that they pump the hot air out via a fairly substantial hose and also have a hose to release collected water. Looking at the sizes I became quite excited. They seem to be between 12 and 14 inches wide, about 16 inches deep and have a height of 27 inches.
Inside my motorhome I have a cupboard that measures 13 x 16 x 29. Whether that would be suitable remains to be seen but the possibility exists and that's what's interesting. Also interesting is the possibility of putting in a vent for a portable AC unit that can be closed off and the unit put away somewhere. I'd have to do some rearranging of my loose storage but I was going to rearrange that anyway.
That leads on to the fact that if I was going to lay in a power line for an AC unit then I'd also put in a power line for an instant water heater. That heater could easily fit under the handbasin and have a secondary line running to the shower. Needless to say, it would only function when water was supplied via a pipe. It's an interesting thought though.
Thinking about the problem of the overheated CPU fan, I realized I need local switches on all my electrical devices. I remembered I have a pile of switches from Radio Shack's going out of business sale. Most aren't suitable as they need to be put into an enclosure but I have some open knife switches that would work. They're only really designed for 0.5A 12v DC but I don't think my CPU fans are any more powerful than that.
Having had the one fuse do it's duty and blow, protecting my battery, I realized I need more fuses in my 12v house system. I need more than just one on the battery. I need one by each device and one on each power line from my charge controller. I should also put some directly between each solar panel and it's connection to my electrical system. Fortunately... I bought a ton of fuse holders in Radio Shack's going out of business sale. The fuse holders even have useful spade terminals. How fortuitous. It looks like my going nuts and buying a ton of stuff wasn't so nuts after all.
The project to add a switch began and I can honestly say that adding a switch into an existing circuit where the wires are glued down and where there's not much space was a little challenging. After tinning the ends of the very fine CPU fan wire, it just would not be gripped by the minuscule screws of the knife switch. I then tried the smallest eyehole red connectors and crimped them on the wires then screwed them to the switch, dropping the minuscule screws many times in the process before resorting to pipe glue to hold them to the screwdriver. Then the knife switch wouldn't close as the eyehole was blocking them. In the end I cut the eyeholes off, removed the screws and soldered the thing together. Now that I could have done on the desk in comparative ease!
While I'm sure you'll agree, that knife switch looks as ugly as sin as does the terminal block, it's an extra safety feature. I'll add the other safety feature of a block of fuses on the device side of the charge controller next. As when I fused my sockets on my 120v system, each socket had an individual fuse. It will be thus on my 12v system. I'll have three fans and one or maybe two USB charging setups. That'll be five separate lines and five separate fuses. I'll also have that timer on the extraction fan, limiting operation to 15 minutes of each hour.
I removed two of my charge controllers today. They were completely redundant and quite frankly added little to the system. My electrics are going to be negative grounded to the bus body in order to eliminate a few potential problems. I'll probably stick with the charge controller from the back of the bus but for the moment the front is using a PMT C02 controller that is specifically built for lead-acid batteries. That's currently charging my fan battery. Eventually, both solar arrays wil be connected into a single charge controller and the bigger battery. I'll probably have to drag my welder out to build a cage for the battery when the weather cools enough for me to get underneath the bus to measure everything.
Meanwhile, today there are no photos of my bus from Walmart. I sent off an online order and had an order confirmation, confirming I'd paid my $1.90 and that the prints would be ready today. Thus far I have had no text message confirming arrival. Indeed, I went to Walmart earlier on another mission. There was an experiment in progress on ordering groceries online, paying for them online and driving there to pick them up. Taking the opportunity, I went into the store and went to ask about my photos at the pickup desk. Nobody was there. I pressed their little button thingy that had a sign that said "If nobody is here, press the button". Nobody came. Then a Walmart employee asked if anybody was seeing to my needs. I told him no and he radioed. Somebody said they'd come and never did. Several other employees walked past without a word. In the end, I walked away. The next stop was the bank but the line was ludicrous. So, I went to pick up my groceries. I gather the lady before me had been waiting 30 minutes. Anyway, her order arrived, shortly followed by mine. That worked. The next trick is to try Wamart's home delivery service! I guess I'll have to wait to see what happens about my prints. I can see the photos I sent off online but can't see my order - all very strange! Perhaps they spent my $1.90 on crack? Well, perhaps not - I suspect crack might be more expensive. They might get to sniff the crack of a down-at-heel hooker for that much though!
It seems that if I want to use my Chinese USB converters and voltmeters with my desktop powerpoints then I need to mount them in 30mm holes since they're panel mounting. That had me puzzling for a moment on how to get a drill bit of such an obscure size. Then I realized that I could probably use one of Harbor Freight's step bits for that. I already have two differently sized, smaller step bits and I can see myself getting a third.
The one place I need to charge phones etc is the bedroom. I'd wanted a portable charger rather than having to have loads of underbody wiring but since I seem to have underbody wiring anyway (and it wasn't nearly as unpleasant as I'd thought - despite the black widow bite), I might as well put a bit more. The one place that will be challenging is the kneehole desk side of the bus because as that's above the fuel tank, I'm somewhat limited in what I can do. Perhaps I'll stick with just one area for USB charging - unless I add a socket at the front or perhaps use a charge controller that offers USB charging.
Anyway, after my Walmart trip, I installed a second switch but this is for the bedroom fan. Now I can switch them on and off at will. That must surely save some battery power. I've already decided that the extraction fan will be on a timer. That's going to save even more power. If I put the USB charger and the volt meter into a small project box mounted on the desk or on the wall, I can add a switch so that I can switch it off in order to prevent those silly LEDs manufacturers like adding to things from burning up power or keeping me awake.
I'm sure you'll agree, that knife switch looks like an ugly cockroach climbing the wall. Having said that, it was the only switch I have that does not need to be built into an enclosure. I have several from Radio Shack's bankruptcy sale. In fact I made sure to get all the useful stuff - switches, connectors, fuse holders etc. I didn't waste my time on the electronic gizmos because Lord knows, I have enough problem with half-assed ready made electronics. I definitely don't need to be adding my own home built electronics into the mix. Electrics I can understand. Electronics I kinda-sorta understand but would have a better grasp of had the electronics teachers in school and the electronics whizz kids in school and in college/university not have rejected all my attempts to further my knowledge.
Before I finished for the day, I installed my fuse bank. I've not wired any of the fuse positions up yet nor have I inserted any fuses. In fact all my fuses are 8 amp which means they won't stop overloads - just short circuits. I'm fine with that for the moment but I do need to build up a supply of fuses for all the things I'm using. It would be nice to standardize on one kind of fuse but I have whatever fuse holders I can find at the time. I could do with a couple of fuse panels for full size blade fuses but I'm stumped as to where to get them.
As you can see, the other charge controllers are now gone - consigned to the old cardboard box. I have a diode set up protecting my solar panel though I desperately need a fuse in there too. The blue and yellow connectors lead to my CPU fan. Eventually they will go to the CPU fan via the fuse panel.
When I put the battery under the bus, that will also have a fuse fitted. The fuse will be right beside the battery unless I can put a little fuse access on the side of the bus. I won't be putting a battery compartment door. I'll likely just put the battery in an open cage, protected from spray by the waste barrel on one side and the battery compartment on the other and probably coat the terminals in spray on insulation. After all, the battery is waterproof or it'd leak acid!
I must admit, I like my little motorhome. It's turning out to be quite nice, even though some people would probably run screaming, calling it more basic than a tent in the middle of a field. I think this motorhome construction might look good on a resume even!
Inside my motorhome I have a cupboard that measures 13 x 16 x 29. Whether that would be suitable remains to be seen but the possibility exists and that's what's interesting. Also interesting is the possibility of putting in a vent for a portable AC unit that can be closed off and the unit put away somewhere. I'd have to do some rearranging of my loose storage but I was going to rearrange that anyway.
That leads on to the fact that if I was going to lay in a power line for an AC unit then I'd also put in a power line for an instant water heater. That heater could easily fit under the handbasin and have a secondary line running to the shower. Needless to say, it would only function when water was supplied via a pipe. It's an interesting thought though.
Thinking about the problem of the overheated CPU fan, I realized I need local switches on all my electrical devices. I remembered I have a pile of switches from Radio Shack's going out of business sale. Most aren't suitable as they need to be put into an enclosure but I have some open knife switches that would work. They're only really designed for 0.5A 12v DC but I don't think my CPU fans are any more powerful than that.
Having had the one fuse do it's duty and blow, protecting my battery, I realized I need more fuses in my 12v house system. I need more than just one on the battery. I need one by each device and one on each power line from my charge controller. I should also put some directly between each solar panel and it's connection to my electrical system. Fortunately... I bought a ton of fuse holders in Radio Shack's going out of business sale. The fuse holders even have useful spade terminals. How fortuitous. It looks like my going nuts and buying a ton of stuff wasn't so nuts after all.
The project to add a switch began and I can honestly say that adding a switch into an existing circuit where the wires are glued down and where there's not much space was a little challenging. After tinning the ends of the very fine CPU fan wire, it just would not be gripped by the minuscule screws of the knife switch. I then tried the smallest eyehole red connectors and crimped them on the wires then screwed them to the switch, dropping the minuscule screws many times in the process before resorting to pipe glue to hold them to the screwdriver. Then the knife switch wouldn't close as the eyehole was blocking them. In the end I cut the eyeholes off, removed the screws and soldered the thing together. Now that I could have done on the desk in comparative ease!
While I'm sure you'll agree, that knife switch looks as ugly as sin as does the terminal block, it's an extra safety feature. I'll add the other safety feature of a block of fuses on the device side of the charge controller next. As when I fused my sockets on my 120v system, each socket had an individual fuse. It will be thus on my 12v system. I'll have three fans and one or maybe two USB charging setups. That'll be five separate lines and five separate fuses. I'll also have that timer on the extraction fan, limiting operation to 15 minutes of each hour.
I removed two of my charge controllers today. They were completely redundant and quite frankly added little to the system. My electrics are going to be negative grounded to the bus body in order to eliminate a few potential problems. I'll probably stick with the charge controller from the back of the bus but for the moment the front is using a PMT C02 controller that is specifically built for lead-acid batteries. That's currently charging my fan battery. Eventually, both solar arrays wil be connected into a single charge controller and the bigger battery. I'll probably have to drag my welder out to build a cage for the battery when the weather cools enough for me to get underneath the bus to measure everything.
Meanwhile, today there are no photos of my bus from Walmart. I sent off an online order and had an order confirmation, confirming I'd paid my $1.90 and that the prints would be ready today. Thus far I have had no text message confirming arrival. Indeed, I went to Walmart earlier on another mission. There was an experiment in progress on ordering groceries online, paying for them online and driving there to pick them up. Taking the opportunity, I went into the store and went to ask about my photos at the pickup desk. Nobody was there. I pressed their little button thingy that had a sign that said "If nobody is here, press the button". Nobody came. Then a Walmart employee asked if anybody was seeing to my needs. I told him no and he radioed. Somebody said they'd come and never did. Several other employees walked past without a word. In the end, I walked away. The next stop was the bank but the line was ludicrous. So, I went to pick up my groceries. I gather the lady before me had been waiting 30 minutes. Anyway, her order arrived, shortly followed by mine. That worked. The next trick is to try Wamart's home delivery service! I guess I'll have to wait to see what happens about my prints. I can see the photos I sent off online but can't see my order - all very strange! Perhaps they spent my $1.90 on crack? Well, perhaps not - I suspect crack might be more expensive. They might get to sniff the crack of a down-at-heel hooker for that much though!
It seems that if I want to use my Chinese USB converters and voltmeters with my desktop powerpoints then I need to mount them in 30mm holes since they're panel mounting. That had me puzzling for a moment on how to get a drill bit of such an obscure size. Then I realized that I could probably use one of Harbor Freight's step bits for that. I already have two differently sized, smaller step bits and I can see myself getting a third.
The one place I need to charge phones etc is the bedroom. I'd wanted a portable charger rather than having to have loads of underbody wiring but since I seem to have underbody wiring anyway (and it wasn't nearly as unpleasant as I'd thought - despite the black widow bite), I might as well put a bit more. The one place that will be challenging is the kneehole desk side of the bus because as that's above the fuel tank, I'm somewhat limited in what I can do. Perhaps I'll stick with just one area for USB charging - unless I add a socket at the front or perhaps use a charge controller that offers USB charging.
Anyway, after my Walmart trip, I installed a second switch but this is for the bedroom fan. Now I can switch them on and off at will. That must surely save some battery power. I've already decided that the extraction fan will be on a timer. That's going to save even more power. If I put the USB charger and the volt meter into a small project box mounted on the desk or on the wall, I can add a switch so that I can switch it off in order to prevent those silly LEDs manufacturers like adding to things from burning up power or keeping me awake.
I'm sure you'll agree, that knife switch looks like an ugly cockroach climbing the wall. Having said that, it was the only switch I have that does not need to be built into an enclosure. I have several from Radio Shack's bankruptcy sale. In fact I made sure to get all the useful stuff - switches, connectors, fuse holders etc. I didn't waste my time on the electronic gizmos because Lord knows, I have enough problem with half-assed ready made electronics. I definitely don't need to be adding my own home built electronics into the mix. Electrics I can understand. Electronics I kinda-sorta understand but would have a better grasp of had the electronics teachers in school and the electronics whizz kids in school and in college/university not have rejected all my attempts to further my knowledge.
Before I finished for the day, I installed my fuse bank. I've not wired any of the fuse positions up yet nor have I inserted any fuses. In fact all my fuses are 8 amp which means they won't stop overloads - just short circuits. I'm fine with that for the moment but I do need to build up a supply of fuses for all the things I'm using. It would be nice to standardize on one kind of fuse but I have whatever fuse holders I can find at the time. I could do with a couple of fuse panels for full size blade fuses but I'm stumped as to where to get them.
As you can see, the other charge controllers are now gone - consigned to the old cardboard box. I have a diode set up protecting my solar panel though I desperately need a fuse in there too. The blue and yellow connectors lead to my CPU fan. Eventually they will go to the CPU fan via the fuse panel.
When I put the battery under the bus, that will also have a fuse fitted. The fuse will be right beside the battery unless I can put a little fuse access on the side of the bus. I won't be putting a battery compartment door. I'll likely just put the battery in an open cage, protected from spray by the waste barrel on one side and the battery compartment on the other and probably coat the terminals in spray on insulation. After all, the battery is waterproof or it'd leak acid!
I must admit, I like my little motorhome. It's turning out to be quite nice, even though some people would probably run screaming, calling it more basic than a tent in the middle of a field. I think this motorhome construction might look good on a resume even!
Thursday, August 3, 2017
Fannying around today.
Lets face it's: 88F and 54% humidity inside my motorhome isn't very comfortable but it's better than the 104 it was a couple of weeks ago. As my extraction fan isn't doing the job I hoped it would, I'm continuing to work on circulation fans. As I write this blog (using an elderly tablet and a Bluetooth keyboard), I am cooled by my current desktop fan. It is one of the bunch of O2Cool fans I bought in Walmart a year or so ago when I first started experimenting with ventilation. In fact, it's the only one of the four that I didn't dismantle. One was used as an induction fan, sucking cool air in from under the bus. That didn't really work all that well. The other two were used as exhaust fans which were then replaced by more powerful CPU fans and then by my current bilge blower. Meanwhile the two O2Cool fans that were used as exhaust fans got recycled into a powered window unit.
Today I'm trying to complete tasks as yet not completed. The stifling heat is really not helping too much. Somebody needs to drag South Carolina a few hundred miles further North into an acceptable climate zone! So, the things I wanted to complete today:
Going back to what I said yesterday, I'm giving the charge controllers and batteries that have been pretty well poo-poohed by Eric a good go. I have a 35AH battery to hand but if these can keep me going until winter when I can get under the bus to configure a single battery system then its great.
Interestingly, I noticed with two charge controllers connected to the same solar panel but to different batteries, the voltages displayed as battery voltages are identical despite the batteries being of very different voltages. I have very much a feeling that one has to use one charge controller and just combine the output of the solar panels. My controllers all claim 20A or 30A output. We'll see about that though. I am still not really convinced that these all in one gadgets such as solar controllers are really worthwhile.
I did manage to install my second CPU circulation fan. That's now mounted above the bedroom desk. As the fan is wider than the 2x4 that supports it, I had to go for a different design than the one I used for the mount on the other fan.
As can be seen, I had to offset one of the supports into empty space. That'll probably help with circulation. I'll just have to see how many arachnids think it's a clever idea to build a home behind it!
So, today I didn't get all my tasks completed. I did have to rethink my idea of charging extra batteries off a second charge controller attached to a single solar panel. In fact it's looking like the multiple battery idea just isn't going to work. I think I'm better off with the single 35AH battery, putting a timer on my ventilation fan so that it goes for just 15 minutes at a time with 45 minutes between runs. The door lock will for the moment remain as an AA powered device. I can't recall when I last charged those batteries save for that it must have been months ago. The CPU fans need individual on-off switches - more as a safety measure than anything else. I need to install a pair of USB charging hubs - one in the bedroom and one in the galley. As for total power usage, my extraction fan is 2.5A, my CPU fans are 0.5A each and the USB hubs (assuming both have two 2.1A sockets) will total 8.4A for a grand total of around 12A. I'm not too worried about the charge controller getting overloaded. I can easily use the controller output to power a relay to connect devices directly to the battery. That has the advantage that I can bypass the limitations of the relay while maintaining a safe environment.
The 50 cal box will remain a holder for my 35AH battery. That battery won't be used until I can get my solar panels linked and get down to a single charge controller. The redundant charge controllers will just have to go into a box. You might be correct for thinking I don't know what I'm doing. The fact is, I'm finding out as I go along by trial and error. If I build another motorhome then I will most likely do it completely differently, using the knowledge gleaned from this one to achieve Nirvana with the next.
So, aside from putting wiring down the beam for the new fan, I'm pretty much done. I'd like to install switches for safety so I can just cut the fans off individually if there's an overheating issue again. Other than that, my fans can remain using the 10AH and 5AH batteries. I won't put USB charging in place until I can get my single battery and wiring installed.
Today I'm trying to complete tasks as yet not completed. The stifling heat is really not helping too much. Somebody needs to drag South Carolina a few hundred miles further North into an acceptable climate zone! So, the things I wanted to complete today:
- Complete construction of my bedroom CPU circulation fan and install it.
- Complete gluing the wire for the galley CPU fan.
- Charge both of my 7AH batteries.
- Turn the 5AH battery over to running the CPU fan (as it did before)
- Work on turning the 50 cal ammunition box into a carrier for my two 7AH batteries, including twin voltmeters and twin USB charging connections. That will be my version of a power bank.
Speaking of power banks, I saw one in Batteries Plus a few days ago. I think it was something ridiculous like 20AH. Had I not already got my bits and pieces for my own portable power bank, I'd probably have bought that. My mission there was not however to buy big batteries. I just wanted a watch battery. When I picked myself up off the floor after I heard the price, it was 50/50 over whether to just buy another watch instead. I paid something like $6.50 for my watch in a sale in Walmart something like a year ago. The battery was $5. I'd looked at watches in Walmart and found the selection they had was not easy to read in low light without pressing the light button. As I need to check the time when I'm at the helm of a bus full of screaming children at 6:30am or way before dawn, that wouldn't have worked. Thus I paid my five pounds of flesh and got a battery. While I was there I did have a good look at the batteries. I must say I was impressed by the size and weight of the lithium bombs. Having said that, if I were to go to lithium batteries, I'd want them in a pod behind the back wheels that could be quickly jettisoned in case of explosion or fire.
I'd like to claim that construction of my second circulation fan assembly went easily but I still could not find my aluminum rivets and ended up accidentally using a steel rivet. My Harbor Freight long handled riveter of course, didn't want to work. Thus I had to use a hand riveter which was quite a challenge with a steel rivet. In the end I had to press the riveter closed with all my force and use the bus floor to support the other handle.
Having done that I noticed my extraction fan gave only 6 minutes of extraction today as opposed to 15 to 20 yesterday. I suspect that is rather more to do with the overcast day than with a global plot against my solar setup though I cannot rule out global plots. In fact, I'm toying with the idea of getting a tee-shirt made that says "Area 51 Crash Survivor". I figure you lot are all bizarre enough that I have to be on the wrong planet!
My next task was to make some battery connectors. The first went together very nicely. The second fell apart. It must be that kind of day I figured. Sure enough. I connected the output of my solar panel to a second charge controller and hey presto... Nothing happened. Then I realized, the second charge countroller might be faulty. That was the one that had a bashed screen. I reconnected the wires and still though there is power flowing, the solar sign is not illuminating.
If you look carefully at the photo above at high resolution you'll see the solar panel symbol displayed at the bottom left of the LCD screen on the top charge controller but not on the bottom model. Disconnecting the battery displays an incorrect voltage from the solar panel. In the end I figured I have a duff charge controller. That didn't surprise me given the bashed screen. Without wasting further time on it, I removed it and eventually noticed I'd wired the solar panels to the output and the output to the battery. There was no harm done even though I blew the protective fuse in my battery pack (thank heavens for the fuse) and overheated my CPU fan, which fortunately still works. It also reminded me of exactly why I have several fire extinguishers aboard.Having done that I noticed my extraction fan gave only 6 minutes of extraction today as opposed to 15 to 20 yesterday. I suspect that is rather more to do with the overcast day than with a global plot against my solar setup though I cannot rule out global plots. In fact, I'm toying with the idea of getting a tee-shirt made that says "Area 51 Crash Survivor". I figure you lot are all bizarre enough that I have to be on the wrong planet!
My next task was to make some battery connectors. The first went together very nicely. The second fell apart. It must be that kind of day I figured. Sure enough. I connected the output of my solar panel to a second charge controller and hey presto... Nothing happened. Then I realized, the second charge countroller might be faulty. That was the one that had a bashed screen. I reconnected the wires and still though there is power flowing, the solar sign is not illuminating.
Going back to what I said yesterday, I'm giving the charge controllers and batteries that have been pretty well poo-poohed by Eric a good go. I have a 35AH battery to hand but if these can keep me going until winter when I can get under the bus to configure a single battery system then its great.
Interestingly, I noticed with two charge controllers connected to the same solar panel but to different batteries, the voltages displayed as battery voltages are identical despite the batteries being of very different voltages. I have very much a feeling that one has to use one charge controller and just combine the output of the solar panels. My controllers all claim 20A or 30A output. We'll see about that though. I am still not really convinced that these all in one gadgets such as solar controllers are really worthwhile.
I did manage to install my second CPU circulation fan. That's now mounted above the bedroom desk. As the fan is wider than the 2x4 that supports it, I had to go for a different design than the one I used for the mount on the other fan.
As can be seen, I had to offset one of the supports into empty space. That'll probably help with circulation. I'll just have to see how many arachnids think it's a clever idea to build a home behind it!
So, today I didn't get all my tasks completed. I did have to rethink my idea of charging extra batteries off a second charge controller attached to a single solar panel. In fact it's looking like the multiple battery idea just isn't going to work. I think I'm better off with the single 35AH battery, putting a timer on my ventilation fan so that it goes for just 15 minutes at a time with 45 minutes between runs. The door lock will for the moment remain as an AA powered device. I can't recall when I last charged those batteries save for that it must have been months ago. The CPU fans need individual on-off switches - more as a safety measure than anything else. I need to install a pair of USB charging hubs - one in the bedroom and one in the galley. As for total power usage, my extraction fan is 2.5A, my CPU fans are 0.5A each and the USB hubs (assuming both have two 2.1A sockets) will total 8.4A for a grand total of around 12A. I'm not too worried about the charge controller getting overloaded. I can easily use the controller output to power a relay to connect devices directly to the battery. That has the advantage that I can bypass the limitations of the relay while maintaining a safe environment.
The 50 cal box will remain a holder for my 35AH battery. That battery won't be used until I can get my solar panels linked and get down to a single charge controller. The redundant charge controllers will just have to go into a box. You might be correct for thinking I don't know what I'm doing. The fact is, I'm finding out as I go along by trial and error. If I build another motorhome then I will most likely do it completely differently, using the knowledge gleaned from this one to achieve Nirvana with the next.
So, aside from putting wiring down the beam for the new fan, I'm pretty much done. I'd like to install switches for safety so I can just cut the fans off individually if there's an overheating issue again. Other than that, my fans can remain using the 10AH and 5AH batteries. I won't put USB charging in place until I can get my single battery and wiring installed.
Wednesday, August 2, 2017
Are solar charge controllers a load of baloney?
You're probably already aware of my miserable experiences thus far with solar power. I have a pile of those all in one solar charge controllers and don't believe any of them is worth as much as a fart in an elevator.
According to what I've read, a 12v battery tops out at 12.8V and is discharged to 40% of its capacity by 11.9V. Going below that 40% apparently risks damaging the battery and thus shortening its life. My two latest charge controllers will not let me protect my battery. Their cut off cannot be raised to 11.9V. Their cut off can be set only between 9V and 11.3V. A battery is 100% depleted by 10.5V. Those Chinese charge controllers are designed to destroy batteries - probably so the Chinese can sell more batteries!
There they are. Totally useless as charge controllers. $20 blown on Chinese junk that I'll never get back. Chairman Mao is probably spending my money right now on snorting coke or on kinky whores.
The purpose of a charge controller is fourfold.
According to what I've read, a 12v battery tops out at 12.8V and is discharged to 40% of its capacity by 11.9V. Going below that 40% apparently risks damaging the battery and thus shortening its life. My two latest charge controllers will not let me protect my battery. Their cut off cannot be raised to 11.9V. Their cut off can be set only between 9V and 11.3V. A battery is 100% depleted by 10.5V. Those Chinese charge controllers are designed to destroy batteries - probably so the Chinese can sell more batteries!
There they are. Totally useless as charge controllers. $20 blown on Chinese junk that I'll never get back. Chairman Mao is probably spending my money right now on snorting coke or on kinky whores.
The purpose of a charge controller is fourfold.
- It protects the battery from overcharge (an overvoltage cutoff switch)
- It protects the battery from overuse (a low voltage cutoff switch)
- It provides for a threshold voltage that cuts power back on.
- It protects the solar panels from the battery (a diode)
All my solar charge controllers claim to have "different charging algorithms" for different kinds of battery. Those claims are totally vacuous in my opinion. Electricity is often compared to water in most electrical textbooks and my question is... how many different ways are there to fill a bucket with water? Water goes in, reaches the top. Done!
I can honestly say I am distinctly unimpressed by the claims of these charge controllers. I'm thinking very much of just ditching charge controllers and going over to a simpler system. All my solar panels are double diode protected. They really should be fuse protected too. That eliminates one part of the charge controller system.
There are undervoltage cut off switches, voltage trigger switches, over voltage cut off switches and diodes. Individually these are probably more costly and take up more space but they might be the way to go, considering these Chinese charge controllers are just so bloody hopeless. So many of these Chinese products are built as though they're middle school science projects, slapped into a pretty case and given Google auto translated instructions that are printed in minuscule text on paper everybody else would wrap around fish and chips.
Looking around I see exactly the same charge controllers - same form factor, different colors being sold by different companies at wildly different prices. I've seen the same thing going on eBay for $10 that has been in Walmart for $20, Home Depot for $50 and Harbor Freight for $80. Then I see charge controllers being sold for upwards of $1,000 in other places. Add in to that the fact you never really know the background of anything and it becomes almost impossible to know whether you're buying a Chinese lemon or an American star. I dare say it took the Chinese 50 years after everybody else to develop a space program because of their lousy attitude to quality.
So, thinking forward, if the charge controller that's supposed to arrive from California on Friday actually works, my next purchase will be a timer. That way I can set my extraction fan to go for precisely 15 minutes every hour. I already have a thermal switch on it so that it won't run in under 25C (77F). I might further add a low voltage cutout switch.
In fact, with the low voltage cutout, a timer and an over voltage cutout, aside from diodes on the solar panels, there would seem no point whatsoever in having a charge controller. Timers seem to go for about $10, low voltage cutouts for about $40 and over voltage cutouts for about the same. For my purposes, with my diode protected panels, all I really need is to protect the batteries from low voltage and put a timer of my extraction fan. Over voltage with 35W of solar power and (when I get my CPU fans wired into the curcuits) 10W of ventilation plus 30W of extraction fan is most likely not going to be a problem. Having said that, it's always worth putting in overvoltage protection.
Meanwhile, I set to and adjusted my charge controller settings on the extraction fan. I figured that the battery was probably already gone so dropping the cutoff voltage from 11.9 to 11.5v wouldn't do any more damage. I'd read on one of those authoritative battery websites that one should never discharge a battery below 11.9v as it would damage the battery. Discharged to 10.5v and the battery would be dead instantly. Not expecting much from it, I initially connected to my 7ah battery and found the extraction fan worked for quite a while before cutting off and recharging after which it worked for quite a while again. Mystified I disconnected the 7ah battery and reconnected my 10ah and left it going. It charged and discharged a couple of times with impressively long fan operation times. I'll have to see how long it keeps going like that.
Then I got on and glued more of my lightweight cable from my circulation fan to the wall and then joined it to a heavier cable that leads to my front charge controller. The fine cable was flimsy enough that a terminal block connection didn't work. The wire snapped off as soon as the screws were tightened. Thus I soldered the connection and put shrink on insulation sleeves. How I wish I'd discovered those 40 years ago! The cable was glued into place and passed through a hole in the partition. I connected it to the charge controller using spade terminals.
Setting the fan going took a few minutes and I had to read the charge controller manual. It was in the usual Chinese gibberish. Alas that charge controller is set to 11.3v cutoff voltage. Now it could be that the website that I obtained my charge level information was written by some joker that had a hidden agenda or he could have been a complete cretin. Equally, he could have been dead right. Only time will tell. I neglected to include a thermal sensor in my fan setup. I will have to add that later.
I'm hoping and praying that my small batteries last a while like this. Not least because if they die, I'll have to replace all my charge controllers. I do intend to switch over to my bigger battery but the plans I have for that also involve adding an external solar or wind power input, putting the battery (which is fairly bulky) under the bus in a custom built cradle. For that I'll probably have to get my welder out of storage and (carefully) weld some of the leftover steel angle to form a cage that can be bolted to the C section members underneath the bus. At the same time I'll put an extra cable from front to back to carry the solar charge to the front where it will be shared between all my devices and a cable from the extraction fan to the front. I'll also include a connection for a fan above my bedroom desk. Then I might include some USB power ports. Needless to say, having the extraction fan on for more than 10-15 minutes is costly in electricity and most likely entirely unnecessary. One complete change of air every hour should be plenty! For that I might need to obtain a timer.
Despite the fact I come across unforeseen issues and problems, I do master them. This bus project has been a series of problems, solutions, frustrations, frequent cursing and I am eternally glad that I have been able to do it. My dad brought me up around tools and showed me how to use many. I wish that my woodwork was better. My dad, of course, was brought up by a multi-skilled father whose claim to fame was that he was a ship's carpenter for some of his life. Sadly, he passed away before I arrived on the scene. I can well imagine his tut-tutting over my carpentry skills! I'm keen to try my bus out on a short camping trip. I'll probably do that after it's retitled and the new insurance is sorted out.
At the moment I'm waiting on Walmart to provide the prints I ordered. They should come in on Friday. Those prints will go together with my $15 dollars and my completed application to retitle my bus as a motorhome pretty quickly. It took the DMV a month to respond last time. This time, I hope they're far speedier. Mind, this time I'm surer of my situation. The bus has been improved substantially and I have a bus driving license now as well as more driving confidence as a consequence.
It seems the biggest thing I did in order to reduce the heat in the bus was to paint the roof white. I have a feeling my CPU fans though slower were probably better value as extraction fans than my big bilge blower. I have a feeling my idea of having CPU fans as circulation fans is probably a good idea. The $5 window screen from Lowes (hiss, spit) isn't as good as the powered screen I built but stays in the windows earlier and wedging the window onto the screen with a 1 inch nut was a stroke of genius. School bus windows were not built to be very adjustable! There's no way, without air conditioning that I'm going to be able to get the temperature inside the bus much lower. Sure, there are elastometric coatings one can paint on the roof - the best example being Kool Seal which they put on the rooves of mobile homes. It's quite expensive and doesn't make enough difference over a gallon of ordinary white paint to be, in my opinion, worthwhile. The best defense against heat is to park in the shade.
Returning to my door alarm, I managed to put it in place so that it operates. From the front of the bus with both the fans going, I can't hear it but it'll surely scare the socks off any bad guy that tries to break in. The side door is more of a challenge as it has a wide rubber gasket.
At work I spoke with a painter whose comment about the paint peeling in patches on the bus was to scrape it off where it peeled then to do pretty much what I am. Where it peels I'm cleaning it and spraying with a self-etching primer then spraying with my usual paint. It means a little work every now and then but that's not a problem.
The latest on my extraction fan is I lowered the maximum charge to 12.9v as for some reason it wasn't reaching 13v and raised the minimum charge to 11.6v as the fan had been running for about 20 minutes. That's quite acceptable. As I said though, I feel CPU fans were a better choice as they ran pretty well constantly in the summer. They were very quiet and though they didn't shift quite as much air, I find that removing hot air doesn't help all that much. I thought it would. The fan setup doesn't half look impressive though!
At the end of the day I was thwarted. I'd started to build another fan assembley like the one in the galley but due to the partition in the bedroom being a different design, the fan assembley needed some extra tweaks. I used a 5/16 rivet on one end of one cross bar. That was fine - the other end and where the cross bar joins will be screwed to the woodwork. My problem was that though I know I have a full packet of 5/16 aluminum rivets I could not find them. Mind, having sweltered for most of the day in 93F while I both blogged and worked on the bus, I was in no mood by 7PM to go to hunt for them. That's a job for tomorrow. Once the next cross bar is secured, the new cross bar can be trimmed with my angle grinder and the overly long bottom bars of my fan holder can also be trimmed. Then it'll be a case of putting it up and waiting for cold weather to install the underbody wiring and to pass the wires through the floor to the new wire run.
I did have a crazy thought based along the lines of putting an LED rope light down the center of the aisle, attached to the ceiling. That could hide extra wires! Then I realized how crazy that idea was because my experience of LED lighting has been poor. This is precisely why I went for replaceable lanterns for my lighting.
Well, today has been one of rapidly changing opinions. I'd been totally dissatisfied with the Chinese battery control units and the batteries I'd bought. Then suddenly it all started to work. I end the day with reservations as to how long that setup will work but the prof of the pudding being the eating, I'll have to wait and see. I was very impressed by my USB circulation fan. I believe I will be equally impressed by the one in the bedroom when I get it installed and working. Once that is done, aside from the underbody stuff and making the battery cradle, I'm pretty much done. Or rather, done until I get another idea...
Looking around I see exactly the same charge controllers - same form factor, different colors being sold by different companies at wildly different prices. I've seen the same thing going on eBay for $10 that has been in Walmart for $20, Home Depot for $50 and Harbor Freight for $80. Then I see charge controllers being sold for upwards of $1,000 in other places. Add in to that the fact you never really know the background of anything and it becomes almost impossible to know whether you're buying a Chinese lemon or an American star. I dare say it took the Chinese 50 years after everybody else to develop a space program because of their lousy attitude to quality.
So, thinking forward, if the charge controller that's supposed to arrive from California on Friday actually works, my next purchase will be a timer. That way I can set my extraction fan to go for precisely 15 minutes every hour. I already have a thermal switch on it so that it won't run in under 25C (77F). I might further add a low voltage cutout switch.
In fact, with the low voltage cutout, a timer and an over voltage cutout, aside from diodes on the solar panels, there would seem no point whatsoever in having a charge controller. Timers seem to go for about $10, low voltage cutouts for about $40 and over voltage cutouts for about the same. For my purposes, with my diode protected panels, all I really need is to protect the batteries from low voltage and put a timer of my extraction fan. Over voltage with 35W of solar power and (when I get my CPU fans wired into the curcuits) 10W of ventilation plus 30W of extraction fan is most likely not going to be a problem. Having said that, it's always worth putting in overvoltage protection.
Meanwhile, I set to and adjusted my charge controller settings on the extraction fan. I figured that the battery was probably already gone so dropping the cutoff voltage from 11.9 to 11.5v wouldn't do any more damage. I'd read on one of those authoritative battery websites that one should never discharge a battery below 11.9v as it would damage the battery. Discharged to 10.5v and the battery would be dead instantly. Not expecting much from it, I initially connected to my 7ah battery and found the extraction fan worked for quite a while before cutting off and recharging after which it worked for quite a while again. Mystified I disconnected the 7ah battery and reconnected my 10ah and left it going. It charged and discharged a couple of times with impressively long fan operation times. I'll have to see how long it keeps going like that.
Then I got on and glued more of my lightweight cable from my circulation fan to the wall and then joined it to a heavier cable that leads to my front charge controller. The fine cable was flimsy enough that a terminal block connection didn't work. The wire snapped off as soon as the screws were tightened. Thus I soldered the connection and put shrink on insulation sleeves. How I wish I'd discovered those 40 years ago! The cable was glued into place and passed through a hole in the partition. I connected it to the charge controller using spade terminals.
Setting the fan going took a few minutes and I had to read the charge controller manual. It was in the usual Chinese gibberish. Alas that charge controller is set to 11.3v cutoff voltage. Now it could be that the website that I obtained my charge level information was written by some joker that had a hidden agenda or he could have been a complete cretin. Equally, he could have been dead right. Only time will tell. I neglected to include a thermal sensor in my fan setup. I will have to add that later.
I'm hoping and praying that my small batteries last a while like this. Not least because if they die, I'll have to replace all my charge controllers. I do intend to switch over to my bigger battery but the plans I have for that also involve adding an external solar or wind power input, putting the battery (which is fairly bulky) under the bus in a custom built cradle. For that I'll probably have to get my welder out of storage and (carefully) weld some of the leftover steel angle to form a cage that can be bolted to the C section members underneath the bus. At the same time I'll put an extra cable from front to back to carry the solar charge to the front where it will be shared between all my devices and a cable from the extraction fan to the front. I'll also include a connection for a fan above my bedroom desk. Then I might include some USB power ports. Needless to say, having the extraction fan on for more than 10-15 minutes is costly in electricity and most likely entirely unnecessary. One complete change of air every hour should be plenty! For that I might need to obtain a timer.
Despite the fact I come across unforeseen issues and problems, I do master them. This bus project has been a series of problems, solutions, frustrations, frequent cursing and I am eternally glad that I have been able to do it. My dad brought me up around tools and showed me how to use many. I wish that my woodwork was better. My dad, of course, was brought up by a multi-skilled father whose claim to fame was that he was a ship's carpenter for some of his life. Sadly, he passed away before I arrived on the scene. I can well imagine his tut-tutting over my carpentry skills! I'm keen to try my bus out on a short camping trip. I'll probably do that after it's retitled and the new insurance is sorted out.
At the moment I'm waiting on Walmart to provide the prints I ordered. They should come in on Friday. Those prints will go together with my $15 dollars and my completed application to retitle my bus as a motorhome pretty quickly. It took the DMV a month to respond last time. This time, I hope they're far speedier. Mind, this time I'm surer of my situation. The bus has been improved substantially and I have a bus driving license now as well as more driving confidence as a consequence.
It seems the biggest thing I did in order to reduce the heat in the bus was to paint the roof white. I have a feeling my CPU fans though slower were probably better value as extraction fans than my big bilge blower. I have a feeling my idea of having CPU fans as circulation fans is probably a good idea. The $5 window screen from Lowes (hiss, spit) isn't as good as the powered screen I built but stays in the windows earlier and wedging the window onto the screen with a 1 inch nut was a stroke of genius. School bus windows were not built to be very adjustable! There's no way, without air conditioning that I'm going to be able to get the temperature inside the bus much lower. Sure, there are elastometric coatings one can paint on the roof - the best example being Kool Seal which they put on the rooves of mobile homes. It's quite expensive and doesn't make enough difference over a gallon of ordinary white paint to be, in my opinion, worthwhile. The best defense against heat is to park in the shade.
Returning to my door alarm, I managed to put it in place so that it operates. From the front of the bus with both the fans going, I can't hear it but it'll surely scare the socks off any bad guy that tries to break in. The side door is more of a challenge as it has a wide rubber gasket.
At work I spoke with a painter whose comment about the paint peeling in patches on the bus was to scrape it off where it peeled then to do pretty much what I am. Where it peels I'm cleaning it and spraying with a self-etching primer then spraying with my usual paint. It means a little work every now and then but that's not a problem.
The latest on my extraction fan is I lowered the maximum charge to 12.9v as for some reason it wasn't reaching 13v and raised the minimum charge to 11.6v as the fan had been running for about 20 minutes. That's quite acceptable. As I said though, I feel CPU fans were a better choice as they ran pretty well constantly in the summer. They were very quiet and though they didn't shift quite as much air, I find that removing hot air doesn't help all that much. I thought it would. The fan setup doesn't half look impressive though!
At the end of the day I was thwarted. I'd started to build another fan assembley like the one in the galley but due to the partition in the bedroom being a different design, the fan assembley needed some extra tweaks. I used a 5/16 rivet on one end of one cross bar. That was fine - the other end and where the cross bar joins will be screwed to the woodwork. My problem was that though I know I have a full packet of 5/16 aluminum rivets I could not find them. Mind, having sweltered for most of the day in 93F while I both blogged and worked on the bus, I was in no mood by 7PM to go to hunt for them. That's a job for tomorrow. Once the next cross bar is secured, the new cross bar can be trimmed with my angle grinder and the overly long bottom bars of my fan holder can also be trimmed. Then it'll be a case of putting it up and waiting for cold weather to install the underbody wiring and to pass the wires through the floor to the new wire run.
I did have a crazy thought based along the lines of putting an LED rope light down the center of the aisle, attached to the ceiling. That could hide extra wires! Then I realized how crazy that idea was because my experience of LED lighting has been poor. This is precisely why I went for replaceable lanterns for my lighting.
Well, today has been one of rapidly changing opinions. I'd been totally dissatisfied with the Chinese battery control units and the batteries I'd bought. Then suddenly it all started to work. I end the day with reservations as to how long that setup will work but the prof of the pudding being the eating, I'll have to wait and see. I was very impressed by my USB circulation fan. I believe I will be equally impressed by the one in the bedroom when I get it installed and working. Once that is done, aside from the underbody stuff and making the battery cradle, I'm pretty much done. Or rather, done until I get another idea...
Monday, July 31, 2017
A Chinese fail? Say it can't be so!
I have been mightily puzzled over the last few weeks by the performance of my solar system. Not so much puzzled by rather concerned. Ages ago, my solar ventilation system was very simple. Two CPU fans connected directly to two solar panels. In strong sun they shifted a lot of air. In weak sun they barely buzzed. Thinking of storing power to use to run the fan, I employed a cheap Chinese charge controller and a 5AH Radio Shack battery. It worked well. The fans would run happily for hours on end in bright sun. In cloudier conditions the fans would still go.
Then I decided to upgrade to a more powerful fan to shift even more air. I upgraded the battery to a 10AH battery that I got on eBay for $20. Initially I was getting 10 minute bursts on the fan between recharging periods. Eventually after a week or so I was getting 10 second bursts with very brief charging times. That was pretty weird!
At the same time as I was getting odd performance I found the maximum voltage of the battery had dropped. That was very weird too. I was using sealed lead acid batteries and not knowingly over-rating them. I was also getting a warning triangle on the display of my charge controller. Looking it up online, it seems most charge controllers from China use it to indicate a battery or a device fault. I disconnected the fan and it remained displayed. Clearly it was a battery fault.
Concurrent with the warning triangle, I put the battery on charge with another charge controller on a separate circuit with a different solar panel and it would not get above 12.5V instead of the 13V expected. My trusty voltmeter reckoned the battery was sticking at 12.5v too. The acid test there will be to put the battery on a car charger and let it charge for an hour or so then let it sit for a few days and measure the voltage again.
I'm getting the feeling this charge controller could be turning into a battery killer. I tried it again today with a pair of 7AH batteries purchased in Radio Shack's going out of business sale. That's a total of 14AH which at 50% use should run a 2.5A fan for between 2 and 3 hours. The first time I tried it today, the battery voltage reached 13v and the fan ran for two minutes. After that, it ran for 10 seconds or so each time. That was about what the 10AH battery was doing too.
The only thing I know definitely to be made in China is the charge controller. Everything else is made in the West. Two of my solar panels come from Italy and the third comes from Texas. My wiring comes from Radio Shack as did my battery.
I don't want to point the finger of accusation at the charge controller but it's looking very much like the charge controller is the problem. I have several other Chinese charge controllers but it seems to me that they're unusable. The highest voltage at which they will stop taking charge out of a battery is 11.3V which is way too low. I understand a battery should not be depleted more than 11.9v without damaging the battery.
In a fit of exasperation I ordered a charge controller yesterday. It's another like the one I ordered that arrived broken. I believe it's coming from California but was made in China. I regret buying that now even though it has not yet arrived.
In communication with Eric, he pointed out that if I bought a USA made charge controller, even though it would be more expensive, I'd save money and hassle over buying large quantities of Chinese junk. He's absolutely right. The price of an equivalent Harbor Freight controller is quite pricy at $80 but on the other hand I have 2 unusable controllers, one broken controller and one that seems faulty plus one I just ordered and at about $10 apiece I've already spent $50 or most of the price of a Harbor Freight controller. I can't return any of the Chinese stuff whereas I can walk into Harbor Freight and shove the offending object under the manager's nose.
Having spent $55 on a $68 battery from Harbor Freight, I'm now rather wary of letting it anywhere near my Chinese controllers given their apparent penchant for destroying batteries. I have a feeling that I might just put the Chinese stuff in a box and just go and get the expensive Harbor Freight controller. I'd rather not risk an expensive battery to the vaguaries of dubious Chinese stuff that comes with either no instructions or at best semi-literate instructions. To be honest, the best Chinese instructions look like they have been whacked through Google's rather dubious online translator. It reminds me of the automatic translation of "The spirit is strong but the flesh is weak" which was translated as "The meat is bad but the vodka is strong".
If I install the new charge controller, I have a feeling I will most likely install it in the front of the bus and run the fan off my 15W panel rather than my two 10W panels - for the moment. Moving it to the front has many advantages. I'll have to install an additional power cable for the back solar panels to bring their output to the front at some future point. Running off the front panel for the moment will also likely be the galley circulation fan - since the wiring is easily accessible.
As can be seen, there's plenty that needs doing under the bus in terms of wiring. All will have to wait til the weather gets cold enough to force the antisocial critters such as spiders, ants and mosquitoes into hibernation. If it's another warm winter, after I've retitled the bus I'll drive North if I have t in order to work in safety.
Then I decided to upgrade to a more powerful fan to shift even more air. I upgraded the battery to a 10AH battery that I got on eBay for $20. Initially I was getting 10 minute bursts on the fan between recharging periods. Eventually after a week or so I was getting 10 second bursts with very brief charging times. That was pretty weird!
At the same time as I was getting odd performance I found the maximum voltage of the battery had dropped. That was very weird too. I was using sealed lead acid batteries and not knowingly over-rating them. I was also getting a warning triangle on the display of my charge controller. Looking it up online, it seems most charge controllers from China use it to indicate a battery or a device fault. I disconnected the fan and it remained displayed. Clearly it was a battery fault.
Concurrent with the warning triangle, I put the battery on charge with another charge controller on a separate circuit with a different solar panel and it would not get above 12.5V instead of the 13V expected. My trusty voltmeter reckoned the battery was sticking at 12.5v too. The acid test there will be to put the battery on a car charger and let it charge for an hour or so then let it sit for a few days and measure the voltage again.
I'm getting the feeling this charge controller could be turning into a battery killer. I tried it again today with a pair of 7AH batteries purchased in Radio Shack's going out of business sale. That's a total of 14AH which at 50% use should run a 2.5A fan for between 2 and 3 hours. The first time I tried it today, the battery voltage reached 13v and the fan ran for two minutes. After that, it ran for 10 seconds or so each time. That was about what the 10AH battery was doing too.
The only thing I know definitely to be made in China is the charge controller. Everything else is made in the West. Two of my solar panels come from Italy and the third comes from Texas. My wiring comes from Radio Shack as did my battery.
I don't want to point the finger of accusation at the charge controller but it's looking very much like the charge controller is the problem. I have several other Chinese charge controllers but it seems to me that they're unusable. The highest voltage at which they will stop taking charge out of a battery is 11.3V which is way too low. I understand a battery should not be depleted more than 11.9v without damaging the battery.
In a fit of exasperation I ordered a charge controller yesterday. It's another like the one I ordered that arrived broken. I believe it's coming from California but was made in China. I regret buying that now even though it has not yet arrived.
In communication with Eric, he pointed out that if I bought a USA made charge controller, even though it would be more expensive, I'd save money and hassle over buying large quantities of Chinese junk. He's absolutely right. The price of an equivalent Harbor Freight controller is quite pricy at $80 but on the other hand I have 2 unusable controllers, one broken controller and one that seems faulty plus one I just ordered and at about $10 apiece I've already spent $50 or most of the price of a Harbor Freight controller. I can't return any of the Chinese stuff whereas I can walk into Harbor Freight and shove the offending object under the manager's nose.
Having spent $55 on a $68 battery from Harbor Freight, I'm now rather wary of letting it anywhere near my Chinese controllers given their apparent penchant for destroying batteries. I have a feeling that I might just put the Chinese stuff in a box and just go and get the expensive Harbor Freight controller. I'd rather not risk an expensive battery to the vaguaries of dubious Chinese stuff that comes with either no instructions or at best semi-literate instructions. To be honest, the best Chinese instructions look like they have been whacked through Google's rather dubious online translator. It reminds me of the automatic translation of "The spirit is strong but the flesh is weak" which was translated as "The meat is bad but the vodka is strong".
If I install the new charge controller, I have a feeling I will most likely install it in the front of the bus and run the fan off my 15W panel rather than my two 10W panels - for the moment. Moving it to the front has many advantages. I'll have to install an additional power cable for the back solar panels to bring their output to the front at some future point. Running off the front panel for the moment will also likely be the galley circulation fan - since the wiring is easily accessible.
As can be seen, there's plenty that needs doing under the bus in terms of wiring. All will have to wait til the weather gets cold enough to force the antisocial critters such as spiders, ants and mosquitoes into hibernation. If it's another warm winter, after I've retitled the bus I'll drive North if I have t in order to work in safety.
Sunday, July 30, 2017
Worthless lighting
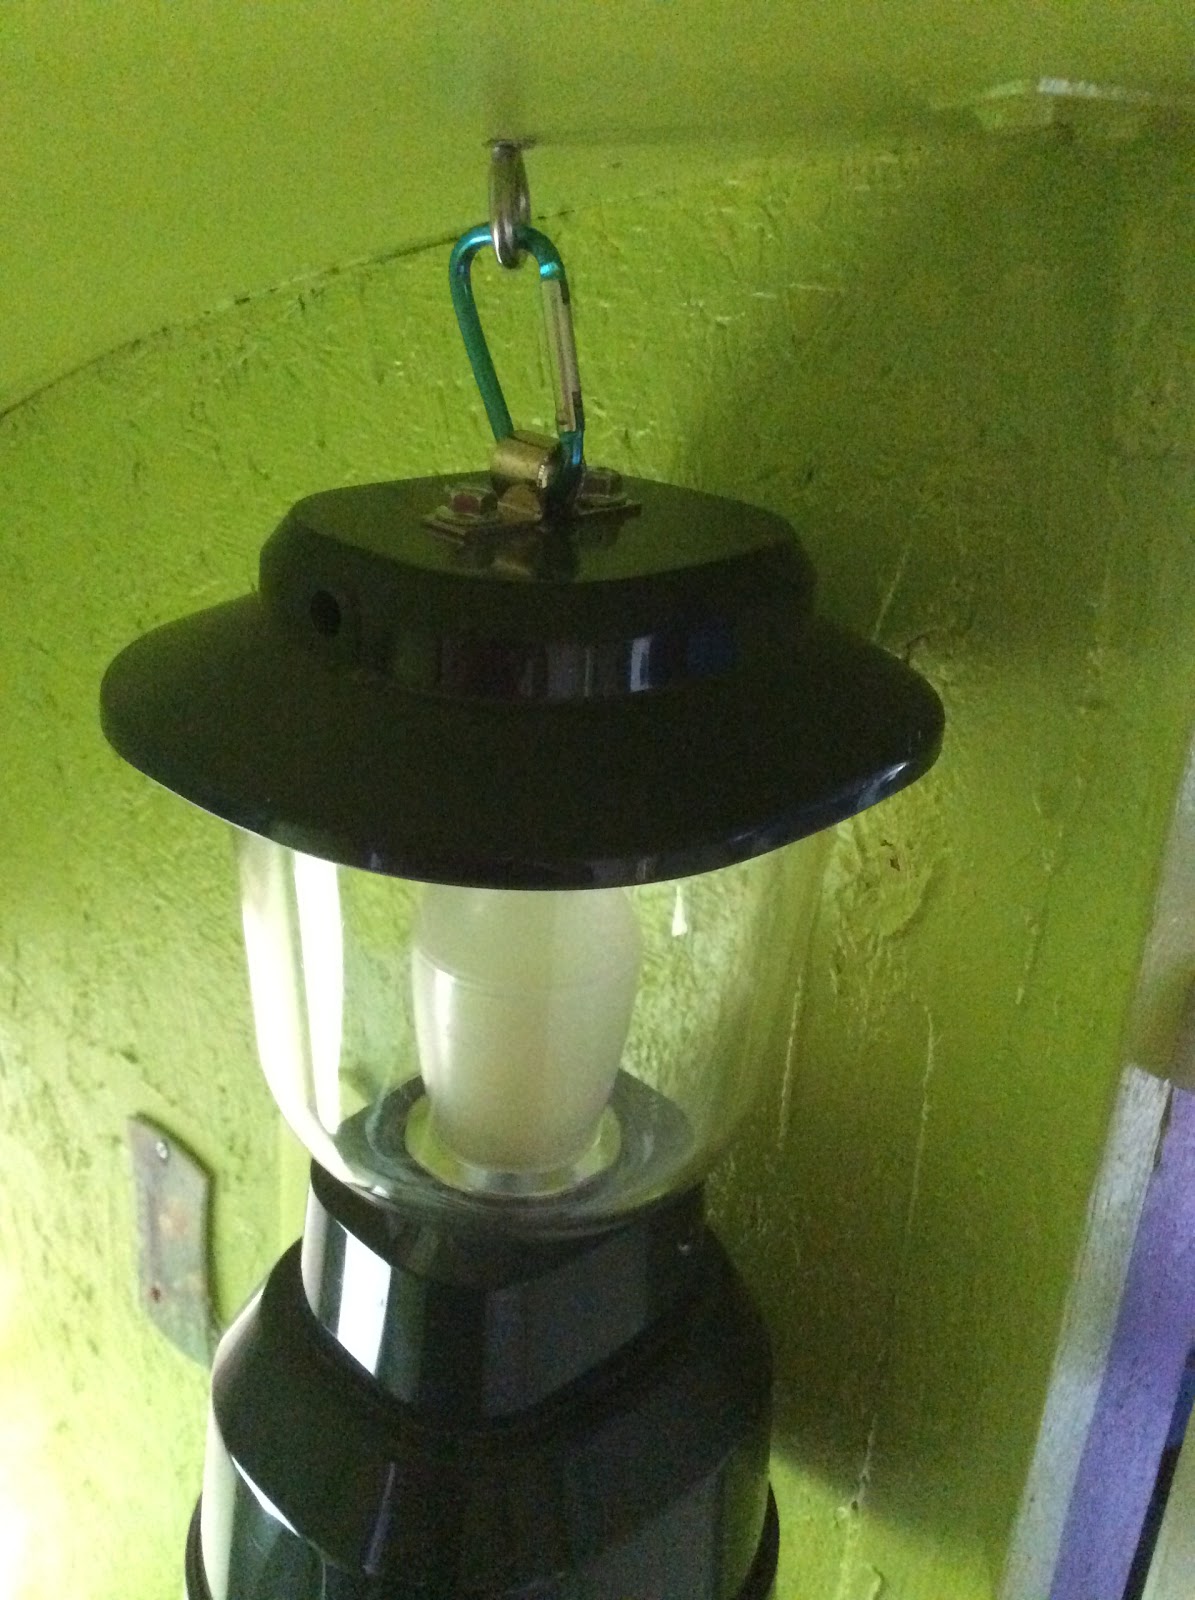
I'm pretty sure by now you've read about my comments on LED lighting many times over. I'm just not very impressed by any of it. It's low powered, dim and short lived. I gather some have better experiences but mine is that incandescent is brighter and lasts longer. Anyway, I do have some LED lanterns and they're pretty bright to look at but the light they shed is worthless. Even combined it's pretty poor. So, the other day I noticed something called a Broadbeam LED lantern. It looked like an interesting technological development but I was not impressed at all by the light level. In my opinion anything less than the equivalent of a 100W bulb is fumbling around in the dark. Here's a nice table of lumens versus watts that I pinched off another website.
Notice how it's only at 1500 lumens that the light produced is acceptable. Now think back on those terrible LED contraptions sold in the stores that proudly claim to be 150 lumens. People only buy the trash because it looks cute and they don't have a clue what lumens are. Worse still, the manufacturer might grade their contraptions in Lux or Candela.
I couldn't find any useful Lux or Candela conversion tables. I found plenty rather daunting looking mathematical formulae designed to do the conversions though. It looks on the surface that 1 Lux is 10 Lumens. 1 Candela is the power emitted by a single candle flame and one Candela is 4 lumens so a minimum acceptable LED lighting contraption would have to be no less than.
Lumens to watts table
| Lumens | Incandescent light bulb (watts) | Fluorescent / LED (watts) |
|---|---|---|
| 375 lm | 25 W | 6.23 W |
| 600 lm | 40 W | 10 W |
| 900 lm | 60 W | 15 W |
| 1125 lm | 75 W | 18.75 W |
| 1500 lm | 100 W | 25 W |
| 2250 lm | 150 W | 37.5 W |
| 3000 lm | 200 W | 50 W |
I couldn't find any useful Lux or Candela conversion tables. I found plenty rather daunting looking mathematical formulae designed to do the conversions though. It looks on the surface that 1 Lux is 10 Lumens. 1 Candela is the power emitted by a single candle flame and one Candela is 4 lumens so a minimum acceptable LED lighting contraption would have to be no less than.
- 1500 lumens
- 100W incandescent
- 25W fluorescent
- 150 Lux
- 375 Candela
That's quite a lot to remember! The acid test though is could you comfortably sit and read a book or magazine by the light of your LED contraption? While dim lighting might be acceptable for grabbing clothes and putting them on or for using the bathroom, showering, cooking etc there are plenty occasions when it's not acceptable. Two examples might be reading a novel
and putting on make-up.
In practical terms, I find the current lot of LED lanterns in what I call the affordable range of $10 to $15 to be pretty poor. I have several. I made the mistake of buying a $30 lantern thinking it would be better. It's certainly easier on the eyes as the LED is shielded but the handle snapped off fairly quickly. While it's possible to buy more expensive lanterns, my experience indicates price is not an indication of quality. It makes me laugh to hear people saying they go to some expensive place to buy
their stuff because everything in Walmart is made in China. I bet they don't realise the stuff they pay 100% more for in Nordstrom is most likely also made in China. It doesn't take much to change a made in label. To do it honestly, all that needs be done is to remove one screw and replace it. Hey presto! The item is now assembled in America and can carry a Made in America label.
Yesterday I didn't blog. What I did was to switch out the bad 10AH battery for one of my 7AH batteries. After initially throwing a fault on my charge controller, it settled down and was running for 7 minutes or so between charges. That just doesn't seem like very long to be honest. Still, it was good to have the ventilation running again. I also spent an hour or so building a mount for one of my smaller CPU fans in order to mount it on the wall as a circulation fan. I'd intended to mount it in the bedroom but the mount was too wide for the beam I'd intended to secure it to. Thus I need to seek out more of my aluminum scrap to make an extender and to build a mount for the second CPU circulation fan. I took no photos yesterday, hence no blog entry.
The first thing I got on with today was looking at my charge controller. It seems the eBay battery (could be a battery from Radio Shacks going out of business sale) is again flagging a fault. As the charge level had reached the trigger voltage but had not triggered, I lowered the trigger to 12.8v. I have a feeling I have a few rather regrettable batteries. I decided I was going to burn through the regrettable batteries before I use my Harbor Freight battery. That shouldn't take many days! I could have a faulty controller though I doubt it since it does seem to work or I could have a faulty wire under the bus though since it is carefully covered in cable shroud I'd doubt that. Given that all my other wiring installed in the same sprout at the same time works, I'd doubt the wiring as a problem. That leads inevitably to the conclusion it must be the battery. Anyway I switched over to my other 7AH battery to see what that does.
The next order of business was to look at my LED lantern. This was made by GE and claims 350 lumens. Which planet GE was on when they recorded the lumens is unknown though I'm pretty sure it wasn't Planet Earth and that in whatever parallel universe it was, the laws of physics must have been very different. It's the most pleasant of my lanterns to use as the light source is properly shielded. For some unknown reason the switch has three settings: Dim, is that faintly glowing thing my lantern and off. They could and should have missed out on the intermediate brightness setting as it's utterly worthless. I think it's there to conserve battery power but honestly I can conserve battery power far better by putting the batteries in my pocket. I can only assume the ultra dim setting is some GE engineer having a laugh at the customers expense.
Anyway, the handle broke off my GE lantern within a couple of months of buying it. That really irked me because I threw $30 at that thing. Today I used a spare brass loop from when I installed bolts on my drawers and bolted it to the top of the lantern. Next I put a leftover mini carabiner through the loop to hang my lantern from a ceiling loop. That worked brilliantly. I am definitely a genius!
Following that, I looked at my circulation fan idea. The basic idea is fine. Where I decided to make a change was that instead of mounting it to the beams, mounting it to the ceiling makes more sense. The wires can run down the beams and be connected at the top with spade connectors. Eventually I'll wire those to my charge controller though this might not be until winter. There's a lot going to be done in winter.
As I've already said, I'm getting ready to retitle the bus as a motorhome. I took the photos a few days ago and sent them to Walmart for printing. I saw absolutely no point whatsoever in paying more than the minimum so I ordered in store pickup a week from now. That brought 20 prints down to $2 and change after tax. It's already going to cost $15 in retitling fees!
Today marks a change in my blogging habits. A few days ago while shopping, I spied a Bluetooth keyboard that was both Android and iOS compatible. Now that's what I call useful. It means I am now no longer subject to the vagaries of Apple or Google spelling correction. Let's face it, spelling corrector are horrible. It takes far longer to proof read after a spelling corrector has messed everything up than to write the article in the first place. I can honestly say that I am loving using a real keyboard once more.
Online, I'd found a 10 inch window screen that looked useful. The only place that was listed as having it was Bed Bath and Beyond. I have a soft spot for Bed Bath and Beyond even though it is expensive and the stench from the chemical "scents" brings on a migraine. Anyway, they turned out not to have it unless I ordered - which I could have done from home. Thus I called in at Home Depot and they didn't have one either. Finally I called in at Lowes (hiss, spit) where I found it and not only did I find it there but it was half the price Bed Bath and Beyond wanted. Now that's not really much of a surprise. A lot of those stores can be expensive. Five dollars seeming about right, I bought one and it works well. It'll stop most mosquitoes from flying in but there's enough of a gap around the top and bottom for ants to crawl in. Needless to say I have to wedge the window to ensure as tight. Seal as possible. It is, after all, a school bus!
While I was out I also found some door alarms that I thought would go splendidly on the back and side doors. My bus is old enough that it does not have door alarms nor a student alarm. Back then if a student opened the door and fell out, it was his own darned fault. These days, if a student gets up, opens the door and falls out, it's apparently, somehow, the driver's fault. That rule comes from the same planet GE on which measures lumens.
Not feeling particularly like leaping around to find my remaining aluminum strip which is quite likely in an abandoned trailer being used as storage, I worked on my sole circulation fan. Attaching it to a cross beam on my wall was easy. There, it'll circulate air. How far it'll circulate air, I don't know. I'll only be able to tell that if I employ a smoke machine and the last time I looked at smoke machines, they were very expensive and there didn't seem to be any economical canned alternative.
While installing my fan, I found that the plumbers glue I'd bought will secure the wires very nicely in lace against the wall. All I have to do is to wipe the glue down the side that needs to be glued, hold it in place and it'll just stay there. That's very welcome. Indeed I had a test wire running to that fan for a few minutes and I could definitely feel air moving in the galley. It was more gentle the further I got from the fan but it was moving and that is going to make an absolutely massive difference.
Again, while I was out, I found in one of the dollar stores, a pair of door alarms for a dollar. I'd already mentioned those and I tried them. They're quite unmistakable! Right now I have a problem because in order to work properly the sensor and the magnet need to be close to each other. The way my doors are constructed, I need to put some kind of step to build one up to the level of the other. That's doable. I just have to think about what I'm going to use - maybe some of the cut off rubber from when I installed my front mud flap since the rubber is still lying on the ground where I left it some months ago.
I noticed a problem with my latest charge controller. It seems to want to keep using the battery until it gets down to 11.3v. I cannot raise that figure any higher. I can go as low as 9v but 11.3 seems to be the maximum. It looks like that will kill a battery dead. My old charge controller keeps on indicating faults with batteries. I am beginning to get a bit concerned about that. This is one reason I'm not connecting my brand new battery yet. I purposely bought universal battery chargers that will charge LIon as well as lead-acid but I'm beginning to wonder whether I should instead have gone for several lead-acid chargers instead. I have one that arrived with the mount broken off but I'm thinking that perhaps I should invest in more and just replace my fancy universal charge controllers.
I tweaked the settings on my charge controller for the fan to cut in at 13v and cut out at 11.9v. It charges remarkably quickly up to 13v and the fan runs for less than a minute before cutting out. Im thus wondering whether it is indeed a faulty charge controller. It wasn't expensive but it is annoying! I don't think I paid more than $10 each for my controllers.
We're back to the yes, it was made in China - but then so is everything else issue again. I'm wishing heartily that I could put extra cabling in underneath the bus right now but what with the insects that's impossible unless I pony up, buy a rechargeable drill and drive to the top of a mountain where it'll be cold enough to send all the critters into early hibernation and do the work there. Sadly, South Carolina is flat. At 8mpg I really don't feel like driving too far - even at $2.30 a gallon.
I suppose the solution is going to be something like heading to Harbor Freight and ponying up $25 for one of their smaller charge controllers. Having looked at their website, their $80 charge controller looks identical to my $10 controller. It's probably the same thing just rebadged! If I'd known this solar stuff was going to be such a nightmare, I'd have just left it with two CPU fans powered directly by solar panels and not had such an interesting time running wires under the bus nor such a headache with flaky charge controllers and flaky batteries. Maybe after a year, my one charge controller is just worn out?
The first thing I got on with today was looking at my charge controller. It seems the eBay battery (could be a battery from Radio Shacks going out of business sale) is again flagging a fault. As the charge level had reached the trigger voltage but had not triggered, I lowered the trigger to 12.8v. I have a feeling I have a few rather regrettable batteries. I decided I was going to burn through the regrettable batteries before I use my Harbor Freight battery. That shouldn't take many days! I could have a faulty controller though I doubt it since it does seem to work or I could have a faulty wire under the bus though since it is carefully covered in cable shroud I'd doubt that. Given that all my other wiring installed in the same sprout at the same time works, I'd doubt the wiring as a problem. That leads inevitably to the conclusion it must be the battery. Anyway I switched over to my other 7AH battery to see what that does.
The next order of business was to look at my LED lantern. This was made by GE and claims 350 lumens. Which planet GE was on when they recorded the lumens is unknown though I'm pretty sure it wasn't Planet Earth and that in whatever parallel universe it was, the laws of physics must have been very different. It's the most pleasant of my lanterns to use as the light source is properly shielded. For some unknown reason the switch has three settings: Dim, is that faintly glowing thing my lantern and off. They could and should have missed out on the intermediate brightness setting as it's utterly worthless. I think it's there to conserve battery power but honestly I can conserve battery power far better by putting the batteries in my pocket. I can only assume the ultra dim setting is some GE engineer having a laugh at the customers expense.
Anyway, the handle broke off my GE lantern within a couple of months of buying it. That really irked me because I threw $30 at that thing. Today I used a spare brass loop from when I installed bolts on my drawers and bolted it to the top of the lantern. Next I put a leftover mini carabiner through the loop to hang my lantern from a ceiling loop. That worked brilliantly. I am definitely a genius!
Following that, I looked at my circulation fan idea. The basic idea is fine. Where I decided to make a change was that instead of mounting it to the beams, mounting it to the ceiling makes more sense. The wires can run down the beams and be connected at the top with spade connectors. Eventually I'll wire those to my charge controller though this might not be until winter. There's a lot going to be done in winter.
As I've already said, I'm getting ready to retitle the bus as a motorhome. I took the photos a few days ago and sent them to Walmart for printing. I saw absolutely no point whatsoever in paying more than the minimum so I ordered in store pickup a week from now. That brought 20 prints down to $2 and change after tax. It's already going to cost $15 in retitling fees!
Today marks a change in my blogging habits. A few days ago while shopping, I spied a Bluetooth keyboard that was both Android and iOS compatible. Now that's what I call useful. It means I am now no longer subject to the vagaries of Apple or Google spelling correction. Let's face it, spelling corrector are horrible. It takes far longer to proof read after a spelling corrector has messed everything up than to write the article in the first place. I can honestly say that I am loving using a real keyboard once more.
Online, I'd found a 10 inch window screen that looked useful. The only place that was listed as having it was Bed Bath and Beyond. I have a soft spot for Bed Bath and Beyond even though it is expensive and the stench from the chemical "scents" brings on a migraine. Anyway, they turned out not to have it unless I ordered - which I could have done from home. Thus I called in at Home Depot and they didn't have one either. Finally I called in at Lowes (hiss, spit) where I found it and not only did I find it there but it was half the price Bed Bath and Beyond wanted. Now that's not really much of a surprise. A lot of those stores can be expensive. Five dollars seeming about right, I bought one and it works well. It'll stop most mosquitoes from flying in but there's enough of a gap around the top and bottom for ants to crawl in. Needless to say I have to wedge the window to ensure as tight. Seal as possible. It is, after all, a school bus!
While I was out I also found some door alarms that I thought would go splendidly on the back and side doors. My bus is old enough that it does not have door alarms nor a student alarm. Back then if a student opened the door and fell out, it was his own darned fault. These days, if a student gets up, opens the door and falls out, it's apparently, somehow, the driver's fault. That rule comes from the same planet GE on which measures lumens.
Not feeling particularly like leaping around to find my remaining aluminum strip which is quite likely in an abandoned trailer being used as storage, I worked on my sole circulation fan. Attaching it to a cross beam on my wall was easy. There, it'll circulate air. How far it'll circulate air, I don't know. I'll only be able to tell that if I employ a smoke machine and the last time I looked at smoke machines, they were very expensive and there didn't seem to be any economical canned alternative.
While installing my fan, I found that the plumbers glue I'd bought will secure the wires very nicely in lace against the wall. All I have to do is to wipe the glue down the side that needs to be glued, hold it in place and it'll just stay there. That's very welcome. Indeed I had a test wire running to that fan for a few minutes and I could definitely feel air moving in the galley. It was more gentle the further I got from the fan but it was moving and that is going to make an absolutely massive difference.
Again, while I was out, I found in one of the dollar stores, a pair of door alarms for a dollar. I'd already mentioned those and I tried them. They're quite unmistakable! Right now I have a problem because in order to work properly the sensor and the magnet need to be close to each other. The way my doors are constructed, I need to put some kind of step to build one up to the level of the other. That's doable. I just have to think about what I'm going to use - maybe some of the cut off rubber from when I installed my front mud flap since the rubber is still lying on the ground where I left it some months ago.
I noticed a problem with my latest charge controller. It seems to want to keep using the battery until it gets down to 11.3v. I cannot raise that figure any higher. I can go as low as 9v but 11.3 seems to be the maximum. It looks like that will kill a battery dead. My old charge controller keeps on indicating faults with batteries. I am beginning to get a bit concerned about that. This is one reason I'm not connecting my brand new battery yet. I purposely bought universal battery chargers that will charge LIon as well as lead-acid but I'm beginning to wonder whether I should instead have gone for several lead-acid chargers instead. I have one that arrived with the mount broken off but I'm thinking that perhaps I should invest in more and just replace my fancy universal charge controllers.
I tweaked the settings on my charge controller for the fan to cut in at 13v and cut out at 11.9v. It charges remarkably quickly up to 13v and the fan runs for less than a minute before cutting out. Im thus wondering whether it is indeed a faulty charge controller. It wasn't expensive but it is annoying! I don't think I paid more than $10 each for my controllers.
We're back to the yes, it was made in China - but then so is everything else issue again. I'm wishing heartily that I could put extra cabling in underneath the bus right now but what with the insects that's impossible unless I pony up, buy a rechargeable drill and drive to the top of a mountain where it'll be cold enough to send all the critters into early hibernation and do the work there. Sadly, South Carolina is flat. At 8mpg I really don't feel like driving too far - even at $2.30 a gallon.
I suppose the solution is going to be something like heading to Harbor Freight and ponying up $25 for one of their smaller charge controllers. Having looked at their website, their $80 charge controller looks identical to my $10 controller. It's probably the same thing just rebadged! If I'd known this solar stuff was going to be such a nightmare, I'd have just left it with two CPU fans powered directly by solar panels and not had such an interesting time running wires under the bus nor such a headache with flaky charge controllers and flaky batteries. Maybe after a year, my one charge controller is just worn out?
Friday, July 28, 2017
Cue the Heavenly Chorus
Today I took my long awaited trip to Harbor Freight. What bliss - surrounded by all the boy toys ones heart could desire! I went on a mission however. I needed a big battery. While I was there I bought a step bit to replace the one I broke a few weeks ago.
I'd been trying my eBay battery and found that it just didn't seem to work too well. It went to 12.9v then powered my 2.5A fan for 10 seconds before dropping to 11.9v. That means that the 10ah battery drops to 40% capacity in 10 seconds. Using 6ah should have taken a 2.5A fan something around 2 hours not 10 seconds.
I didn't install my battery today. I did, however, put it on one of my charge controllers to find it was at 12.9v and was full. I tried it in my 50 cal ammunition box. It fits and I can close the lid. The terminals are close to the lid but don't touch. I can easily glue plastic to the lid to ward off accidental contact. There's enough space in the box to install a voltage meter and a pair of contacts. There's no need for a USB connector on the house battery though.
Thinking about retitling, I moved the bus today. Aside from the brakes sticking initially, it moved and started easily. I'll have to drive with the brakes lightly applied in order to clean the rust off them. While the bus was moved, I took some exterior photos as required for the retitling process.
The rear facing camera needs attention. The LEDs are a little dazzling. That can be cured with black tape or black paint. Having said that, drivers should keep way back anyway. I need one of those bumper stickers that says "If you can't see my mirrors, I can't see you".
The outside, I'm sure you'll agree, looks pretty anonymous and pretty good. The inside is good too. I definitely need to complete installing my new battery. As far as the two 7ah batteries purchased via eBay go, I'm not convinced I should even attempt to use them. I'd bought them because they could be used to recharge a phone or tablet. I'm thinking more now toward a different solution though I've not yet got an idea solid enough to mention; I'm still mulling over different options.
The other day I looked idly at small manual pumps online. I'd thought of having a manual pump drawing fresh water out of a 5 gallon can under the sink. Then I realized I'd be paying $25 for a pump when I could easily pour water from the 5 gallon can into a jug fir use be worry less about contamination.
While I was out, the thought of a water inlet cane to mind. Again, I decided it's not really worth my while at the moment. That might change at some point in the future. It's tempting though right now beyond the scope of what I'm prepared to do.
My lighting inside the bus is pretty sad. I have LED lanterns giving off some quite pathetic amounts of light. Sure, it's enough light to see large objects but anything more is a case of fumbling in the gloom. Looking at the lanterns available, those that claim to be ultra bright are usually the most pathetically dim things I've encountered. In my research I came to the conclusion that lanterns that don't offer a minimum of 1000 lumens are a total waste of time. Those that cost more than $15 represent wasted money. I've got 5 lanterns each of which claims to be bright but which fail miserably to produce enough light to do anything worthwhile.
On my journies today I saw a new kind of LED lantern that had a broad glowing stripe. It looked interesting but as soon as I saw the description of "brightest ever" my eyes glazed over. I've heard that old wives tale so many times it's not even funny. I probably won't change any of my led lights until they fail - which at the rate they fail, won't be long. It's worth finding out more about them but I feel very much that though I had my first LED light in 2009 that LED is still in its infancy. I'm not prepared to be the diaper that tries them out though!
I'd been trying my eBay battery and found that it just didn't seem to work too well. It went to 12.9v then powered my 2.5A fan for 10 seconds before dropping to 11.9v. That means that the 10ah battery drops to 40% capacity in 10 seconds. Using 6ah should have taken a 2.5A fan something around 2 hours not 10 seconds.
I didn't install my battery today. I did, however, put it on one of my charge controllers to find it was at 12.9v and was full. I tried it in my 50 cal ammunition box. It fits and I can close the lid. The terminals are close to the lid but don't touch. I can easily glue plastic to the lid to ward off accidental contact. There's enough space in the box to install a voltage meter and a pair of contacts. There's no need for a USB connector on the house battery though.
Thinking about retitling, I moved the bus today. Aside from the brakes sticking initially, it moved and started easily. I'll have to drive with the brakes lightly applied in order to clean the rust off them. While the bus was moved, I took some exterior photos as required for the retitling process.
The rear facing camera needs attention. The LEDs are a little dazzling. That can be cured with black tape or black paint. Having said that, drivers should keep way back anyway. I need one of those bumper stickers that says "If you can't see my mirrors, I can't see you".
The outside, I'm sure you'll agree, looks pretty anonymous and pretty good. The inside is good too. I definitely need to complete installing my new battery. As far as the two 7ah batteries purchased via eBay go, I'm not convinced I should even attempt to use them. I'd bought them because they could be used to recharge a phone or tablet. I'm thinking more now toward a different solution though I've not yet got an idea solid enough to mention; I'm still mulling over different options.
The other day I looked idly at small manual pumps online. I'd thought of having a manual pump drawing fresh water out of a 5 gallon can under the sink. Then I realized I'd be paying $25 for a pump when I could easily pour water from the 5 gallon can into a jug fir use be worry less about contamination.
While I was out, the thought of a water inlet cane to mind. Again, I decided it's not really worth my while at the moment. That might change at some point in the future. It's tempting though right now beyond the scope of what I'm prepared to do.
My lighting inside the bus is pretty sad. I have LED lanterns giving off some quite pathetic amounts of light. Sure, it's enough light to see large objects but anything more is a case of fumbling in the gloom. Looking at the lanterns available, those that claim to be ultra bright are usually the most pathetically dim things I've encountered. In my research I came to the conclusion that lanterns that don't offer a minimum of 1000 lumens are a total waste of time. Those that cost more than $15 represent wasted money. I've got 5 lanterns each of which claims to be bright but which fail miserably to produce enough light to do anything worthwhile.
On my journies today I saw a new kind of LED lantern that had a broad glowing stripe. It looked interesting but as soon as I saw the description of "brightest ever" my eyes glazed over. I've heard that old wives tale so many times it's not even funny. I probably won't change any of my led lights until they fail - which at the rate they fail, won't be long. It's worth finding out more about them but I feel very much that though I had my first LED light in 2009 that LED is still in its infancy. I'm not prepared to be the diaper that tries them out though!
Subscribe to:
Posts (Atom)