Showing posts with label fridge. Show all posts

Sunday, April 10, 2016

Is this the end?


It certainly looks like the end of the road for my cheap Walmart microwave. I count 5 bullet holes in its carcass. Seriously, how can Walmart sell junk like this? After a little over 2 years use the bottom of the microwave inside was very rusty. It lay idle in a dry location for a further 2 years then when I set to cleaning it up, the pan had holes in it under the paint. No wonder every time I cooked, the countertop was covered in nasty looking water.

Today was one of those days when little was accomplished. Mostly that was because I am not really all that well. I didn't go to Lowes (hurrah). I did trim a little of the excess steel from the fridge to make some blanks to cover the apertures under the top front flashers. I started that a little late in the day and despite a spectacular mishap that went to show why only fools would take the guard off an angle grinder, I managed to cut two rectangles of steel.

Once I'd cut the steel, I ground the rusty bits back to clean steel then sprayed both sides with zinc paint. The zinc spray can started dripping and dribbling paint which was annoying but on the other hand this is exctly why I do prefer a brush and pot of paint. There's just no point in wasting a 65c brush for a little bit of painting though. Spray cans are handy for quick, small touch ups and that's about it. I decided on rectangles on the basis that they're easier and faster to cut. As long as they're mounted in the right places, they should have a balanced look. I'll have to trim the top outer corners to match the curve of the roof and I'll have to trim and indentation for the CB aerial. Other than that, the steel should be fine as it is.

As the paint was drying I turned my mind to the rear turn signals and switched one of the lenses over so that unlike the right turn signal, the left now has no arrow. It didn't improve matters. I suspect the bulb could be the problem in the left turn signal. It just seems dimmer than the right turn signal.

By the way, the right turn signal is a completely new unit that I installed last year as is the right hand reversing light. I'll have to replace the bulb to see if it improves matters. Really and truly it doesn't matter to me whether the lens has an arrow on it or not. I just hoped I could make it brighter. So, it looks like a new bulb but I won't stop there. I'll see if I can get some of that silver reflective Christmas wrapping plastic foil and fit it inside each of the light assemblies to improve the amount of light coming from them. These things just aren't visible enough for my liking in daylight.

By the time the light began to go, the paint on my steel plates was not fully dry so I put them inside the bus. I would have liked to have installed them today rather than leaving tape over one of the apertures. Having said that, there's always next weekend and the tape should keep rain out.

I looked at the ground beside the bus. That'll need a good clean up when I finish working on the bus. I have a feeling I'll spend an afternoon picking up trash from the yard! The plan for the big piece of fridge is to cover the lower door window aperture at the back of the bus. I'll have one piece that I'll trim to weld into the aperture. Once that's welded, I'll fill the space behind it with closed cell insulating foam then either use rivnuts and screw a sheet of steel over the inside of the door or rivet a sheet of steel there. On the whole, I think rivnuts make more sense as it allows me to perform maintainance if needed. I just hope I can make my welds waterproof.

I am very disappointed with the amount done today. I know I have overdone it today. I know I overdid it yesterday too. I wanted to go to Lowes to get my final plumbing part. I wanted to put two stop nuts on each bolt for each barrel. I wanted to plumb the shower barrel in fully. I'm still looking at plumbing the handbasin. I just hope I can get everything completed by the end of the month. My dad was griping that I hadn't completed it by April of last year, which was my original completion goal! I think my original target was a little ambitious given that I had so much to learn and that I'm such a perfectionist.

Saturday, April 9, 2016

What the Hell is that and where does it go?


Despite the fact I feel more like the Walking Dead than any semblance of being human, today I took the bits I bought at Lowes (hiss, spit) that I neglected to blog about the other day and put them together. As I currently work with small children I get just about every ailment they so generously give me. It's all airbourne stuff that's hard to defend against so this weekend I have a tummy bug. How nice!

So, the other day somebody gave me some spare 1/2 inch Pex tubing. Thus I got myself a T adaptor for the downpipe from my shower and some other connectors in order to connect the waste barrel via flexible hose. That makes life much easier for times when I might have to take the barrel down to get silt and crud out of it. I'm sure it'll need cleaning at some point!

All that fitted together very nicely though I had a problem at the other end of the Pex tubing because I'd bought the wrong size connector. I'll fix that tomorrow if I'm feeling any better or maybe later this evening. It all depends on how my virus goes.

That's a bigger view of my construction. From left to right we have...
1. A Walmart ball valve for a hosepipe that cost $1.95. That's way cheaper than the cheapest faucet Lowes has!
2. A 3/4 inch angle with a thread on the end pointing down. The other end just happened to fit into my 1.15 inch tubing nicely so I said "what the heck" and glued it in there.
3. A 1.25" T adaptor that will fit onto my 1.25" downpipe. 
4. A piece of 1.25" tubing connecting the T adaptor to a 1.25" to 0.75" hosepipe adaptor.
5. A 1.25" hosepipe adaptor.
6. A Hosepipe swivel. That will make removing the barrel so much easier as I can just unscrew the tubing.
7. A 0.75" to 0.5" threaded Pex adaptor.
8. Some 0.5" Pex tubing.

Not shown because I bought a 0.5" to 0.25" threaded Pex adaptor in error is the adaptor on the other end of the tubing that will be connected to the barrel. 

I'm pretty sure I could have got a plastic swivel but Lowes (hiss, spit) didn't have one. The dollar store might and I might look into that for the other side of the bus for the handbasin waste pipe. Actually, the handbasin waste piping will be handled totally differently anyway. I will learn from the shower outlet and do the other side differently!

After building (but not installing) the new plumbing bit, I climbed up onto the hood of the bus to use my new Grabbit tool to remove a crosspoint screw that had the cross worn out by a previous attempt to remove it. As I suspected, the Grabbit was little more than a nice-sounding gimmick. It did nothing other than cost me about $8 (or about an hour's wages). That screw will have to be removed the traditional way - with a drill bit! Then I felt wobbly and sick after my not too strenuous exertions and had to lie down in the cool for a couple of hours.

Returning to the fray, I attacked an old fridge that was dumped on m'lady's land. That yielded a nice piece of steel even though it went through 3 cutting disks on my angle grinder. There's plenty steel left too! It's a little thinner than I would like but on the other hand, it is free and welded to the back door, will make the door much more secure than a solitary pane of glass.

I did take a photo of the fridge lying amidst the foliage but for some unknown reason my phone told me it had taken the picture but had not in fact done so. I could say Bah Humbug but that being a little Dickensian should be more replaced by the modern equivalent of "bloody technology". I mean, seriously, what's the point of these wonderful electronic gizmos if they don't work ALL the time?

As an aside, I did mention that I am living way out in the backwoods of South Carolina. Remember the TV series The Dukes of Hazard? Remember the rebel flag I showed you a few days ago? Today I show you the mailbox. It doesn't get much use and hence is more of a bird's nest. That's how far into the backwoods I live!

After another trip inside to rest, I found the old U bend or S bend - whichever you want to call it - that I had put under the handbasin. It seems to be 1.5 inches. My task will be to find something that'll bring that down to 1 inch to fit my standard plumbing. Moving swiftly on, I took two photos of the old fridge - one to show where it's located.

Then I took another photo - of the side I had removed. The inside is steel also which means it could be useful. The left hand side of the fridge which is up against a tree, I didn't start to cut but looking at it, there wouldn't have been much point as that side has a rather large calibre bullet hole through it at a strange angle!

Having done that, my attention turned to the school bus flashers. The screw that wouldn't come out eventually did after I used an angle grinder at a shallow angle so as not to damage the bus. It transpired that this screw could have been ignored. It held only the lens in place. Four other screws held the flasher lens in place.

If I am careful, I can probably replace the amber lenses with arrows with the amber lenses of the flashers. That makes my indicators much more visible. Anyway, having removed the light assembley - which wasn't that hard, I cut the push fit connectors off and screwed on some wire nuts. It turned out that there were two wires and two elements inside the light. It was a most peculiar affair. Having removed it, I've taped over the aperture for now but this is what it looks like without tape.

What surprised me was not just the huge size of the aperture but the cobweb behind it! Using the lens as a template, I marked out some disks on a sheet of aluminum, ready to cut them out to cover the holes.

Having marked the circles I realise that cutting 4 circles is going to be challenging. Rather than delegate that, instead I might use steel and make two sheets of steel with vaguely rounded ends cut to as close as possible, the same dimensions. Then after painting them, simply put silicone seal behind them and rivet them into place. If I pre-drill both sheets and put the holes in the same places, it should look quite tidy.

Meanwhile, tomorrow's task - assuming I feel better which I suspect I will - is to get the plumbing completed for the shower side of the bus, including removing the nuts that I put Thread Locker on and replacing them with two sets of stop nuts. That means a trip to Lowes (hiss, spit) for a 3/4 inch to 1/2 inch Pex fitting that I can glue into place. While I'm there I might as well get the stuff for the other side of the bus too. Having done that, if there's time left, I'll add a second set of stop nuts to the handbasin side of the bus. Ideally I'd like to get the blanks put up to replace the top flashers but that might be a pipe dream for this weekend.

Meanwhile, I totally forgot to say but the AA powered phone chargers arrived yesterday. These are really nifty because it means I can charge a phone using rechargeable AA batteries or via disposeable AA batteries. Basically, that pretty much takes care of all of my electrical requirements. I just don't need electricity for anything other than lighting and my phone, tablet or mifi pad.

Saturday, December 26, 2015

Another epiphany

Toda started with the usual tummyache after eating too much on Christmas day. Then I headed outside to do battle with the metal that I dragged out of the bushes a few days ago that looked like an ideal floor for my battery compartment.

Cutting thin metal is always a challege for my angle grinder - which is now working perfectly thanks to the new carbon brushes and I went through several grinding disks. Good job I bought a second 10 pack of disks a while ago! Just look at the state of the disk I've just been using.

I cut the steel construction I found a few days ago, cutting the edge off one side and cutting it in two such that when two edges are welded together, the construction will be approx 18" by 29" which is about the size of my battery compartment.

As the steel had some handy folded edges, these will act as a strengthening bar down the center of the compartment. Very useful. I had, however to trim the excess fold off as it is somewhere water is likely to collect.

While cutting the floor of the battery compartment, a thought came to mind that has occurred before - namely why I'm even putting a battery compartment. I definitely need access to my main breaker panel and that's always best under the bus. Other than that, I can store the cables more securely inside the bus.

Given that I'm not putting a big house battery, the point of a battery compartment is somewhat questionable. Having said that, it does set me up for future expansion.

Thinking about batteries I was wondering about using NiMh batteries rather than lead-acid or lithium. Lithium batteries are just horribly expensive. NiMh batteries just don't seem to be available in 12v. This is a bit annoying! Out of interest, I looked up NiMh AA batteries and found I could get 48 for $24 and 3,000mah each. If they were put in sets of 10, giving 12v per set then I'd get 4 sets at 12,000mah or 12Aah. 

Thinking further about the NiMh idea, 6v would be way easier to work with just 4 batteries put in series. The downside is that all the charge controllers are set up to charge lead-acid or lithium batteries. To my mind, NiMh is way better than lead-acid because it doesn't gas and can be completely discharged without harming the battery.

Given that the only power I'd need would be to charge my phone, tablet and batteries for my LED lantern and my shower pump, I could probably get away with just D cells and a solar D cell charger. The D cells could in turn power a USB charger. Heaven knows how long that would take to recharge my phone though.

There are a whole load of different options out there for power. My favorite for cooling and for refrigeration at the moment are fans powered solely by solar power and a fridge powered solely by solar. The cold could be maintained in a fridge by simply using freezer blocks. The fans need only to remove heat when the sun is shining. As for the rest, lighting, the shower pump and phone charging - these can all be done from NiMh D cells. For the moment though, I shall continue the plan to install the battery compartment and the shower outflow.

Meanwhile, in a stunning development, the bathtub that m'lady often complained about has vanished. It didn't so much vanish in a puff of smoke but more behind a garden tractor and was hauled to one of the junk piles in the back yard.

It certainly looks better without the bathtub. For those with long memories and the ability to hunt through this blog, the bathtub came out of the original construction. It was used for most of the last year as a handy trash recepticle and had it not been full of trash, would have been easy just to carry.

Things are definitely progressing. The last thing done today was to paint the underside of the new bathroom vanity. This vanity will not have a sink. Instead it will have a removable plastic bowl that can be emptied either into a bucket or down the shower and hence into the bucket under the shower or onto the ground.
Apparently emptying water that's been used for hand washing is frowned upon. That seems to be just plain bizarre to me but I suppose if dumping grey water was approved, people would stretch it further and dump sewage too. Honestly though, as long as its buried properly even sewage can be disposed of outdoors without harm to the environment.

Sunday, December 20, 2015

I got me some sugar!

Yup - after spending a rather unproductive time using soda as a blasting medium with my Harbor Freight air blasting tool, I located a small container of sugar that I poured into the blasting head. The difference was immense. I could bring the paint down to bare metal when I needed and managed to roughen the surface of existing paint. 

It is indeed regular cane sugar. The traditional thing to use is sand or preferably silica free sand. Given that sugar is a substance broken down easily by the human body, I'm not too bothered about inhaling minuscule quantities though I hold my breath while I'm blasting. Sand contains silica which causes silicosis - a really nasty and frequently terminal lung ailment. The best thing is sugar is available just about everywhere. A 20lb bag is cheap in Walmart while for sand I'd have to go further and pay more.

Lacking time to paint properly as it was getting close to dusk, I pulled out the first spray can I could locate. Meanwhile, I have been wondering whether I should change the paint scheme. On one hand, I can get grey fairly readily. On the other, I could paint the bus a more interesting color. I'll probably stick with grey on the basis that most of the paint is probably not going to peel. If necessary I can use a steel brush or sandpaper for occasions when the compressor is unavailable. 

One of worries is whether my welds are good enough. I'm going to have to find a real welder and ask his opinion. I think my battery compartment is going to be strong enough. Mind, I've just measured it against a nearby car battery. It seems that the door the hillbillies put on is not large enough to allow a full sized battery. Thus, my plan of using gas seems to be much more of a thing. I can build a smaller cage to hold a small gas container. No need for a huge one as far as I can see. I can get away with a smaller battery because it's not going to be used for powering mains equipment. I'm thinking small electronics such as my tablet and my phone etc.

Speaking of welds, I welded some scrap steel together. This is so that m'lady's niece's boyfriend can his destructive streak and try to destroy it. If he can then I'll have to look harder at my existing welds.

Looking at my bus batteries, they were down to 50% so I put them on charge to bring them back up to 100%. The bus has been sitting idle for months. That's not good for the batteries but one day I'll get around to installing my solar panel. That should keep the battery topped up.

The solar panel I have should keep the bus batteries topped up. I suspect a similar sized panel might be sufficient to provide for my daily electrical needs unless, of course, I decide to install a fridge that runs off 12v. As I've mentioned, I'm experimenting with Peltier elements and these form the basis of 12v fridges. Now a single Peltier would use around 60w or 120ah. To make a freezer, 4 Peltier elements would be needed, using 480ah. That's way in excess of what I'll set up to do. I figure 10-15ah is all I'll likely need if I use gas. Indeed, since my microwave is close to being deceased, it's not too much of a stretch to put a gas hob where the microwave used to be. indeed, I suspect that I might have been better off not installing the 120v setup at all but rather, installing 12v and gas. Having said that, I have what I have. It'll all probably work out for the best. The goal was to have all electric and while that is possible, it's not of immediate financial practicality.

Monday, November 9, 2015

Underbody storage!

A few days ago, when I was in Tractor Supply, I casually picked up a couple of their flyers. Today while sitting in the car waiting for time to go into work, I read that flyer.

Imagine my surprise when I found people were selling ready made underbody compartments. Most seem to be 18 inches tall which would hang 4 inches below the skirt. I've seen busses with storage compartments dangling down. Still, it gave me ideas.

I'm going to put the replacement compartment in for the existing hillbilly cable compartment. I've built it to take two batteries. That should provide all the 12v power I should ever need.

I'm tempted to put extra storage under the bus but I'm going to stick with just the rebuilt compartment for now. The goal is to be operational not perfected.

Noting the wetness in the front of the bus, I looked into getting a dehumidifier. It seems dehumidifiers start at $60 and go up. The $60 model is a Peltier system. Reading further, the Peltier system works by transferring heat from one side of the Peltier element to the other. The colder side attracts condensation that drips into a collection tray while warm air wafts out of the other side. Many Peltier dehumidifiers use fan cooling but given clever design, the fan can be eliminated and convection used to circulate air on the hot side. The other side should not need circulatory assistance.

The Peltier elements run best off 9 - 15 volts. In order to save bother, I've ordered 5a solar panel. Plugged straight in, that should run the dehumidifier at zero running cost. In terms of total cost...

The future dehumidifier will cost just $27.12. The solar panel can be retasked to keep batteries fresh too. I could even retask the Peltier into a diy fridge!

Sunday, November 8, 2015

Things that don't work.

Sitting in the bus today, I reflected on things that haven't worked out. Not because of the waste of time and money but because things that haven't worked out have been minimal.
1. My cheap 10-24 bolts that broke under very light pressure.
2. My plan for barrels as water tanks. They're just not available!
3. My multimeter. I bought a multimeter in around 2006 and tried it today. It's totally dead. I tried changing the battery and the internal fuse but it is dead, refusing to move the needle even after twiddling all the adjustments. Yet another gizmo designed not to last very long and another reason not to buy expensive gizmos.

4. Rustoleum paint. This doesn't stick to anything.
5. Silicone sealant. This works well but doesn't stick to PVC. By the time I realised that, I'd already laid my PVC floors. Had I known this before, I'd have used latex sealant instead as that does stick to PVC. That would have meant I would not have needed a shower base. As for the roof, the silicone sealant works but doesn't lie flat. That could be a problem if a tree branch rubbed the raised seal off.
6. Latex paint. This looks good and adheres well. It's just not that rugged.
7. Interior. Were I doing this again, I'd probably do it very differently. I did it the way I have because I was aiming at an all electric installation. I think I'd put less woodwork inside and I'd put a pot bellied stove to compensate in colder weather. I've designed my installation as more of a home for extended periods. I'd probably have been better keeping it more like a weekend camper.
8. It looks like some of my NiCad batteries haven't survived. I tried charging them today.

9. My microwave. Sure it didn't cost much but it should have lasted longer than a mere 2 years. I used it daily from November of 2011 to April of 2015. By mid 2013 the paint was bubbling and peeling. I wouldn't use that microwave now. It's just in too poor condition.

10. Electromagnets - I'd just make my own rather than fiddling about waiting for them to come from China.

As far as I've gone, I'm happy. I need to thin out my stuff - I have too many clothes so I need to get shot of stuff that no longer fits. I might need to thin down on books to - perhaps go for ebooks instead? I've also got a pile of broken mobile phones, old chargers and general electronic wiring garbage - the kind you build up on all the time. I probably need to cut down in crockery too. I have a set of cheap mainstays China that cost me a princely $10.

Since my microwave has clearly died, I'm wondering whether I should go for something like a small gas burner and put an extraction fan in. That would increase water usage as I'd have to do more washing of saucepans but would decrease the need for electricity. That would put me squarely into boondocking territory. Having viewed the prices though, a replacement microwave seems better as well as safer.

Going forward the plan is - given a dry weekend - to redo all the bolts in my underbody compartment. This weekend was a loss because of the rain. There are a lot of dry weekend tasks to be completed, if ever there is another dry weekend. There seems to be somewhat of a plot against me these days as every weekend is wet. I blame the French! Only the French can be underhanded enough to inflict me with wet weekends.

Sealing or rather resealing the roof seams and repainting will all have to be done in due course. I'd love to have done more over the summer but what with heat exhaustion, it was rather hard. It'd be nice to be able to work under cover but building even the cheapest cover over my bus would be prohibitively expensive.

This weekend, nothing much was achieved bar a redesign of the plumbing necessitated by availability of supplies. With luck, next weekend will be better.

I'll have to do something about onboard humidity. 78% is high. Maybe I should get a Peltier dehumidifier and try to run it from a solar panel? If that works, it bodes well for a Peltier fridge.

Monday, September 21, 2015

Caulked

Today before work, I completed caulking around the shower base. That's not going to be moving anywhere on its own now. The next thing will be to install the underfloor waste tanks or at the very least, a way of emptying the waste. The waste pipe definitely needs another nut to hold it down but that has to be applied from under the bus. I don't actually have that nut either. Since Lowe's does respond to their twitter account, I sent them a tweet to try to get if not another nut, at least the specifications so I can order one online.

Lowes did eventually respond with the ultimate answer that they weren't going to help. Meanwhile I diud track down the real manufacturer, Danco and explained that due to a constructional oddity I needed a second nut. As of now I'm awaiting their response. Worst case scenario, I have to buy a complete second outlet just to get the nut!

The handbasin since it looks like its going to be used, needs to be fastened down, somehow. The proper mountings never came with it so I will probably have to get creative. It's one of the reasons I don't like that handbasin.

Since I'm waiting on plumbing parts, I'll probably work on rebuilding the battery/cable compartment. Unlike the hillbillies, I'll build it with real angle iron of which I have a large supply. Alternatively I could use aluminium which would be lighter though I'd have to buy the aluminum. Either way, I need to buy nuts and bolts. Ideally I'd rivet it but don't have a supply of strong enough rivets nor an appropriate rivet gun.

My Nema 5-30 inlet arrived today. My next task is to fit it where it can be used. To do that, I need to rebuild the cable compartment. I really wish the hillbillies hadn't made such a massive compartment. It really wasn't necessary. Really and truly, I don't need that compartment. I'd rivet the blessed thing shut given half a chance! Sadly though, I need some kind of access hatch to access my main breaker. I do wonder about cutting the door in half and putting a half-sized compartment instead. One that contains just the breaker box. The cable I can store elsewhere. As far as a house battery is concerned, I can put that in anytime and it really doesn't need a special compartment. If the compartment housed solely the breaker and Nema 5-30 socket then it need not be built strongly. In fact it could just be there to protect the contents from water!

Installing batteries is another issue entirely. Speaking of which, I noted the fridge I removed from the bus was made by Avanti. Looking at Walmart's website a search for Avanti threw up a so-called superconductor fridge for $120ish that runs off 120v AC or 12v DC. Current consumption was high at 83 watts but that's because it probably runs off a heater element. That looks interesting and something that could be fun off a pair of batteries.

I'm still waiting for my drawer bolts to arrive. They should be here anytime now. That'll complete the galley area. The bathroom plumbing and every underbody facility are my main battlegrounds now.

Saturday, September 19, 2015

It's 14 inches!

Thinking more about water tanks, it makes sense to use purpose built fresh water tanks as opposed to repurposed tanks. The bigger they are, the more costly they are - whoever said building an RV is cheap?

I measured before but had forgotten why I wanted smaller tanks. Others use the big 55 gallon tanks but after having measured the depth of the skirt as being 14 inches between the bottom of the body ribs and the bottom of the skirt, it became obvious that if I want things not to be vulgarly on display them they cannot be deeper than 14 inches. There's just no reason why anybody should look at my bus and see it not as a bus.

There are 15 gallon drums available at $40 each new. If they're more than $10 secondhand, they're not worth having. Looking on eBay at RV water tanks, they're not that expensive. A 40 gallon grey tank is $130 + $43 shipping. I'd need 3 blue drums of 15 gallons each to match that. That sounds very possible and the lower the price, the better they are.

Out of curiosity I paused at an RV store and priced white water tanks. Some of the prices were a little eye watering.

Online, via eBay, the prices are a lot lower but shipping is the killer, adding a lot to the cost. Thus, I had a look at a scrapyard at secondhand beer barrels. They're stainless steel but the good ones go like greased lightning. Those that they had, had bullet holes in them (it IS America and Americans put bullet holes in everything given half a chance). While the holes could easily be plugged, the problem is the lead fragments inside the barrel plus contaminants that had crept in through the holes.

The next thing I looked at was coolers, bearing in mind the idea that coolers could hold warm water too. I took measurements and thought while I was doing so of using plastic storage boxes for water. The lids could be sealed with inlet and outlet put through the lid. Clearly they'd need support from the bottom, sides and ends to stop them collapsing but that's a possibility.

RV water tanks are neat but as they're rectangular and have no visible method of attachment could be interesting to mount. In an emergency, a plastic tote sitting inside the vehicle with rope and wooden slats tied to it could be used.

Following that, I had a look for plastic 15 gallon barrels for waste water. I found a sign with some samples but could not locate the place selling them. Whichever way I went looked the wrong way so I gave up on it.

Fortunately the weekend is not a dead loss. I did get another fire extinguisher and some velcro to hold up some shower curtains over the bathroom windows. Predictably I forgot to get the shower curtain. I'll have to have another go at getting the barrels. They're only for waste water so it's not important what was in them as long as it wasn't something like pure sodium!

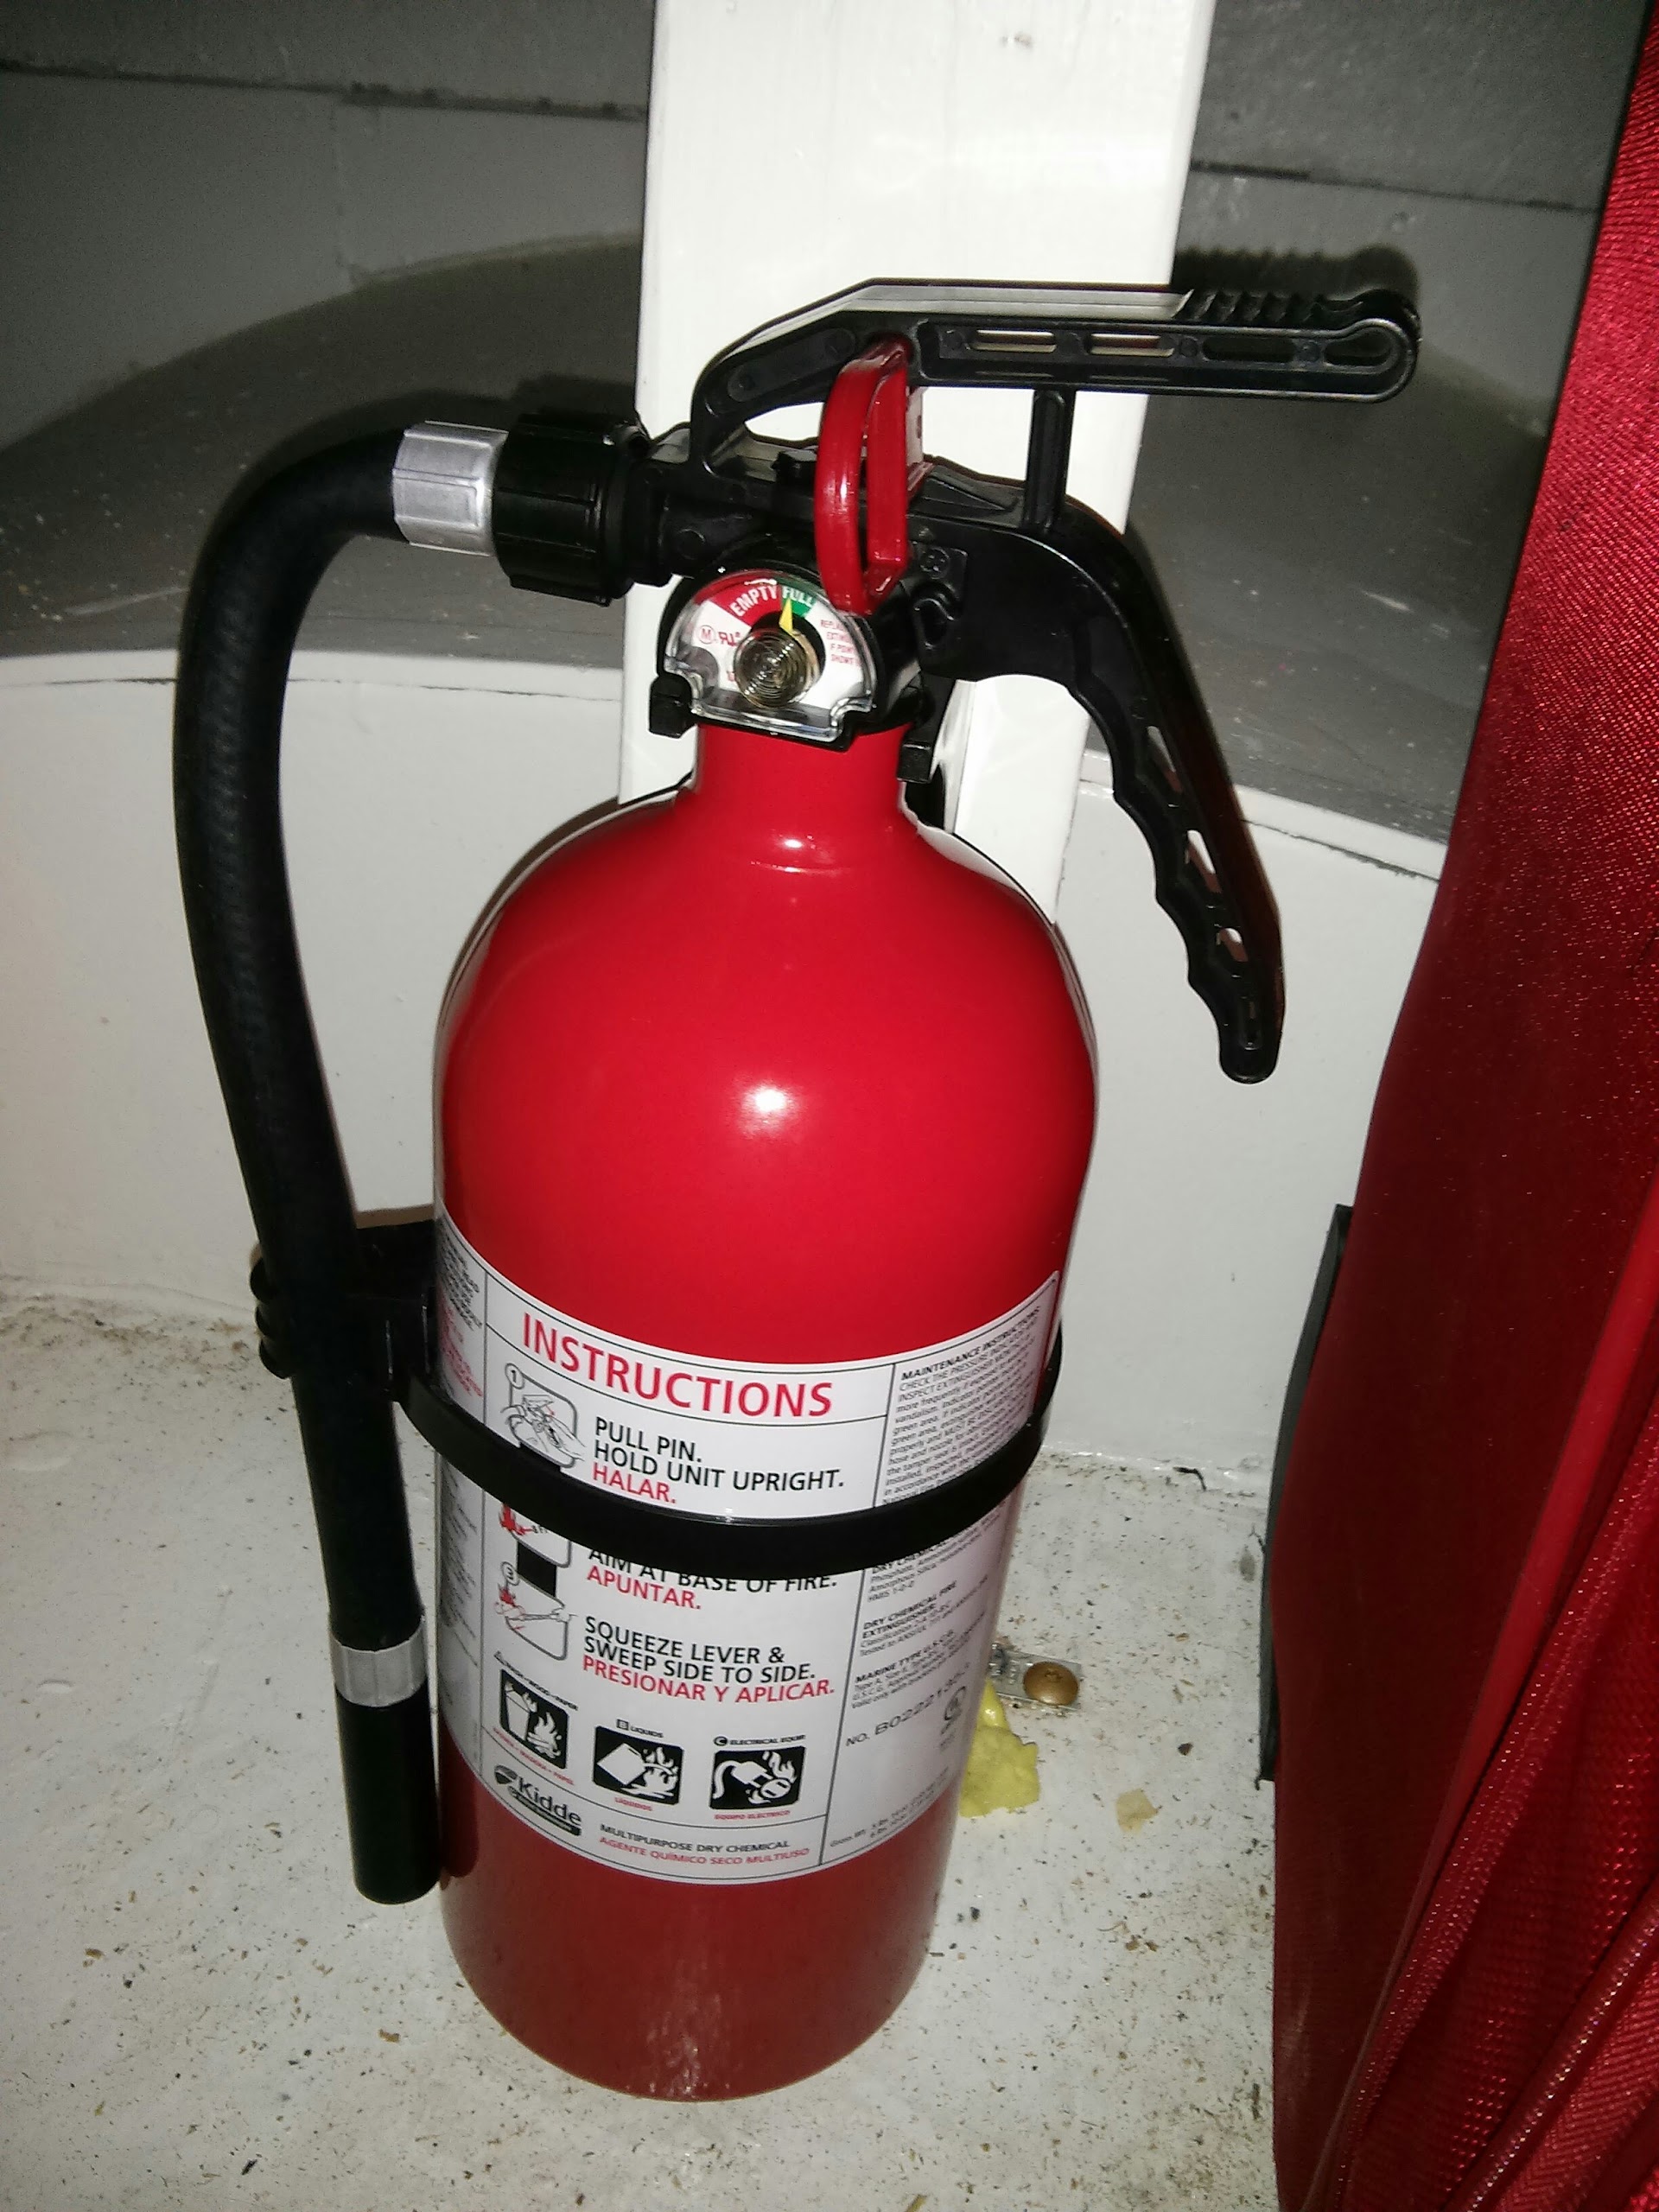
The first thing done inside the bus today was to install a new fire extinguisher. This means I have three, two installed by myself. This one being a little larger went into the bedroom.

The next thing was to install the cutlery tray in the cutlery drawer. The tray was wider than the drawer so the edges had to be cut off the tray. In the end, it fitted nicely.

In order to install the shower base, it appears I need a 1.5" hole saw for the outflow. As I don't have one, that means a trip to Lowe's. It also means having to go underneath the bus to locate a good spot to put a 1.5" hole.

A suggestion was made that if the water tank was generated from 3" PVC piping, that could be an economic solution. On the whole, it does look interesting. Indeed tubing would be easy to bundle and hold together with steel straps and easy to sling under the bus. To carry 50 gallons at 0.36 gallons per foot, it'd take 138 feet of piping but in 5 foot lengths, that'd be 27 lengths. Laid with reducing numbers of pipes 7 - 6 - 5 - 4 - 3 - 2 - 1 would get the job done. The cost though works out at $12 per 10 foot section or 14 x $12 which works out at $170 which is pretty expensive!

Meanwhile, I realised that if I'm at an RV park, I can just plumb straight in for white and grey water with no need for tanks. Despite all that, I plugged on with the shower base mount. One end is now completed. The other I'll complete tomorrow.

As I did that, my eye alighted on the cooler I bought a few weeks ago. It's only 3 gallon but could hold enough hot water for a good all over wash.

I looked at the old fridge that was in the original motorhome conversion and would have plugged it in in order to test it. I didn't though as it was in a tricky place to access.

Having got this far, I've been thinking about some way of keeping my plates, dishes etc from rattling against each other in the drawers. I'm low on wooden dowels so I'll probably have to get some. The idea is to build a dish rack into the drawers. Perhaps one might be available to buy which would simplify things a lot!

Thursday, August 27, 2015

Behold - the shower base!

Certainly it is a 24x46 concrete mixing tub from the farm supply store but it's new purpose is as my $18 shower base.

It's small enough that I could wedge it against the wall and have a ton of space. That might lead to mold however so that's not what's going to happen. It is going to go roughly where shown, held in place by a mount made from PVC planking.

After installing the bathroom floor, I had enough PVC plank left over to make two of the four edges from the plank. Sadly, I'll have to pony up for more but it'll be worth it! The corners will need special care but this is what the corner looks like without special attention. Eventually the corners will be squared to perfection.


Meanwhile, in the hunt for a 12v fridge, it transpired that the 12v heater/cooler fridges are built out of standard coolers with a single Peltier element. The Peltier element is very interesting as it transfers heat from one side to the other when power is out across it. The maximum cooling is 20C or 35F below ambient. That, however is a great playground for experimentation with water cooling systems etc.

Coolers are pretty cheap - I picked one up for $15 new a week or two back. Peltier elements are about $5 on eBay. CPU heatsinks and CPU fans are also pretty cheap. With a little care, a 12v fridge can be built for under $30.

Peltier coolers don't keep things very cold but they should be fine for prolonging the lives of fruit and bread. There was an article I read about one fellow who built an air conditioner using a Peltier element. Apparently it worked well enough. Again, given a water jacket cooler, lower temperatures might be achievable.

Given the horrible efficiency of solar panels I'm giving thought to building a vertical wind turbine. I'm nowhere near ready for it yet but I know exactly how to build it.

Saturday, July 4, 2015

Pretty much a nothing day

Today I trimmed the fridge door to a closer approximation of the size needed. It needs further trimming however. As it had sat out in rain overnight, the already cut edges were rusty and had to be cleaned. Cleaning them took next to no time at all. After that I slapped a coat of white Rustoleum on one side. As that had not yet dried by nightfall, I slid the cut and painted door under the bus, rested on a plastic bucket.
As I slid the bucket, I noted tiny ants wandering across the paint. Ants are a major pest in the yard. I've seen them in the bus though not an infestation yet. Someday soon I shall have to fumigate the bus to eliminate any critters. This is one reason why almost all of my wood is pre-treated.

Now the reason I didn't do much was I went shopping. I'd run out of paint - well, white semigloss topcoat anyway. Thus I bought more primer, more topcoat and a nice purple topcoat. The plan for tomorrow is to touch up where I missed with the roller in the angles with primer, to prime the cabinet tops on the unpainted sides and maybe roller the ceiling again. There are also several planks that need white paint that will be used for drawer runners.

If the white is dried in time, I might put a coat of purple. I'm not worried about drips as I have plenty white I can use to cover up. To be honest, I didn't get a problem with drips when I did the bedroom!

One thing I cannot find and I've hunted high and low is the latch plate for the doorframe for my cockpit door catch. I know I had one but I'm blowed if I can find it! I guess I'll have to sit down and make one.

The bus is feeling more complete now I'm going to paint the dinette\kitchenette. I know there's stuff still go do in the cockpit, bathroom and bedroom but I'm seeing progress.

In Lowes today, I chanced on 10x24 screw eyes. At 2 inches they're a bit overlong but should hold a chain quite satisfactorily to the ceiling. The chain I bought has a maximum weight rating of 35lbs though supported every foot of so, this should not be a problem. Hey presto, I have a closet rail! The chain will hang along the ceiling.

Now, as luck would have it, I am out of 10x24 rivnuts. I'll have to order some. I would have used M5 screw hooks but for some weird reason, they're horribly expensive!

It's all getting quite exciting now!

In other news, I doubt my bus will be ready much before August and since my job starts back about August 15th, I might have to forgo my planned trip to Canada to see Eric! I haven't seen him since we attended a wedding some years ago.

Wednesday, July 1, 2015

July is here. Holy Hell!

I can't believe it's July already! My first date for completion of the bus was January 1st but that's been slipping ever since. I swore it'd be done by July 1st but it now looks like being August sometime.

If you've been following my progress via Facebook then you'll notice my Facebook profile has vanished. I had nothing to do with that disappearing act. I had a note that popped up last week asking if I am human. I confirmed that I was. Yesterday I was denied access to my Facebook account unless I send Facebook a copy of my drivers license, social security card etc. Basically, all the stuff an identity thief or a marketer would love to have. Needless to say, I declined their request and it seems Facebook has retaliated by closing my account.

Do I open another account under a new name, say Sponge Blob or Captain Underpanties? Do I just say f* it and f* Facebook and carry on without Facebook? I asked friends if they followed my bus progress via Facebook - which was all I ever published on Facebook and most did not. I had a few Facebook friends that were so much into auto posting of jokes, recipes etc that I just had to stop following their posts. I think Facebook is more of a nice idea than something of any practical value.

Between blog postings, you can also follow and sometimes interact with me via Twitter.

Today I spent the first part of the day cleaning the kitchen/dinette area ready for painting. I also put some 1\2 inch dowel into the 1\2 inch hole I drilled in the door to the cockpit. That hole was intended for a lock but the lock was too thick. The easiest way to enlarge the hole was either to order a larger twist drill or put dowel in and redrill with a cheaper flat drill. Needless to say, this is the option I chose and as soon as the glue has dried I'll be doing that!

One of the pieces of 2x4 that I'd put in the front closet has a nasty twisting warp on one end. It will have to become cross members. Fortunately I did buy an extra piece of 2x4 yesterday. It needs to dry so its lying flat in the bedroom while I complete the dinette/kitchenette.

As you can see, I've started painting the dinette. I used a roller so I covered most of it fairly quickly. Even so, I developed a raging headache from the heat. I had to complete the first coat in 3 separate trips to the bus, coming into the house to cool down every 30 minutes.
There are corners and places that could not be reached with the roller. The drawer slide mount proved to be the problem I thought it would be hence my decision to paint the kitchenette before I install drawers.

The ceiling got a coat of paint from one side of the bus to the other. In fact, I had to stop when I ran out of Glidden Primer & Sealer. I used 3/4 of a gallon! The next stage will be to put white topcoat on the dinette. Then I will fill in the gaps where the primer didn't work, using a brush. Fortunately, I have another gallon of white primer as well so in theory I should be able to complete painting the kitchenette and dinette.

Sadly, I could not paint the kitchenette today as the counter is in use. When the dinette has topcoat, I'll transfer things from the kitchenette to stand on newspaper on top of the dinette. There are several areas in the dinette that would benefit from some latex caulk. I'll have to get on with that!

The summer in South Carolina is pure Hell for working outside. It's meant for lying on the sofa while eating bon bons! I'm sure that's what God intended anyway! Either that or this really is Hell and we've been really wicked in a past existence.

Painting the dinette is really a sign of progress! In April, the dinette didn't exist. After completing the kitchenette which could take a while what with all the drawers I'll need to build, I'll do the bathroom. The front closet will take next to no time.

Finally today I dragged the other fridge door toward the bus where with the gentle persuasion of my angle grinder and a crowbar, it gave up enough steel to complete filling in the other half of a missing window.

I had to give up for the day after this because the heat had me thoroughly exhausted. I just about made it into the house!

Friday, June 26, 2015

Who took the fridge door?

Today was another of those blisteringly hot South Carolina days; the kind that saps your strength and has you racing for air conditioning. I had ideas of doing some painting or perhaps some work in the bathroom. As usual, that's not quite what happened.

The day started with a walk around the yard. My eye alighted on a fridge door which had me racing back to the bus for my tape measure. Quickly I measured the windows that I wanted to fill. It transpired that the fridge door would provide the perfect amount of sheet steel and with a very useful angle.

The fridge door was dragged by hand, 200 yards in the intense heat. That was quite enough and a break in the aur conditioning was called for.

Returning, I set to with my angle grinder and began to cut two sections for the windows. Cutting was pretty quick and easy though the cutting disks wore out pretty fast. This must be the downside of small disks.

It took about half an hour to roughly cut two window covers. Shaping them precisely took longer including several fitting sessions. Eventually they were both cut to the right size. This took quite a while due to the necessity for breaks indoors under air conditioning.

Eventually the steel was cut and fitted. The insulation was scraped off with an old chisel. Then it was time to paint the steel. There were rust marks on the fronts but those will be dealt with at a later stage. Right now I painted the backs to keep them rust free. It'll need a second coat, I'll have to treat and paint the fronts as well as smoothing the edges.

For the moment, the metal is stored under the bus while the paint dries. Apparently it's going to rain tonight!