Showing posts with label drawers. Show all posts

Friday, October 2, 2015

The naysayers

A few days ago, I noticed some leaks inside the bus. I'm not quite sure where they're coming from because the likely seams have already been hit with silicone seal. Today, assuming a dry spell, would be an opportune time to have a look on the roof to see what's going on.

Needless to say, my thought of tracking down the actual leak and spot sealing it with silicone caulk or aluminum tape got poo poohed. One day I will stop paying any heed at all to what others say on allegedly sensible online groups. I bet the people that run commercial bus companies fix their leaks cheaply and easily. I bet they don't do what the people on those groups insist is the only method which is to put a $200 bucket of Kool Seal. Kool Seal didn't exist when I was young and buses didn't have leaky rooves. Clearly the Kool Seal only idea is yet another example of internet groups following their leader like lemmings. In fact, I find the vast majority of other people are a bit lemming like but this is especially pronounced in online groups. It used to be especially entertaining to go to sit in an internet cafe with a book and a cup of tea to just watch the rows of lemmings glued to computers. Indeed, my dad used to run a library and his prime complaint was of people that would sit down to play with the computer and who would be there all day, hogging the computer without even going to the bathroom. Indeed they even exhibited aggression when asked to allow others to use the computers. Basically, an addictive reaction.

As far as Kool Seal goes, $200 is a ludicrous price to pay to fix a leak that could be fixed with a small patch of tape or silicone seal. Certainly, if there were multiple leaks then an all over solution might be good. For patches, its very much overkill. I'll just never truly understand peoples thinking.

The plan otherwise was to put bolts onto all the newly installed drawers and to paint the dinette floor though with oil based paint rather than latex. As today is a day when I could be called in for work, I had an ear open for my phone while working.

The roof leak has flooded my countertop at some point. I'm glad to see the wood has not been adversely affected despite having swollen slightly. One of my receipts has been washed clean of ink, however. As soon as there's a dry day, that leak will have to be located. Had I had vinyl stuck down then the water would have caused damage. I'm glad I stuck with the cheaper option!

Meanwhile, here's a photo of my first drawer lock.

Putting it on required a piece of hardboard to space the bolt assembly off the structure. Putting the receiver on was tricky. That involved all kinds of fiddling but it worked in the end. That was the first drawer. There are seven more! I'll be so glad when this bus project is completed.

I'm very clearly still not over my recent illness. I did one bolt and had to rest due to feeling wobbly. I returned and did another two and felt more wobbly. Clearly I still have some recovery to do. Having said that, 3/8 of the bolts are now installed.

Yesterday I plugged the bus into the power supply. Today I had not just my battery hurricane lantern but a real, honest to goodness electric light in there. That made working so much easier!

Reading further about roof seals, apparently Kool Seal only lasts 5 years or so. That's $75 for what I'd call a bodged roof repair. Bus Kote is $200 and requires a protective coating which likely is another hundred or so.

The hillbillies that had the bus before me had attached hooks to the bus which probably attached a tarpaulin over the roof. Clearly their caulking didn't quite solve the problem. Thus, on the first dry day I'll put aluminum tape up and paint over it all! It might even be worth painting the seams and rivets white then putting tape then painting grey. That way, damaged areas of tape will be easily visible.

The bolts are looking quite good. I managed a further two before feeling wobbly and having to take a further break. I suspect it's going to be like this for a few days yet. Of course the bolts all work well. When they're completed, I can finish cleaning and tidying the dinette. After that I should put up curtains, paint the floor and possibly screw down the shower base as well as giving thought to securing the microwave and erecting my dry erase board.

Well, that's all 8 bolts installed. My drawers will not now open in transit. Of that, I am certain. I definitely overdid it today with activity, even just kneeling with a power drill putting in 6 screws at a time!

As far as work goes, it didn't matter whether there was reception or not - the blasted thing with 75% battery had turned itself off in my pocket! I hate Android with a passion! In fact I'm quite with those guys Eric spoke about that live in zero electricity houses! Needless to say, there was a voicemail from work but oh well. Too late to call them.

posted from Bloggeroid

Saturday, September 19, 2015

It's 14 inches!

Thinking more about water tanks, it makes sense to use purpose built fresh water tanks as opposed to repurposed tanks. The bigger they are, the more costly they are - whoever said building an RV is cheap?

I measured before but had forgotten why I wanted smaller tanks. Others use the big 55 gallon tanks but after having measured the depth of the skirt as being 14 inches between the bottom of the body ribs and the bottom of the skirt, it became obvious that if I want things not to be vulgarly on display them they cannot be deeper than 14 inches. There's just no reason why anybody should look at my bus and see it not as a bus.

There are 15 gallon drums available at $40 each new. If they're more than $10 secondhand, they're not worth having. Looking on eBay at RV water tanks, they're not that expensive. A 40 gallon grey tank is $130 + $43 shipping. I'd need 3 blue drums of 15 gallons each to match that. That sounds very possible and the lower the price, the better they are.

Out of curiosity I paused at an RV store and priced white water tanks. Some of the prices were a little eye watering.

Online, via eBay, the prices are a lot lower but shipping is the killer, adding a lot to the cost. Thus, I had a look at a scrapyard at secondhand beer barrels. They're stainless steel but the good ones go like greased lightning. Those that they had, had bullet holes in them (it IS America and Americans put bullet holes in everything given half a chance). While the holes could easily be plugged, the problem is the lead fragments inside the barrel plus contaminants that had crept in through the holes.

The next thing I looked at was coolers, bearing in mind the idea that coolers could hold warm water too. I took measurements and thought while I was doing so of using plastic storage boxes for water. The lids could be sealed with inlet and outlet put through the lid. Clearly they'd need support from the bottom, sides and ends to stop them collapsing but that's a possibility.

RV water tanks are neat but as they're rectangular and have no visible method of attachment could be interesting to mount. In an emergency, a plastic tote sitting inside the vehicle with rope and wooden slats tied to it could be used.

Following that, I had a look for plastic 15 gallon barrels for waste water. I found a sign with some samples but could not locate the place selling them. Whichever way I went looked the wrong way so I gave up on it.

Fortunately the weekend is not a dead loss. I did get another fire extinguisher and some velcro to hold up some shower curtains over the bathroom windows. Predictably I forgot to get the shower curtain. I'll have to have another go at getting the barrels. They're only for waste water so it's not important what was in them as long as it wasn't something like pure sodium!

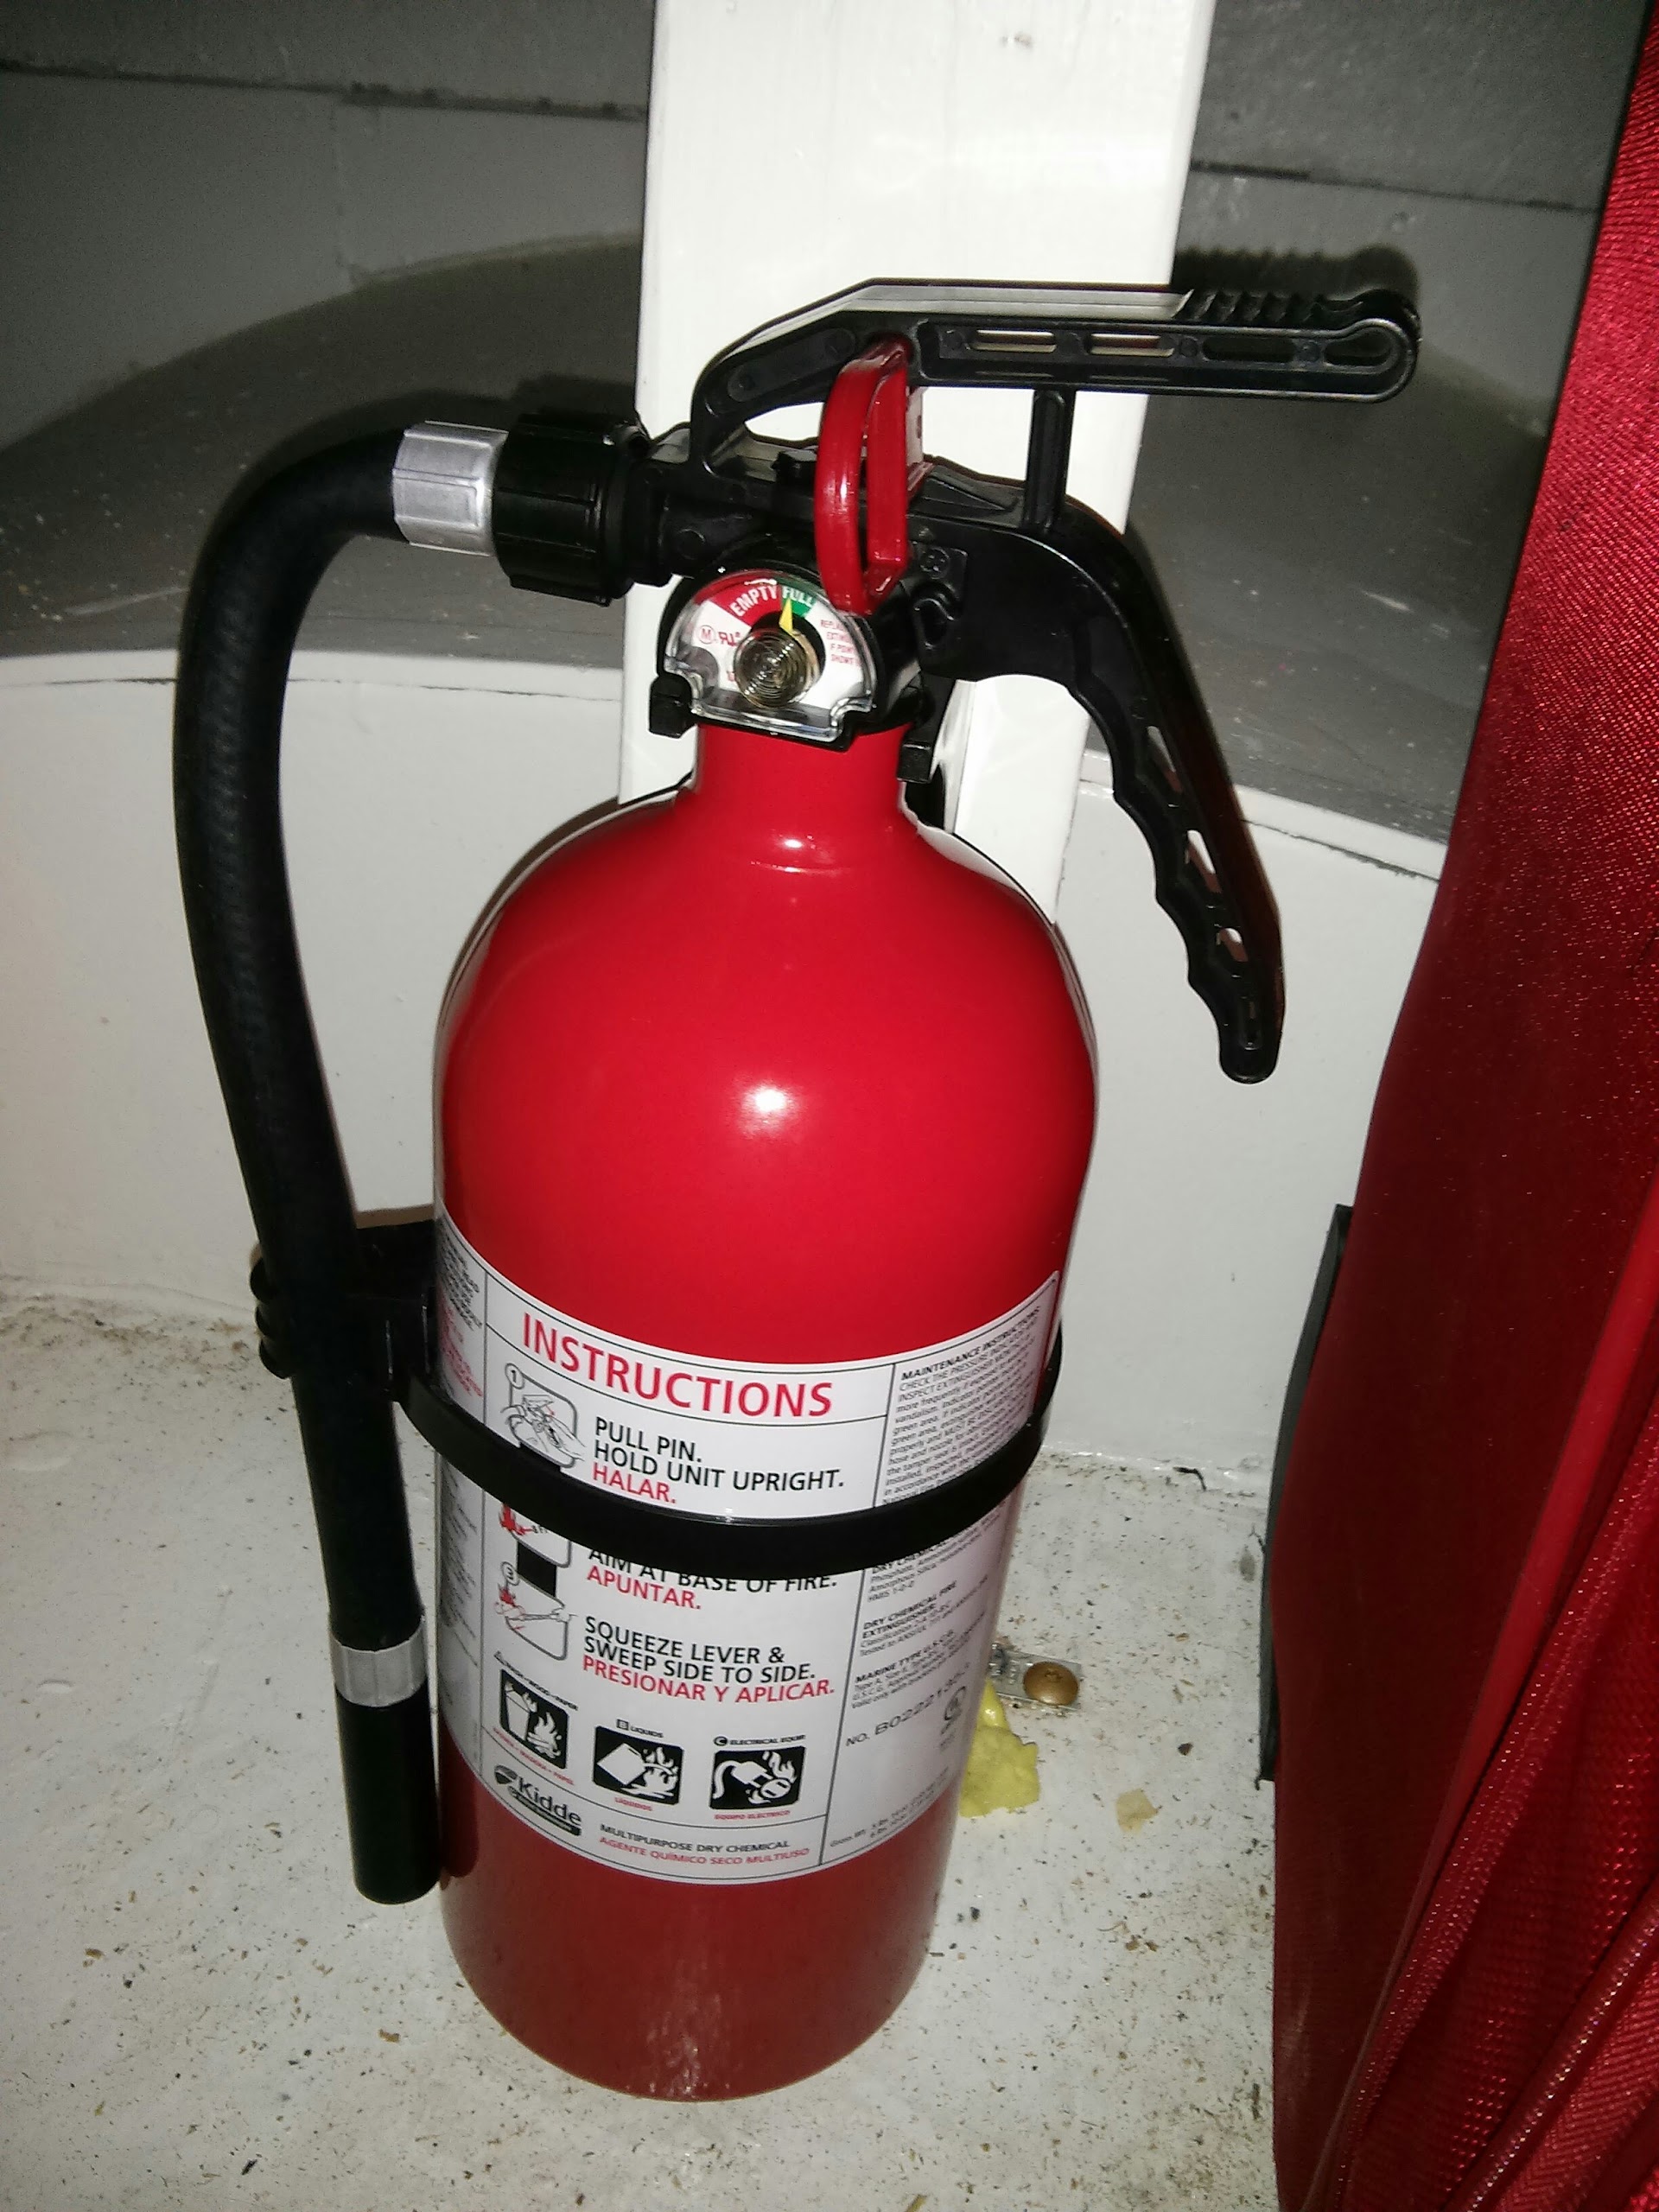
The first thing done inside the bus today was to install a new fire extinguisher. This means I have three, two installed by myself. This one being a little larger went into the bedroom.

The next thing was to install the cutlery tray in the cutlery drawer. The tray was wider than the drawer so the edges had to be cut off the tray. In the end, it fitted nicely.

In order to install the shower base, it appears I need a 1.5" hole saw for the outflow. As I don't have one, that means a trip to Lowe's. It also means having to go underneath the bus to locate a good spot to put a 1.5" hole.

A suggestion was made that if the water tank was generated from 3" PVC piping, that could be an economic solution. On the whole, it does look interesting. Indeed tubing would be easy to bundle and hold together with steel straps and easy to sling under the bus. To carry 50 gallons at 0.36 gallons per foot, it'd take 138 feet of piping but in 5 foot lengths, that'd be 27 lengths. Laid with reducing numbers of pipes 7 - 6 - 5 - 4 - 3 - 2 - 1 would get the job done. The cost though works out at $12 per 10 foot section or 14 x $12 which works out at $170 which is pretty expensive!

Meanwhile, I realised that if I'm at an RV park, I can just plumb straight in for white and grey water with no need for tanks. Despite all that, I plugged on with the shower base mount. One end is now completed. The other I'll complete tomorrow.

As I did that, my eye alighted on the cooler I bought a few weeks ago. It's only 3 gallon but could hold enough hot water for a good all over wash.

I looked at the old fridge that was in the original motorhome conversion and would have plugged it in in order to test it. I didn't though as it was in a tricky place to access.

Having got this far, I've been thinking about some way of keeping my plates, dishes etc from rattling against each other in the drawers. I'm low on wooden dowels so I'll probably have to get some. The idea is to build a dish rack into the drawers. Perhaps one might be available to buy which would simplify things a lot!

Wednesday, August 12, 2015

Purple rain

I never meant to cause you any sorrow
I never meant to cause you any pain
I only wanted to one time to see you laughing
I only wanted to see you
Laughing in the purple rain

And so sang the artist formally known as Prince which gets us rather neatly to today's first achievement. Purple paint! Today I put purple paint on the ceiling of the galley or rather, a second coat of purple paint. The white undercoat was showing through in places. A second coat should see that gone from view. The walls also needed some recoating and the new drawers had a coat on the fronts. This latex paint isn't very durable and I've already had to touch up some areas.

Needless to say, there have been a few drops of purple rain from the ceiling and I did run my head into a freshly painted patch. I'll have purple hair for the next few hours! It always washes out pretty easily.

Earlier today, I had a trip to Lowe's. Yesterday on my way back from my voluntary work, I also stopped off at Lowe's. It's nice to wander around the electrical aisle to see what's there. I'm trying to decide how to approach the electrical system. Thus far, these are the ideas....
1. 3 x 110v sockets in the kitchen for a 110v fridge, microwave and one other appliance.
2. 12v or even 5v for two USB sockets in the bedroom and on the othger side of the galley.
3. 12v led lighting throughout or no lighting bar movable led lanterns.
4. Electric water heater. This could be a small (1 gallon) gravity tank above the handbasin or shower.
5. Underbody hot tank. This needn't be more than 5 or 10 gallons and could be heated directly by solar panels.

It's all very much of a mishmash because I've not really decided on my direction. I could go solely solar with no plugin whatsoever. Basically, a totally boondocking solution. I could go with a totally plug in solution that would eliminate batteries and inverters and just use a small generator for boondocking. Wind hasn't featured in my deliberations though perhaps it should.

Reading about people's wind power solutions with RVs, they seem to be universally disappointing. I'm not sure why though - whether they're expecting more from wind than it can deliver it whether there are problems of scale and location. I'm not even sure what kind of power consumption they have.

Solar seems popular though it is expensive. A single 100w panel will cost around $100 and will produce 6 - 10 hours of power at around 50w average. Thus, a 100w panel will produce about 50watt hours of power per day. Putting that into a 100ah 12v battery would put about 4.15ah into the 12v battery. That's not really practical!

I'm thinking that I should have a solution initially that has no battery and which uses solely external electricity. I'm beginning to see why people use gas for cooking and water heating. I must admit that a gas solution does look attractive!

So, after painting the ceiling and the drawer fronts, my next task was to work more on painting the toilet. This will take several painting sessions. There are some areas I can't really reach with a brush but I'll do my best as always.

It's getting rapidly to the point where I will have to tidy the galley, to free it of construction debris. Indeed, its approaching usable! Question is, where to put everything? I guess I need to plug on, put up the closet chain and put the batwing doors together. That should reduce the quantity of stuff yet more.

After the toilet, while waiting for the paint to dry, I had a good knobbing session in the galley. Put that dirty mind away! This is what I meant..

I put the knobs on almost all of my drawers. The last knob on the other side of the bus proved problematic. It's bolt was too short so I need another bolt. Measuring it, it seems to be 3.9 to 4mm diameter which probably means its a 5/32 or it could be an M4 since the knob was made in China!

There are 3 varieties of knob. Two are close enough to be the same but packaged under different labels. There are 2 different sizes. Basically, its what I got from Ace Hardware's bargain bin the other day. Only a real plonker would buy stuff at full price!

Returning to my labors, I touched up a lot of the white paint and turned the kitchenette counted the right way up. The smooth side is now down. Now the idea had been to put self adhesive vinyl tiles on top. The new idea is to get thick, vinyl tablecloths as long as they can reliably be as long as my countertops then to attach Velcro strips and simply Velcro them into place. That seems to me to be much easier and cheaper as well as more instantly replaceable than vinyl tiles.

Putting yet more paint on the toilet, I noted that two more very brief painting sessions will see the whole toilet painted. The bathroom vanity top needs but one painting session before it gets screwed into place or rather, after it ius screwed down.

In essence, there are but three tasks remaining. To put up the closet chain, to build the saloon doors and to screw all the countertops down. Then it's all electrics, water and attending to the front door locking/unlocking mechanism.

Trying my cutlery tray into place in what will be the cutlery drawer showed it to be a little wide. Darn! Still, it was only ever a cheap thing. I can do better!

Sunday, August 9, 2015

Space - the final frontier

These are the voyages of the the good bus NSA 2011. Its five-year mission: to explore strange new places, to seek out new life and new civilizations, to boldly go where no Brit has gone before.

Well, I don't know about a 5 year mission but I do know I'm running out of space rapidly. After painting the green paint on the bathroom roof or rather, giving the roof a second coat, it was too soon to consider giving the lower wall a final coat of white as the green was not hard enough to take masking tape.

Clambering around the galley, I constantly tripped over pieces of molding. Thus, it was time to use them and use them I did. The first piece, I glued and nailed but it wasn't that great. The second, I just put the glue and nails away, drilled, countersunk and screwed it in place. Much more satisfactory and a load faster.

I noticed how warped some of my doors are and how off vertical some of my verticals are. All highly unsatisfying but they're good enough that nobody will notice and it'll all work just the same. The green paint could do with another coat in places but its not really enough to merit the time. I have until the 17th to have the bus ready. After that, woirk recommences and further construction will be relegated to weekends.

My biggest challenge right now is rehousing all my construction materials as its becoming somewhat challenging to find space to do anything. I've transferred my paint cans and long wood to the front closet but tools and supplies take up a lot of space.

In order to work in the bathroom, I'd moved the toilet to the bedroom and the shower base to the galley while the handbasin is in the cockpit. Moving two pieces of molding from the galley because I was falling over them to use them in the bedroom meant clambering over the toilet. It would be so nice to be able to do all this in a great big air conditioned garage where I could pile things ready for use!

I washed the somewhat mucky head protector from the emergency exit and replaced it after the paint had dried. There's now no Virgin Exit sign - they all left! http://schoolbushome.blogspot.com/2015/07/virgin-exit.html


I had a feeling I should be doing more painting and painted a cupboard door purple before deciding that my effort would be better employed marking where to put the drawer handles I bought last week at Ace. Thus, the drawers were marked and holes drilled. Now I can install knobs when I've finished the paintwork.

Tomorrow its probably going to be a good idea to paint the lower bathroom walls, washstand and some, if not all of the toilet. That way I can finish the bathroom then move all of the bathroom bits into place. That should give more room in the galley to work on the galley.

The batwing door hinge looks pretty straightforward. Looking at materials, I should have just about enough to complete the doors. They won't be a fancy shape - they'll be square but they'll be there!

I can see all the flaws in my workmanship and that makes me want to do better but honestly, I've done it just about as well as is reasonably practical given I need it completed by August 17th. Apparently I should be starting back to work about then.

Onwards and upwards! Completion is getting incredibly close. I look back to where I was just two weeks ago and progress has been little short of amazing!

Wednesday, August 5, 2015

More painting amid thunderstorms!

As I'm not doing anything electrical with circular saws, angle grinders, power sanders or power drills, the fact rain was falling didn't matter a tiddlers winkle. In fact,it was cooler with the rain falling if not comfortable inside the bus.

The first thing done today was to finish priming everything. The front closet had the areas untouched by the roller primed. Then the drawers had the final bits of primer then the toilet was mostly primed. Some areas are just very tricky to reach with a brush. That'll take some determined contortions!

After the priming was completed (bar the tricky bits of the toilet), the closet had a coat of topcoat. That'll need work with a brush tomorrow. After that the front partition might get a coat of blue paint. During that process it might be as well to paint the floor. Now that should be black to match the existing floor but by the time it's been walked on a few times, it'll turn black

Yesterday there was no blog entry. This was due to work commitments, an after work meeting and some shopping. Ace Hardware had a bargain bin that had brass drawer knobs. They look the same but there are in fact two varieties. One is fractionally larger. At less than half price it was impossible to resist the temptation. While there, a fire extinguisher caught my eye. As there's a plan to have six - two in each compartment, it seemed a good time to pick one up.

The one purchased yesterday claims to work with electrics and flammible liquids. That sounds like it should be good for engines, batteries and kitchens.

The bus came with one. It seems to be OK but with extinguishers its not possible to have too many. I'm not really sure which extinguishers are best so I'm fumbling around in the dark.

Monday, August 3, 2015

No pictures but a lot of work

Today got off to a late start but start I did. Going to the bus with the intention of doing something simple - putting green paint in the bathroom - I found as usual that I ended up doing something totally different.

Wanting to get the bedroom table done and out of the way, priming was the obvious thing to do. As the cockpit, closet, drawers and toilet needed priming also, I started in the cockpit. The closet was a bit rushed because it was hot leaning in there so there are gaps. I'll fix those anothger day.

The cockpit walls are well primed though perhaps I should also have primed the floor since it is bare plywood. After the cockpit I moved on and primed some of the toilet before printing the beam in the bedroom and the underside of the table.

Needless to say, as it was over 100F in the bus, I did take several breaks. At one point I had to add water to the paint to thin it as it was getting thick in the heat. I continued on and primed most faces of the drawers and the topside of the table. The new cupboard door saw primer too.

By the time the last drawer had received paint, the light was beginning to fade. I popped the brush in a can of water to keep it soft and left, admiring the fact the cockpit now looks a load better.

Tomorrow is a shopping day. I need solely bolts to lock the drawers shut. I might also get more brushes and rollers. I know I have several brushes but it was all I could do today to find just one!

Of one thing I am certain - the way I'm rip-roaring along, the bus will be painted by the end of the week. Meanwhile, some weeks ago, I glued two pieces of PVC plank together. Looking at it today, that joint is now rock solid. I know exactly what I'm going to build my shower base mount out of! Yup - PVC planks glued together and glued to my PVC floor!

Friday, July 31, 2015

Close to the end of internal construction

Well, probably. I have a feeling I might want shelves in my storage closet, overhead bins and more storage at the front but its looking good!

Today I mounted all of the cupboard doors in the dinette/kitchenette. A couple of doors gave me a little trouble. The one that I thought would be the hardest turned out to be the quickest and easiest.

During my drawer installing progress I had to straighten the first drawer I ever installed. It's now perfectly straight. The next things for the dinette/kitchenette will be to put latches on all the cupboard doors and on all the drawers plus handles on doors and drawers. Then it'll be fastening down the countertops, finishing the painting and putting vinyl floor tiles on the countertops.

Using the lift on lift off hinges I got via eBay from Britain solved a lot of problems. They were easy to install too - just drill a hole and screw them in. I used a section of angle bracket to help with this.

In order to paint and clean the dinette/kitchenette properly, I need to clear it of supplies. The floor is currently quite cluttered with paint pots and wood. I could shift the stuff to the bathroom but I wouldn't have space to work in the bathroom.

The solution - to build the planned table for the bedroom. I have a feeling I will be cutting wood to fit, assembling it, painting it then installing it. The leftover plywood from my drawers has given me enough for my table and there's enough left over for a mini shelf over the bathroom washbasin. Great for toothbrushes etc!

I have a feeling internal construction might be done very soon. My original projected date was January 1st, 2015. I'm about 7 months behind schedule!

Thursday, July 30, 2015

It was brutal today or how I did my drawers!

Looking at the whiz-bang thermometer gizmo in my bus, I noted that the 102 degrees farenherit combined with 60% humidity might have been the reason for my frequent breaks. I'd work and do very little then I'd be drenched in sweat. Each time I worked, it was like having a mini shower - in sweat!

Despite the heat and a mini thunderstorm, I managed to complete most of what I set out to achieve today. I put fronts on all of my drawers. What I didn't get around to was retarding one drawer about half an inch still there's always tomorrow!

The first drawer front went on and I managed to install it a shade too low and a little crooked.

After that I put the one above straight. Now the reason I got it crooked was that I couldn't find my pre-drilled holes due to my putting glue over them. With later drawers I was careful to avoid covering the holes with glue.

It's a little redneck but I found my way of spacing drawer fronts was easiest using a pair of carpenter's pencils. I'd put them on top of the drawer front below and then just rest the next drawer front on them and wiggle it to the right position before drilling my holes. A piece oif plywood offcut leaned against the drawer front as I worked helped a lot.

As can be seen from the photos, I used a lot of drywall screws. These were used rather than clamping everything together. That really sped things up. I'd drill the holes, take the drawer out and place it on a workbench then apply glue, put screws through the fascia and locate them in the holes on the drawer then screw it together. I'd start with just two locating screws then add more as needed to squeeze the wood together. And the glue I used was Elmers. It seems to have worked well!

Finally, I had all the drawer fronts in place. The bottom left drawer could do with some trimming of the fascia tomorrow. I knocked off after this because I felt I had done well today and didn't want to push my luck and mess something up.

In the dinette/kitchenette, my remaining tasks are hinges for 3 cupboard doors, handles on 3 cupboard doors and 8 drawers, catches on the drawers and doors, painting the drawers, ceiling and floor, privacy film on the windows, painting the door and construction of my saloon doors. There's even sufficient plywood left over for the bedroom table!

Wednesday, July 29, 2015

Advances all around

The first thing I did was to try to replace the film on the back window. Clearly I didn't take enough care because the film suddenly started folkding in on itself and sticking to itself. After trying vainly to untangle it in a very hot bus while it became ever more stuck and entangled, I gave in to the inevitable and threw that piece away. The next piece went on brilliantly. I suspect the problem was that rather than preparing it next to the window, I'd prepared it further away and the motion of moving it halfway down the bus had set it swinging into catastrophe. It was amplified by the fact that piece was rather large and hence more prone to problems. My fault and not the fault of the film nor the supplier.

The end result looks excellent as I'm sure you'll agree. I have a feeling though that the water could do with a little more soap. I'll have to attend to that when I do my next windows. The first set of side windows have bubbles. I'm not really sure whether it's worth doing but out of duty, I might. I like to keep my best foot forward.

After the window and a break, I took the cupboard door I made and trimmed off the excess hardboard then sanded the edges. I did think about hinges but today's task was drawers.

The new 16 inch drawer runner was installed fairly quickly then the base of the drawer. I did have an idea of retarding one of the drawers because it protrudes too far but I never got to that.

The two bottom drawers sides and backs were large and could not be built using 1x4 which was rather a good thing seeing as how my remaining piece of 2x4 is about 8 inches long! Thus they had to be cut from plywood. I'm slowly working my way through my plywood supply. The question now is whether I use the large piece of plywood as a bedroom table and use scraps for the drawer fronts or build drawer fronts and find something else for the bedroom table.

Building the drawer backs and sides was not easy as I don't have a jig. My solution was to pre cut all the pieces then to pre drill some holes then glue everything and while the tackiness of the glue held everything together, completed drilling the holes, inserting screws as I went. It all seemed to work quite well.

I'll be the first to say I'm not a carpenter and that my carpentry displays this but even the most cynical skeptic has to admit that I've taken on a massive project and that I'm achieving my goals.

Tomorrow will be all about mounting cabinet doors, making drawer fronts and attaching them. Indeed, this might evev take a few days!

Sunday, July 26, 2015

More drawers

It was terribly hot again today but that's every day in South Carolina. I went to the bus in 30 minute sessions again. This time I was defeated at the end of the day not by the heat but by darkness. Indeed the longest day was a month ago and the evenings are noticeably drawing in now.

I corrected the upright I tried the other day and put the hinges in place. I had thought that I'd make the door but wasn't in the mood to do battle with a large piece of hardboard so I went to work on the drawers instead.

I looked at the top right drawer that was stiff yesterday and found it was canted. Changing the position of the screw holding the rear of one slider mostly sorted the cant out and the stiffness. Job done! Actually, it is still slightly canted but only by 1/8 inch over the 12 inches width. I'm really not bothered by that. When I put the faceplates on the drawers, they'll all be square. The faceplates will also hide how warped Lowe's 1x4 is. Some of it has a curve across the 4 inch section!

Doing the individual drawers, I put sides and backs on 4 of the seven. The seventh I'll buy a runner for on Tuesday, along with more 1.25 inch drywall screws. 4 of the drawers took sides made of 1x4. Two will need bigger sides because they are deeper.

One drawer which will be my cutlery drawer was a little too shallow for 1x4 and needed 1x3 of which I possessed none. As I needed but 50 inches of the stuff, I cut down some of my strip of 1x4. I doubt I shall need any more 1x4 for the moment.

I didn't have time to complete the drawer before the light escaped on me. What I'd been doing was gluing and screwing the sides and backs firmly into place. I'd drill the holes in the bottom and one section of the side or back then glue it and screw it in place. Then I'd move to the next piece. Ordinarily I'd have glued and clamped but since I have so much to do and since I can borrow but two clamps, I used screws.

This is a drawer I made earlier with screws and glue. Basically, I have four drawers complete bar the fronts, 2 drawers that need bigger sides which I'll cut from plywood and one drawer that needs to be put together. I'll probably use some thin wood or maybe plastic to make the dividers for the cutlery drawer unless I can utilize my existing cutlery tray. I'm not sure whether I designed the drawers to accommodate it.

So, tomorrow should see the backs and sides on all the drawers I have sliders for. I might even make a start on the fronts! Or I might just work on the cupboard door. The beauty is, whatever task I choose, I'm getting ever closer to completion.

As of now, I need to make adjustments to the toilet, paint the bathroom and toilet, give the dinette a second coat of purple and touch up the white. I need to put up the closet chain, build and paint the bedroom table and paint the cockpit all and closet. I also need to build my saloon doors between the bathroom and the dinette. That's without mentioning the tub mount, doors on the vanity and possibly a shelf or medicine cabinet and tinting the remaining windows.

Then I'll be ready to do electrics and plumbing!

Saturday, July 25, 2015

Thrashed by the heat

The day started with my having little inclination for carpentry so I set to and installed film over two window panes. This went well as I seem to have mastered the art of doing it. I kept the offcuts thinking that I might try putting two pieces together on one of the shower windows.

The next thing was to rework two of the three drawers I did yesterday. They didn't slide easily. Now they do. I did intend to install 4 drawers on the other side but I was short of a 16 inch drawer slide. Still, 3 drawers were installed. They all need sides backs, fronts, handles and latches (it IS a motorhome). One doesn't slide easily yet but with a little work tomorrow, it should.

I did notice that some of my drawers done today aren't quite level. I'll have to see if they're off enough to merit working on them. I suspect they're passable though I do like to try to get things right whenever possible.

Not feeling like working more on the drawers having noticed an error, I looked at where I need to put the final cupboard door. I have a policy of doing something different if I make an error. Working on correcting errors when tired makes them worse.

It was 97 in the bus today and if been out for too long. Looking at where the cupboard door needs to go, I needed an extra vertical beam to mount the hinges. Well, I cut the beam and slipped it into place. Then I realised that to mount the hinges I should have drilled holes and inserted the hinges first. Struggling against the tight fit, I realised I was getting a headache and finding it hard to breathe. I'd been out too long and the heat was thrashing me again.

I headed inside to the cool oif air conditioning and gulped down large quantities of water. This South Carolina heat really slows down progress. If I'd been working on this in Britain, I'd have been done months ago. That's how bad the heat is!

Friday, July 24, 2015

Getting into her drawers again


After rescuing my damsel in distress to the tune of $2135, I returned to the bus. There really wasn't much left of the day so what was done seems paltry.

The usual problem of heat exhaustion keeps cropping up. I still
need to take more breaks than I would like. The humidity was pretty high which didn't help.

Despite all that, I plugged on, trimmed 4 pieces of 2x2 and fastened them so they're level, ready to attach drawer runners and install drawers. The plan was for four drawers. Then I hit a snag. One set of runners is incomplete. It's also a bit long. All the runners above the seat rail can be 18 inches but the one below has to be 16. Clearly I'll have to hit Lowe's for that. I'm also running low on 1.25 inch drywall screws. I have enough for now but will have to buy more, probably.

Having installed all four strips of wood for the drawer runners, the sky darkened and rain began to fall. That pretty much was the end of work for today.

The drawers I put in yesterday vary. Two are a little stiff and one opens freely. It's probably not worth redoing them but for the sake of ease of use, I might have a go at adjusting them. At least silicone glue can be removed. All I have to do is to peel them apart when the bus is hot. Silicone glue hates heat.

I'm certainly looking forward to completing the project. I've already decided that the first trip I'm going to make with the bus will be a one or two night stay at Sesquicentennial State Park about 40 miles away, just to run a good test on all the systems.

Thursday, July 23, 2015

Ooh, look at her drawers!

It was fairly straightforward carpentry and something I'd prepared for, weeks ago. To be honest though although I'd already built one drawer from 1x4 planks, the prospect of building drawers was a little off putting.

It all went well enough though. As I had correctly surmised, the metal washers worked perfectly as spacers. Way cheaper than plastic spacers and I didn't need anything quite as thick as the plastic spacers.

The plywood cut beautifully with the circular saw. Aside from a little trimming on the edges, the drawer bottoms all fitted. One drawer is a little tight but I'm not worried. It'll loosen in use.

I'm using metal runners (cheating) and just to make life easier, after getting it all to fit, I slipped some silicone glue onto the lip that holds the shelf bottom and silicone glued it together. When I work on those drawers next, I'll simply screw the runners to the drawer. The tops I'll like as not just glue together.

Tomorrow I have to rescue a damsel in distress so its unlikely that I'll get to do much on the bus. If I do then I'll probably start putting the other four drawers in.

This bus conversion is a most massive project and my insistence on partitions, doors and privacy has added a lot to the complexity of the task. Had I just slapped paint on, put up window film and hung blinds over windows things would have been faster and simpler. A lot less satisfactory though.

Wednesday, July 22, 2015

Shopping, shopping and more shopping

Yesterday being Tuesday, I went to the store on my way back from my Tuesday voluntary work. I got some plywood and a few other bits. The plywood was horribly expensive at $25 a sheet but should make lighter drawers than my first drawer.

I also bought some paint. For the bathroom, Line Passion which is about the most vivid green in existence. For the front, Tranquil Aqua. Sherwin Williams had an app for my phone that matches colors. While it matched the hue perfectly, the color was several shades too dark. As I have the paint now, I can't do anything but use it. I don't regard the exact match as being that important to be honest.

Today I went to start work and found I was out of 2.5 inch drywall screws. I tried other screws but the heads just stripped. 3 inch drywall screws were too long and my normal 1.5 inch drywall screws were not long enough. That meant that either drawers had to wait or I had to go to Lowe's.

Since I had two options, one of which was painting, I had no option other than go to Lowe's. My paint marked clothes have been drenched in sweat and I don't want to get paint on anything else. Clothes aren't free!

While I was at Lowe's, I looked at various things. I looked at electrics for the 110v system which will be primarily just the microwave and fridge. I considered using battery powered led lighting and think that'll probably work well. There were some interesting LED lights in Lowe's but they looked devilishly expensive. I decided to look for those online instead.

I got some better hinges for my toilet. They should fit better. Of course I got my screws and while I was there, looked for spacers. I know my drawer runners won't be perfectly parallel without them. It turned out plastic spacers were costly while ordinary steel washers came cheaply in bulk packs. No prizes for guessing which I bought.

So, when I got back, I set back to work building drawers. Needless to say, I cut my plywood a little on the large side and have to trim it down. The rails were pretty well mounted with the new screws and washers.

Needless to say, it was 106F in the bus so in short order, sweat was running into my eyes. That was not my only problem. A more pressing issue was that as I'd piled everything into the dinette when I worked on the bathroom, I'm having to clamber over things to work. Hardly a good working environment.

Tomorrow and for possibly the next few days I'll be working on drawers. After that I'll probably build the bedroom table and the partition rail. Then the closet chain followed by a painting marathon. Somewhere I'll also squeeze in building my saloon doors between the dinette and bathroom.

Internal construction is rapidly drawing to a close. I can't wait to complete the project! Ooh and in exciting news, my lift off hinges arrived - all the way from Wolverhampton in the UK.

I have two cupboard doors that need to be opened more fully than the surrounding woodwork will permit. One of my design flaws. (What designing did you actually do - editor). To be honest, I have a tendency to plan vaguely then build. It's worked pretty well so far!

Monday, June 22, 2015

Rain stops play

Another scorching hot day loomed. I put off going out to work in the bus as long as possible then braved the heat. The first trip out, I forgot the power drill but I found some of the wood I'd cut yesterday needed finer fitting so that's what I did.

The next trip I remembered the power drill. After a bit of adjusting, drilling and screwing, I'd got most of the center partition for the drawers done when the sky began to darken. I carried on in the mounting gloom until with thunder crashing and rain hammering down, it was too dark.

Returning to the bus I screwed the center partition to the floor (mostly). There were two bolts that just would not go in or rather, the drill wouldn't penetrate after self drilling screws decided to go sideways. There's something amiss under that plywood floor and I'm beginning to regret not ripping up all the plywood. Still, I can always add another bracket in another place - they're not exactly hard to obtain.

Having get as far as I could, somebody suggested a carbide bit. I might get one. While I was there I looked at the drawer slides I'd been given. I seem to have slides for two complete drawers and half the slides needed for two different sized drawers. Interesting! Clearly I need more slides.

The plan is to install three drawers on one side and three or four on the other. Having also today looked at Eric's blog, I noticed he has a nice glass washing basin that stood on top of his countertop. Interesting and I'll have to think about it! It's an idea.

Saturday, June 20, 2015

Changes reigned supreme

With the intention of building the sub partition in the bedroom, I cut two pieces of 2x4. When it came time to do a trial fitting, one piece couldn't be fitted because the site upon which it would be mounted was taken up by a bracket fastened to one leg of the bed. That was awkward enough to make me pause the project pending further thought.

Thinking in 108F is not an easy task so instead I concentrated on building the partitions for the drawers underneath the kitchen counter. I built the first partition broadside which means I lose a couple of potential inches of drawer space. Thinking about it though, being broadside does add to structural integrity. That's important if there's a collision as I don't want everything collapsing like a pack of cards.

As you can see, my carpentry is pretty rudimentary. My joints are good though. I've been using big screws rather than brackets. For the drawers, I'll probably be using more glue. Speaking of drawers, my last drawer was pretty heavy. The plan going forward is to make them lighter.

I had to work in 30 minute bursts today. Sweat was dripping on the ground, on my work and running in my eyes. That was quite unpleasant. Of course, later, when it cooled off, I was bring eaten alive by mosquitoes!

Tomorrow's plan is to complete the drawer partitions and possibly build some drawers. I measured my cutlery tray carefully in order to make a drawer that can accommodate it. I feel now that was pointless as the drawer itself should be partitioned rather than relying upon a partition insert. Two drawers will be deeper as they will be for plates inserted edgewise into foam padding.

Before I make any drawers though, the whole kitchen and dining area needs to be painted.

Wednesday, June 17, 2015

Timetable to drawers

As many of you know, I made a drawer base a few days ago. Then I did nothing because it was simply too hot. I've realised the heatwave is continuing so I'm now working in briefer spurts. The temperature in the cockpit of the bus a couple of days ago was astounding. Read the thermometer!

Thus today I set to , to complete my drawer. No plans have ever been drawn up for anything I've done in the bus so far and its all working wonderfully. The first thing was not to start work but to fix a plumbing leak in m'ladys yard. Then it was a case of feeding and watering chickens and doing the myriad of other things one does on a homestead.

Eventually I managed to measure and cut three planks of 19 inches and 15 inches with the circular saw. That was enough and I had to go inside to cool down. It was 104F outside and hotter in the bus. In fact, the bus feels like an oven when I'm inside!

Returning to the bus after cooling down, I worked on cutting two more short planks for the drawer. Sweat was dripping onto the floor with a splashing sound and running into my eyes giving blurry vision and a stinging sensation.

Eventually, after yet another trip into the house to cool off, I assembled the final parts of my drawer. It's definitely heavy. I just hope the runners are up to it!

It could have done with a little sanding and fine fitting but it works. It is my first ever drawer. The next drawer will be lighter and I might just abandon using Lowes $7 runners and just use wooden runners instead. Far cheaper and simpler!

Onward... The next thing to do to the dinette is to put a countertop and two cupboard doors! After that I can paint it and call it mostly completed.

Saturday, June 13, 2015

Getting into her drawers!

Drawers came to mind today as did painting. I reasoned that to paint, I'd better clean the dinette. Then I reasoned that it would be better if the drawer was completed and in place ready to paint.

It was pretty hot but with the internal door propped open as well as the front and side doors, it was bearable. I put a fan up to blow hit air out of the bus but it didn't improve matters much.

Putting the drawer together wasn't actually that hard. Oh, I can complain and bitch about it and it took until I ran out of wood to put it together but it was all pretty simple. The key was cut accuracy. Everything had to be pretty accurate.

I started days ago by ensuring that all the supports that would be involved with drawers were perfectly symmetrical. Today it was just a case of installing the runner bars and making sure they were horizontal, both at the same height and that they were parallel. So, 3 dimensions of orientation at each end.

Once that had been achieved it was a case of adding the drawer runners, one of which rather usefully captures the slider so that it can only be removed at the end of its run. That helped with measuring the width needed for the wood. Cutting the wood was easy enough.

I only miscut one piece - a mistake I've made before. I simply misread the tape measure which is not that hard when reading the numbers upside down. I cut the wood too short. Sadly I was unable to finish the drawer because the next piece of wood as supplied by Home Depot had been consumed by termites. Now you know why I try to make sure all my wood is pre-treated. The termite problem must have occurred at Home Depot or before. Wood in this condition should never be sold!

After stopping work for supper, I raced down to Lowes to replace the two drill bits that had broken, to get a catch foir the cockpit door and to get some more OSB and 1x4. The 1x4 is excellent for making drawers. As with the 2x4, its wet and I laid it across a stepladder to dry overnight. Speaking of the 2x4, its definitely drying. One piece of the four is still pretty heavy and might need a lot more drying. The rest is probably now usable.

Of course now its dark so nothing can be achieved until the sun reappears. Its getting quite exciting looking at progress...