Showing posts with label paint. Show all posts

Sunday, May 15, 2016

Ouch! Note to self - wear gloves!

Today there were three or four goals in mind and blow me down if I didn't achieve most of them! The first thing I did - while waiting for milady to enter my smaller chariot in order to whisk her off to our monthly date at Walmart (for grocery shopping) - I  sprayed the inward face of the security panel with more white appliance epoxy.

During the monthly jaunt to Walmart, I nipped next door and visited Lowes (hiss, spit) and bought a gallon of white paint, some M5 nuts and replacement electrical plug and connector. The plan is to use M5 nuts to space my panel away from the door a little more in order to stand it off, away from the rubber gasket holding the window in place. As I already have M5 bolts and M5 rivnuts, it would seem a shame not to use them! The space between the M5 nuts can be filled by my leftover window padding from when I moved some of the original bus windows around.

Having returned from Walmart, I looked at the bus and decided to paint the roof. I started initially with a brush and a small can but graduated to the gallon can and a roller fairly quickly. The brush left the usual streaks and dribbles but the roller was far better with more even coverage. Needless to say, I finished the edges fairly quickly using my stepladder and roller.

It was time to climb on the roof. Before now I had used a ladder to climb up to the roof. This time I used a stepladder to climb onto the hood then the small steps I use to enter the bus via the back door to climb from the hood to the roof. The first trip to the roof was quite painful as the roof was very hot and burned my hands. Next time I wore a pair of gardening gloves and that solved that!

I think I was up on the roof of the bus in hot sunshine for about two hours. I was quite wobbly by the time I came down for the last time. The first coat of white went on so well that I don't think that it is necessary to put a second.
I'll tidy up the areas where I have painted white into areas I want to remain grey at a later date. I might even get a can of white spray to touch up areas I haven't hit with the roller when I was trying to cover up areas painted with a brush. Clearly at some point I'll have to paint the inside of the front wheel arches. They're still yellow at the moment.

Inside the bus, shortly after completing the white paintwork I noticed the thermometer had recorded a 2 degree drop in temperature. I'll have to see if it reaches the summer high of 140F that it reached last year. After the white paint had dried, I put my hand on the white area and it was not uncomfortable. I put my hand on a neighboring grey area and it was very uncomfotably hot.

I continued on working with my security panel but after painting the window side of the panel with white paint, the paint had not fully dried in the crevices. Thus, after drilling the mounting holes, it was not really practical to install it. Of course, having got so exhausted by the heat, I spent a while just putzing around, doing little jobs before deciding to drill the holes in the panel.
The first putzing job was straightforward - I put the caps into the holes intended for faucets on my sink. I do have a little catching device that goes down the plug hole but I haven't much idea which box it's in at the moment. Anybody that knows me in real life will know I store everything in boxes but can rarely remember which item is in which box. At one time I tried cataloging my boxes but didn't keep the catalog up to date and that was the end of that idea.
I think those caps look pretty good. I'm happy with the result. As you can see, there's a lot of tidying that needs to be done. I'm slowly beginning that process, taking leftover materials to the shed as well as tools that I won't need to use again in the bus, even during routine maintenance. As you might have guessed, I'm coming toward the end of construction.
Another of my putzing jobs was to replace the plug and connector on my 20A cable. The plug is a 15A plug but that's not a problem. I'll eventually replace it with a 20A plug when the bus is in use. Those are interesting plugs as they're hinged at the sharp end. My old plugs probably disintegrated because though they were for 20A cables, the cable probably put too much stress on them. I've tried to leave the plugs a little less stressed by not tightening the case screws too hard. If they break then I'll have to find some heavier duty plugs - probably via eBay.

I was very impressed with yesterday's test of my CPU fan. It shifted large quantities of air. I can well imagine two of those would evacuate quite a lot of the hot air from inside the bus. Combined with my white paint, this should make a major reduction in interior temperature.

I am looking forward to completing this project. As far as I can see - aside from cleaning, tidying and putting my stuff in the right drawers - there's not much left to do. I need to put an unlocking system on the front door. How useful that would have been, done right at the start! There's the ventillation, the remains of what needs to be done to the security door and fixing a hole the hillbillies cut in the floor of what is now my wardrobe.

Other than that, it might be interesting to put a battery into the mix. I'm still not convinced by solar panels. On the other hand, all my battery will be doing is charging phone/tablet/laptop/camera batteries. It need not be a massive battery. I'm very tempted by NiMh D cells or perhaps AA cells, built together in an old ammunition box. Unlike lithium batteries, they're a cheaper way of doing things. Unlike lead-acid, they won't emit noxious fumes. Unlike SuperCaps, they don't cost the earth. Another advantage is that I can get replacement cells very easily.

Thursday, April 28, 2016

I must be the biggest sucker

No photo again but today's work didn't merit it. Two things were achieved but only two.

Those that can cast themselves back a couple of blog entries will recall that I ran out of rivets putting the steel plates over the sites of the old schoolbus flashers. Well, today despite feeling quite yucky from working, I replaced the four screws used temporarily with rivets then sprayed over with grey paint. Not very exciting but worthwhile.

My other accomplishment or rather the reason I consider myself to be the world's biggest sucker stems from an experiment I carried out today. Those with very long memories will recall I bought a pair of electromagnets from China some months ago. It has already been established that no matter what polarity current was supplied to it (which would normally alter electromagnetic polarity), the electromagnet never would change polarity. In fact, it seemed to be both polarities simultaneously. Two identical electromagnets would not repel each other. They would just attract. Similarly no matter which polarity of permanent magnet was introduced to the electromagnet, the electromagnet could never be persuaded to repel the permanent magnet. Pretty strange and rather useless.
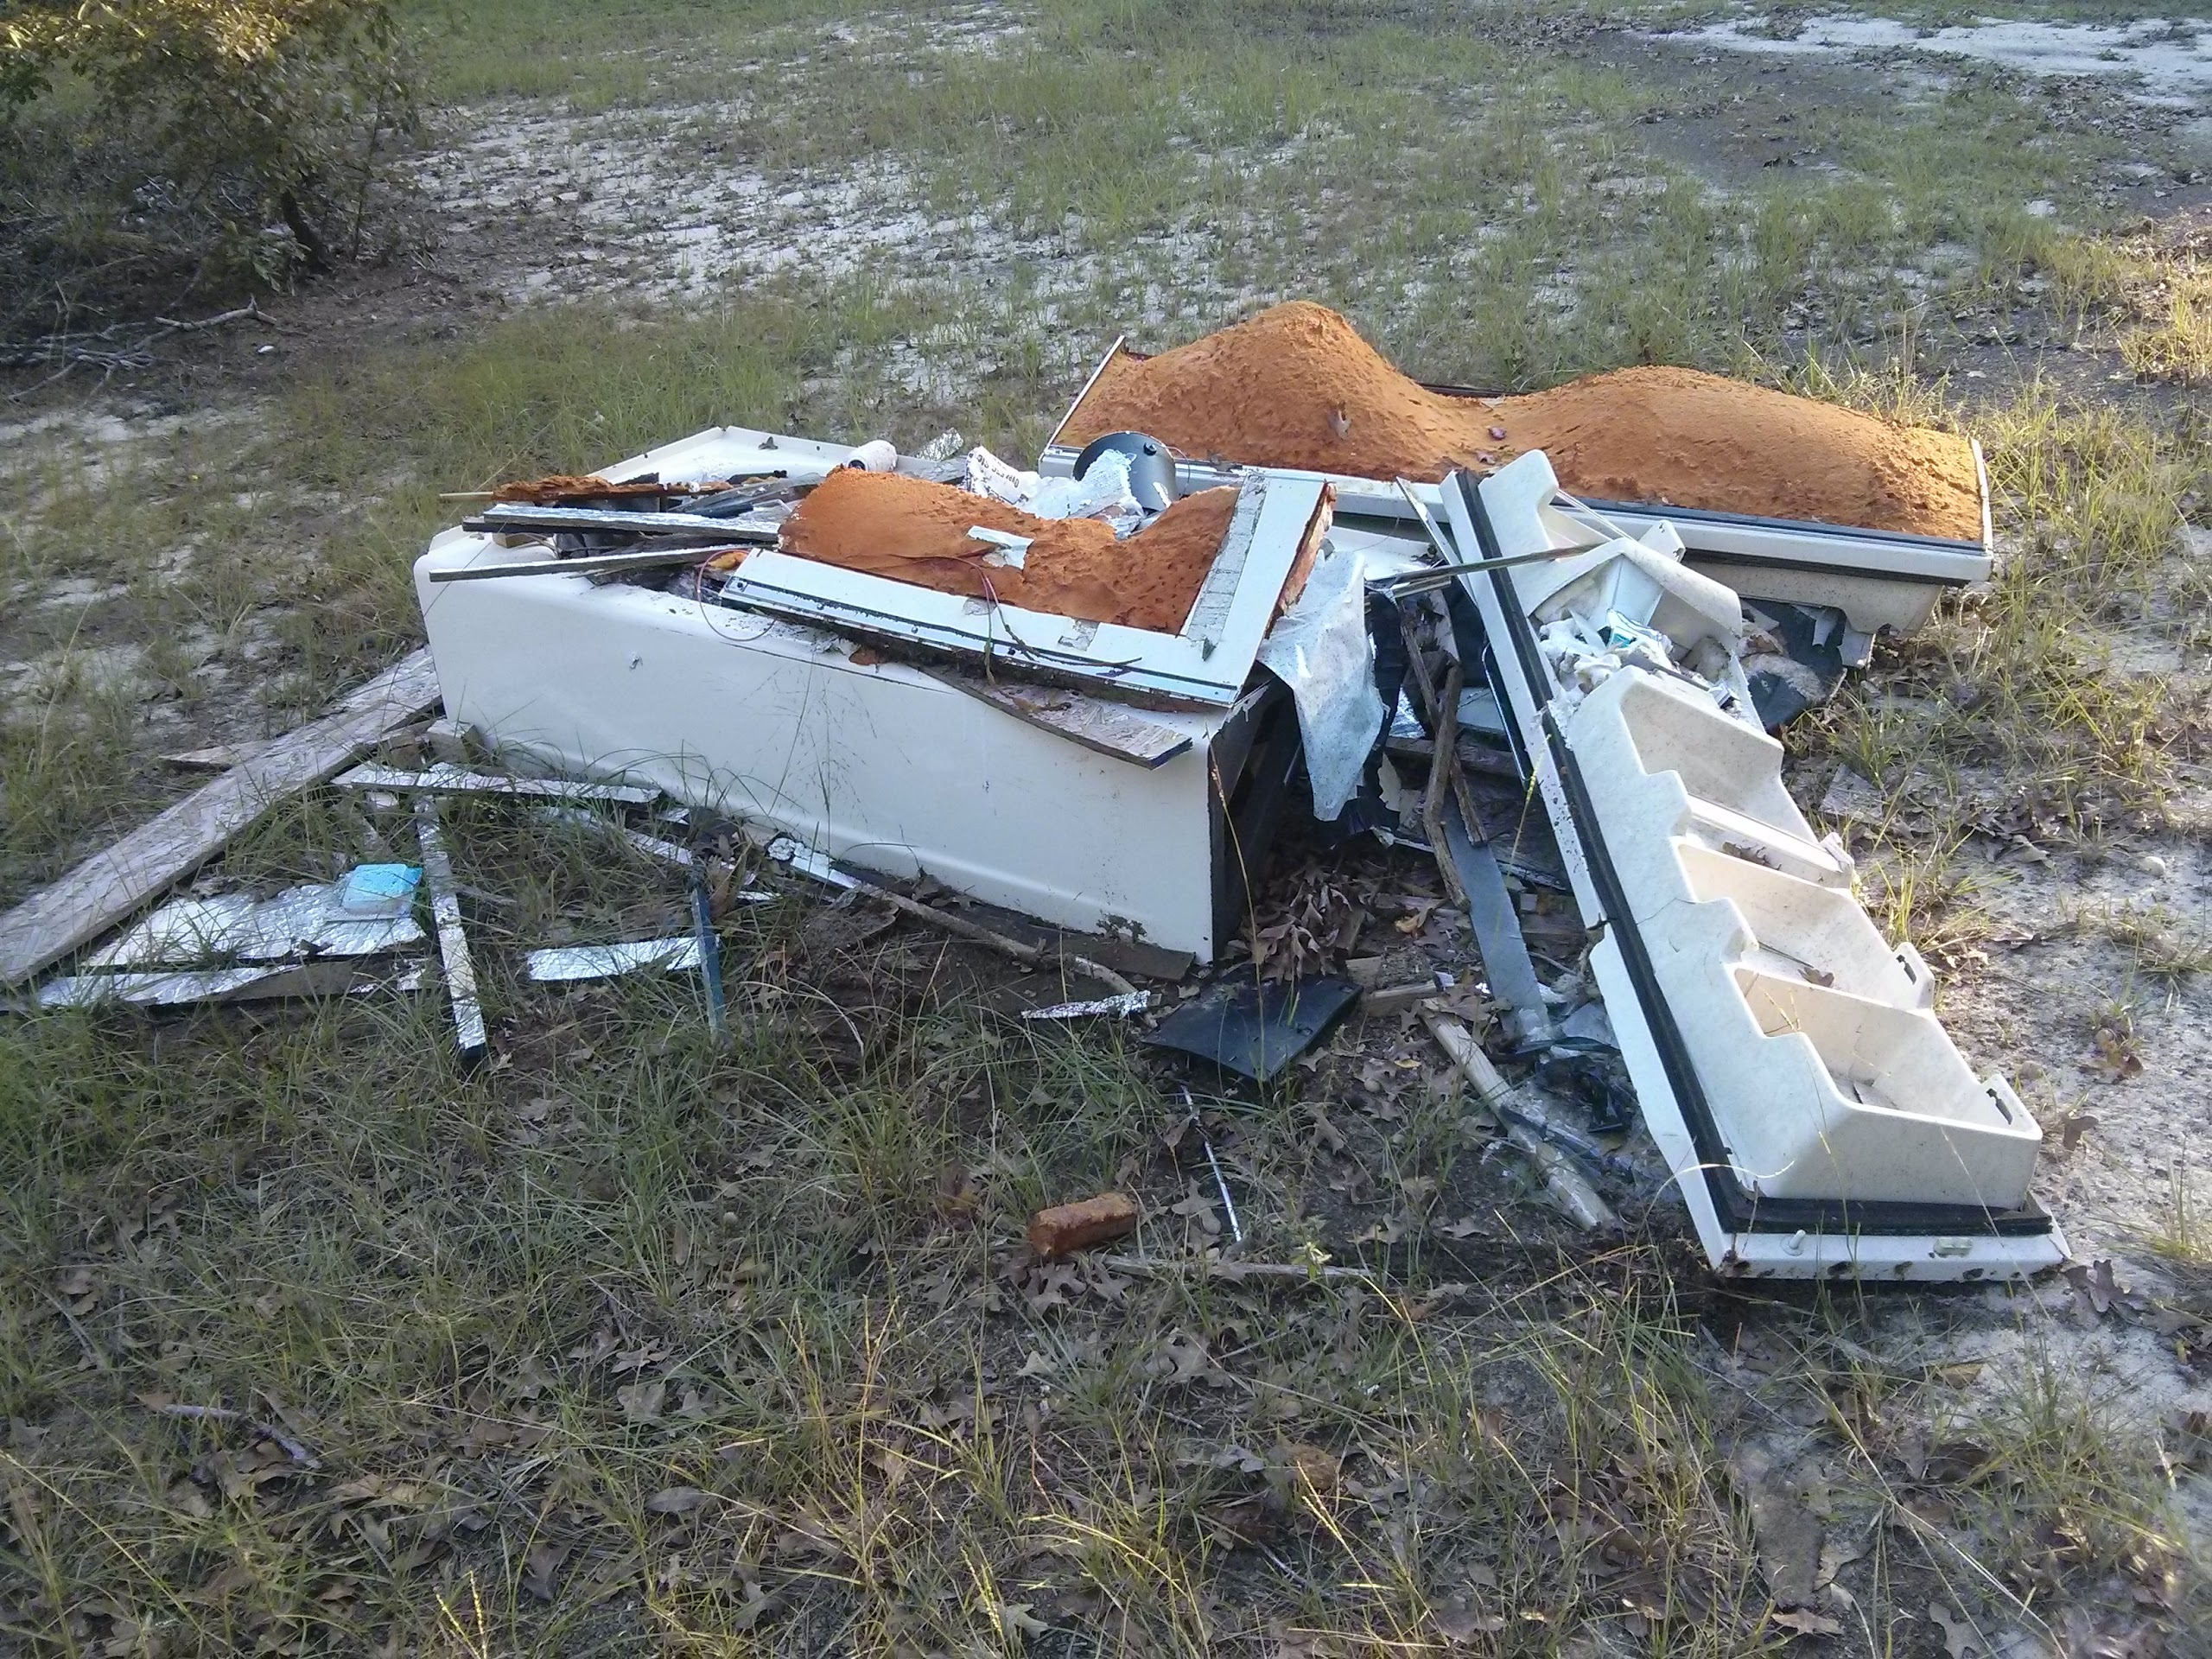
Today I tried the electromagnet for its attractive purposes. Fail again! It would attract but as a 9v magnet, it would attract from around 1/8 inch but very feebly. It would grip something strongly but was utterly useless in all other respects.

My goal is to engineer a way of opening the bus front door. What I'm trying to do is to lift the locking latch on the front door opening mechanism. Carpenter did employ an electric door opener but my bus has only a manual opener. Had I had the electric version, I could have simply tapped into the circuit with a remote opener. Looking around those would set me back $500. That's just too costly!

Clearly I was a fool to believe any Chinese electronic gizmo would actually work. I do buy bits from China but that was my first electronic gizmo. Oh well, lesson learned. Don't buy any electronics from China.

Looking around, there are some linear actuators on sale. That would make the door an electric only affair. That would make exit in an emergency somewhat interesting so I'd have to put some way of bypassing the electrical system. Sounds interesting though!

Sunday, April 10, 2016

Is this the end?


It certainly looks like the end of the road for my cheap Walmart microwave. I count 5 bullet holes in its carcass. Seriously, how can Walmart sell junk like this? After a little over 2 years use the bottom of the microwave inside was very rusty. It lay idle in a dry location for a further 2 years then when I set to cleaning it up, the pan had holes in it under the paint. No wonder every time I cooked, the countertop was covered in nasty looking water.

Today was one of those days when little was accomplished. Mostly that was because I am not really all that well. I didn't go to Lowes (hurrah). I did trim a little of the excess steel from the fridge to make some blanks to cover the apertures under the top front flashers. I started that a little late in the day and despite a spectacular mishap that went to show why only fools would take the guard off an angle grinder, I managed to cut two rectangles of steel.

Once I'd cut the steel, I ground the rusty bits back to clean steel then sprayed both sides with zinc paint. The zinc spray can started dripping and dribbling paint which was annoying but on the other hand this is exctly why I do prefer a brush and pot of paint. There's just no point in wasting a 65c brush for a little bit of painting though. Spray cans are handy for quick, small touch ups and that's about it. I decided on rectangles on the basis that they're easier and faster to cut. As long as they're mounted in the right places, they should have a balanced look. I'll have to trim the top outer corners to match the curve of the roof and I'll have to trim and indentation for the CB aerial. Other than that, the steel should be fine as it is.

As the paint was drying I turned my mind to the rear turn signals and switched one of the lenses over so that unlike the right turn signal, the left now has no arrow. It didn't improve matters. I suspect the bulb could be the problem in the left turn signal. It just seems dimmer than the right turn signal.

By the way, the right turn signal is a completely new unit that I installed last year as is the right hand reversing light. I'll have to replace the bulb to see if it improves matters. Really and truly it doesn't matter to me whether the lens has an arrow on it or not. I just hoped I could make it brighter. So, it looks like a new bulb but I won't stop there. I'll see if I can get some of that silver reflective Christmas wrapping plastic foil and fit it inside each of the light assemblies to improve the amount of light coming from them. These things just aren't visible enough for my liking in daylight.

By the time the light began to go, the paint on my steel plates was not fully dry so I put them inside the bus. I would have liked to have installed them today rather than leaving tape over one of the apertures. Having said that, there's always next weekend and the tape should keep rain out.

I looked at the ground beside the bus. That'll need a good clean up when I finish working on the bus. I have a feeling I'll spend an afternoon picking up trash from the yard! The plan for the big piece of fridge is to cover the lower door window aperture at the back of the bus. I'll have one piece that I'll trim to weld into the aperture. Once that's welded, I'll fill the space behind it with closed cell insulating foam then either use rivnuts and screw a sheet of steel over the inside of the door or rivet a sheet of steel there. On the whole, I think rivnuts make more sense as it allows me to perform maintainance if needed. I just hope I can make my welds waterproof.

I am very disappointed with the amount done today. I know I have overdone it today. I know I overdid it yesterday too. I wanted to go to Lowes to get my final plumbing part. I wanted to put two stop nuts on each bolt for each barrel. I wanted to plumb the shower barrel in fully. I'm still looking at plumbing the handbasin. I just hope I can get everything completed by the end of the month. My dad was griping that I hadn't completed it by April of last year, which was my original completion goal! I think my original target was a little ambitious given that I had so much to learn and that I'm such a perfectionist.

Tuesday, March 1, 2016

Let there be a place to stick it!


There is a photo of progess so far. The power inlet cover is in place. The grey doesn't match the grey of the bus but there is something I have in my possession that will resolve this - a paintbrush and a pot of paint. "A paintbrush" I hear you exclaim! Well, yes - a paintbrush - because spray cans contain so little actual paint and I have at least 3 or 4 lying around that represent about $20 - $30 of money wasted because the nozzzles won't allow paint out. Even switching nozzles has no perceivable effect. Spray cans are handy for quick touch-ups but only as long as you can use the entire can in one session. A paintbrush and a pot of paint is far less sexy but works far better and costs far less.

As you can see,the breaker box is lying on the ground, still attached to the cable coming through the floor of the bus. If you remember, I buggered up the inlet box that I was going to use on the back of the inlet - behind the skirt - the other day by snapping off two screws in the threaded holes. That was me just not thinking and using an electric screwdriver. Had I used the manual screwdriver I was too tired to find, this would not have happened.

Looking at the point where the cable enters the bus, I rivetted a steel plate around the area. As I installed that with a hand riveter and aluminium rivets while being unable to see what I was doing because of the hillbilly compartment that is now not in existence, that went a bit cockeyed. I'll see about drilling out those aluminum rivets and redoing that entry point. I rather think that replacing the rivets with screws might be a better solution. Instead of using rivets, to use rivnuts and screws. Of couse I'll have to use 10-24 rather than my preferred M5 screws on the basis that America is not all that good at metric stuff. I'll also have to use thread lock or silicone goop to ensure the bolts don't vibrate loose when I'm driving. I'd wondered why the area above felt cold and drafty. Now I know - there's airflow though my badly fitted plate. I can fix that though!

Sunday, February 28, 2016

Inlet socket

Today was spent utilizing the warm temperatures. Inside the bus it was a rather sweltery 82F and I sat in the bus to write today's blog entries. First off, the bad. Two of the $3.99 self-adhesive paper blinds that I installed are falling down. This does not surprise me one little bit. My experience of glue is that in general it's just not very good. Those things are helf up by a self-adhesive strip. I can see that I shall have to go back to Walmart and buy some proper roller blinds. Still, it's only 5 that I have that are self-adhesive so that's not exactly going to break the bank.

The main thing today was to work on installing the power inlet in the side of the bus. It took a while but I managed to drill a hole large enough to accommodate the Nema 6-30P inlet (rated 30A at 250v). Now that socket though it's rated at 30A should easily handle 50A at 120V. Having said that, my current cable is 20A and my planned maximum is going to be 30A. I just don't see any need for more than 30A - at least not in a motorhome.

Having drilled the hole, I slipped under the bus (how I detest being in such a cramped space) and painted primer on the inside. It's supposed to be a rust-killing primer so I'll have to see if it works on the small specs of rust that were on the bare steel. Then on with a mission for m'lady for about 30 minutes.

By the time I returned from my mission, the primer was dry and I managed to pop the power inlet cover temporarily into place. It looks pretty darned good, to be honest. There is orange paint on the edges of the cover from yesterday when I used orange spray paint to mark the outline. I love orange paint for just that purpose. It seems to scrape off with my thumbnail so that shouldn't be difficult to clean off.

The next order of the day was to drill a few more holes in order to attach the inlet directly to the side of the bus. The inlet will be secured to the bus and the housing I bought will fit over it. Really and truly, I could have done my own housing using PVC piping but I didn't think of that in time. There's a problem with the housing as only 2 of the 4 screws will work. Two shreared off during a test assembly. Two should hold it though. 

Having got all the requisite holes, I again slipped under the bus and painted the inside with topcoat. I'll probably put a rubberised spray over the inside later. Of course it follows that I also painted the outside of the bus too. Both times I used grey Rustoleum. Now if it peels off nicely primed, clean, dry, steel then we will have absolute proof how ghastly Rustoleum is. I await the results with baited breath!

Following this, I bolted the flange on the inlet through holes drilled in the bodywork and through the socket cover that I'd bought. The socket back, I didn't have time to install though seeing as how two of the four threaded holes have bolts broken off in them, I suspect I might be wise to replace it or to follow a different solution. Indeed, the plastic tubing solution sounds lighter, more water-resistent, cheaper and though not squirrel proof, definitely worthy of consideration. Needless to say, I plugged a spare Nema 6-30 plug into the socket and it worked brilliantly.

I'm not sure I got the socket 100% square but it's pretty darned close. Somebody would have to be really anal to notice that!

Next week's task is to build on what I have done today, to install a socket backing and possibly some protective PVC tubing over my electrical cables. Once that's done, I can work on installing the main breaker. It'll mean yet more grubbing around underneath the bus and put me a bit further behind schedule but I want to get this done right! As I always say - a job's not done unless it's done right.

Saturday, February 27, 2016

Unexpected achievements and a bad Kahr.

Today was, I had thought, going to be a day of zero progress on the bus. How wrong I was. I did most of the things I intended to do for tomorrow!

Work, which was scheduled for today, was to have been a full day of training but that was truncated at 1pm when two of the trainers were indisposed. Thus, being sent home early, I popped into Lowes (hiss, spit) for some plumbing pieces (of which more at a later date) and headed home.

Arriving home at 3pm, there were 3 good hours of daylight left so they got put to use. Last night I had been thinking about a handbasin for the bus. I considered the end of a small gas cylinder. I'd noticed there was such a cylinder on the junk pile. Thus, out of an abundance of caution, I placed it on the ground, ready to ensure it was empty. The cylinder said "helium" on it but it could well have been refilled with propane. Labels don't always mean what they say!

Not wanting to cut into a cylinder that might have propane in it, I decided on remote ventillation so I grabbed my (somewhat disappointing Kahr PM9) and fired a single shot from about 25 yards away. The shot did not immediately appear to have hit the cylinder to I aimed for another shot whereupon I discovered the blasted thing had jammed. Racking the slide, I found it kept jamming. In the end I put it away. That Kahr PM9 has been nothing but trouble since I bought it. I wish to Heavens I'd gone for a revolver rather than that stupid thing. Revolvers never jam! I would hate to be surprised by a bad guy when carying a PM9. I am pretty sure the PM9 would be more effective simply hurled at the bad guy. In terms of penetration the PM9 managed to get through one side of the (very thin) steel then totally failed to make an exit hole. I can hear the bullet rattling around inside. I'm going out on a limb and going to say that I just don't think the PM9 would penetrate a bad guy's shirt!

Putting the cylinder out of the way for the moment - the plan is to cut the top off to turn it into a handbasin - I proceeded onto today's work. I'll have to see if I can weld something this thin. That might present a significant challenge!

Today the plan was to complete welding the patch over the hole in the side of the bus cut by the hillbillies. That took me all of the remaining daylight. It was just a laborious process of building up steel and filling gaps until eventually the result was pretty good. It looked rough from the outside but it'll do.

I put the power socket cover over the area where it'll be fitted and sprayed with orange paint. Then I pulled out my angle grinder but instead of a cutting disk, I put a grinding disk. This worked surprisingly quickly and ground the excess welds flat to the point the socket cover fitted without rocking. It did reveal two small holes in the welding where the welding has not really filled the gap. These holes are minimal. I had thought 6011 rods would penetrate and fill holes but oh well. 

Next, the whole lot got cleaned up with a wire brush then painted with brown undercoat. This bus does not have to look perfect - it just has to work well. The undercoat went on well enough. Tomorrow I'll put undercoat on the back of the plate then paint the front with grey paint. But before I do that, I'll make the holes for the socket cover. With any luck - if the paint inside is dry in time, I might put a second coat inside and then install the remains of the underbody electrics. The main breaker inside will be installed at a later date. Some have asked why I'm putting a main breaker box. The answer is simple - the main breaker is there to protect the cable from overloading. Currently I have a 20A cable but I'll also make up a 30A cable and might get a 10A cable too. The reason for this is twofold. Firstly different sites offer different facilities and secondly, the heavier rated cables cost more per foot. If I can park close to a power point I can use my heavier cables and get more power. There is another thing in that the heavy cables being more expensive are more prone to theft.

Wednesday, February 24, 2016

What a day!

Two entries - would you even believe it? Yes - today has been exceedingly eventful. What with no electricity in the morning followed by intermittant electricity, I am much more inclined toward gas as well as my 120v plugin.

After breakfast/lunch/whatevertheheckitwas, I left to go to work. Arriving, I found the normal rooms locked up and the lights out. Then I found the boss. Apparently he'd tried to let me know that work had been cancelled for today but his letting me know had been to ring my phone and leave no message. That wasn't particularly helpful but anyway as nothing could be achieved at work, I turned around and headed back home, stopping off at the barbers on my way. It had been a couple of months since my last haircut!

Arriving home, after checking out the microwave I set to, working on welding the final patch over the hillbilly cable compartment disaster area. It took a while to trim the steel to shape and I deliberately undercut it this time in order to avoid the warping problems I had last time. 

Welding with 6011E 1/16th rods used a lot of rods and I had major problems - as before with burn through. In the end and because I ran out of 1/16th rods I turned to 3/32 rods. What a difference - these were and this is extremely counter-intuitive much easier to weld with. I began to fill the gaps where I'd undercut the steel but before I had quite finished, the daylight escaped on me. Had I had another couple of hours of daylight, I'm sure I would have finished the task.

Using the 1/16th rods I never had a problem with the welder shutting down to cool down. With the 3/32, rods I'd manage about two rods before the welder would overheat and need to cool. It has a 20% duty cycle. If I'd spent more on the welder I would not have the problem. On the other hand, I am happy that I didn't pay for more than I need.

By the time I had to stop due to darkness, I'd welded about 75% of the edges. I applied some black bumper spray since my Rustoleum anti-rust spray and my Rustoleum self-etching primer sprays didn't want to work and since I didn't want to use a paintbrush. 

As can be seen, I haven't finished welding the bottom left now the lower left side. My welds aren't pretty but they do work. I'll be glad when this operation is completed!

As mentioned before, I looked at the microwave. I pulled it out and wire-brushed the rusty parts inside. The more rust I removed, the more I found. The paint just peeled up and revealed yet more rust. It really wasn't very impressive for a microwave that I purchased in November of 2011 and used until May of 2014 then stored in a dry location! I don't think 30 months is a good life for a microwave!

Anyway, I kept working on the rust with steel brush and scraped the paint away with a plastic paint scraper. After a while I noticed that the rust wasn't surface rust. It was rusted through in places. How on earth is this possible? There was so much rust that repairing the microwave just seems pointless. Certainly I can deal with rust. Looking at the holes in the bottom of the roller recess, it just seems to me that the microwave is beyond repair.

Sadly, I took the microwave out of the bus. I'll have to replace it with something else. So, for the moment it's sitting on the ground awaiting disposal or recycling.

I had hoped at least to get the electrical inlet hole made but still, I have made progress. Indeed maybe I might have made faster progress had I used 3/32 rods from the start. I didn't know that at the time for I am but a self-taught amateur welder.


Saturday, February 20, 2016

Probably the worst welding in the world!

Yesterday I was reminded of my 2 year anniversary of meeting m'lady. Needless to say I'd had subtle reminders for the past week or two. I'd been finding notes written in Sharpie on my dinnerplate that I'd discover after doing my usual plate-clearing feat. I found notes in my lunch bag, reminding me of it all. So yesterday it was suggested that as it was forecast for 20% rain for Sunday, maybe we should head out on Sunday. That would leave me with all day today to work on the bus.

Well, today I started by cutting the steel for the infilling for the old cable compartment. That was pretty easy and after a little careful grinding, it was just the right size.

The plate, usefully, kept succumbing to gravity so in order to counter the effects of gravity which seems to be somewhat of a problem, I used existing hillbilly holes, some of my defective 10-24 bolts, washers and nuts. That held it all in place quite nicely.

Being mindful of the speed with which I can cut through 15 gauge steel with my 6011 1/16th welding rods, I worked quickly to weld the steel together. Now the steel I am welding in comes from the sole surviving seat back that the hillbillies left in the bus. That has been really useful supply of steel as it has been used for several things. Needless to say, I achieved the feat of cutting holes in the steel without too much problem.

I did get better as I went along though I had to pick up the pace a bit in order to complete the job before I ran out of welding rods. It was touch and go most of the time! I managed to burn quite a few holes and then had to sit there and build up the steel in order to fill the holes.

I don't think my welding will win any awards - aside from the booby prize. Maybe a Rotten Tomatoes award for ugliness. It does work though even though it looks nasty.

The biggest problem I had was that the steel sheet warped and moved a bit. It's nowhere near flush which might or might not be a problem. I might have to trim my compartment in order to fit it around my wonderful workmanship.

As it was getting gloomy - it had been overcast all day and I'd had to try a whole load of different tactics to be able to see what I was doing. My welding helmet is a little too dark to be honest. It's fine in bright sunshine but not in cloudy weather. In the end I found the hand-held eye guard worked best as it allowed me to see the area around the weld while blocking the really bright light.

Having put all my tools away, I wire-brushed the welds on the outside and slapped some primer on everything. Needless to say, as soon as I'd done that, the 20% rain arrived a day early.

With luck the rain won't harm the paint. I need to get underneath to prime the steel on the back. Judging from the smell of burning rubber when I was welding, the back of the bodywork has some rubberised paint on it.

With luck, I might be able to get the compartment installed tomorrow though I'm not counting my chickens. Today's welding took rather longer than I had anticipated to be honest. Had the weather not looked like rain then I would have welded the final strengthening pieces on the compartment. I never thought to check whether my main breaker box will fit nicely beside my distribution panel. If it does, perhaps it might be simpler just to finish infilling the hillbilly compartment and simply putting a socket box there instead. 

Meanwhile, my screw eyes arrived today. Too late to do anything with them today though. I now have everything I need to be able to complete the shower curtain fittings. Well, perhaps almost everything - I might need some S hooks.

Monday, February 15, 2016

What a disaster!

The angels wept today and did drench the surface of the earth with their tears. Menwhile, an icy blast and possible Snowmageddon quietly began. Yes, folks, today was bitterly cold and wet. Not a good day for doing anything on the bus. Thus, today was mostly a shopping day.

In Walmart, I picked up a couple of things, the most interesting of which was for $10 a miniature cordless electric drill. It seems to charge off 6v. 20 years after everybody stopped putting NiCad batteries in things (aside from the Chinese) and it has a NiCad battery. Now normally I use a full-sized electric or cordless electric drill. Most of the time that's just fine. For my breaker box compartment it's just too big. I can't get the drill in, in order to get the holes in the right place to attach the compartment to the frame. I figured if I takes an hour a rivet hole, that drill will be worthwhile. I only need it in order to install 6 - 8 rivets! There was a better version available at $15 but I figure if this little fellow can do the job and since it's a job I probably won't have again then there's no point in spending more.

After I weld the next bits on my breaker box compartment I'll have to replace the paint that burns off so I bought more paint and some cheap brushes. At 68 cents a brush, it really isn't worth wasting gasoline on them to wash the paint out. While on the paint thing, I also got some appliance paint. I figured I can try derusting my microwave, spraying it with rust killer and then appliance paint. I know it still works - it just doesn't look pretty!

Remembering what the guy I read about the other day had said, I bought some paint thinner. The grey paint is peeling off quite well in some places. I can simply brush the loose paint off and wipe down with thinner before repainting. If the fellow mentioned online was correct then it might be the solution to problems like this:
I shall be rather glad to be in a position to register this bus as a motorhome. I feel that's getting ever closer. I could have done that with the old hillbilly compartment but wanted to redo it anyway. I am waiting on delivery of my screw eyes and rivnuts right now. These will help me to complete the shower. Then I will have a shower with a funky water delivery system but a shower nevertheless. Other than that, water disposal is taken care of with a bucket but I want to go to stage 2 and have at least one underbody tank. The proper breaker box compartment is a huge step for electrical supply and having seen the old compartment was probably little short of essential.

A 12v electrical system is not as yet planned out but the concept is there. Ideally, rather than a battery, I'll use a supercapacitor setup. That kind of thing can be left alone and it'll be just fine. No worries about overcharging nor about the cells wearing out. 

I said last year that I wanted this bus done by April. It definitely looks like being this April rather than last April. If I can only get a good weekend then I can get the underbody compartent done! It is literally a tiny bit of welding, a tiny bit of painting and some rivetting and bolting away from being done. After that it's a tiny bit of plumbing, some riveting and application of restraints and the waste water system is done. Then there's erecting the shower curtain, cleaning inside and it's done.

For the future I'd want to install my 12v system, possibly an underbelly water tank and way off in the future, possibly a black tank. Then of course there's the bedroom and kitchen ventillation and that is all that I can reasonably hope to want. 

Monday, December 21, 2015

Interesting!

I looked today more closely at my tyres. It seems that somebody has put 11R 22.5 on the back but 10R 22.5 on the front. Checking the inormation panel inside, both front and back rims are identical. Thus, both sets of tyres should be identical. This is very odd. I'll bet the guy that sold me the bus just got a mate to throw on the cheapest tyres that would vaguely fit.

Indeed, looking at the tyre sizing chart, it seems that I probably have 20x7.50 rims though I thought the panel had 20x70 written on it. The rims might not be original anyway. Looking again at the chart, there's a surprising degree of tolerance between tyre sizes. It sounds bizarre that I can fit a 9r22.5, 10r22.5 or 11r22.5 on the same set of rims. 

I didn't get anything actually done on the bus today. What with grey, depressing weather that was also pretty cold and Christmas shopping to boot, as well as a headache caused by the noxious perfumes inflicted upon the public by stores I really didn't feel like doing anything much. Indeed, I intended to buy a big bag of sugar to use for sugar blasting. Being Christmas and therefore sugar buzz time, there were no big bags of sugar left.

The new bathroom vanity top still needs to be painted but its a bit cold to be doing paintwork at the moment. Not just to be outside doing the painting but because the paint just won't dry very well in these temperatures. A look inside the hillbilly cable compartment showed it to have cobwebs. That's not welcome to the international President of the arachnophobes club!

Thinking more toward power options it looks costly whichever way I go. Solar panels are desirable though I'm wondering whether a wind option might be more economical. It would be tiresome to keep erecting and dismantling but would potentially offer more power while maintaining the non motorhome external appearance of my bus due to its removability. 

Friday, October 23, 2015

Lol. What a load of plonkers!

Out of interest, I had another look at the bus conversion forum online. Yup... They're still mostly plonkers. I put a simple question about paint and had answers from the outlandish to the ridiculous. Not one could name a barrier primer nor the best value economy top coat yet they all claim to have busses and all claim to have repainted them!

Today I visited Tractor Supply. I didn't buy much. In fact I spent less than $10 but in addition to 100 10-24 nuts and two M4 bolts. I got some 1\4x20 bolts, nuts and lock nuts. Thinking about it, I'd probably have been better off buying all my nuts and bolts from Tractor Supply as they sell them by the pound!

The 1\4x20 bolts will carry way in excess of 1200lbs before sheering. Again, looking for the sheer strength online produced very dubious looking figures. My usual go-to source of The Handbook of Chemistry and Physics didn't have anything bar a definition of sheer strength. Perhaps my engineering handbook would but at the moment it cannot be located.

The 4mm bolt did the biz. This screws into my electro magnet nicely. The bolt is a shade too long but I can always space it off with washers or even trim the bolt a shade with my angle grinder. All I need is to bolt one to a steel bracket and the other to the underside of the latch and the bracket to the bulkhead beneath the latch and its a very simple electro unlocking mechanism. They always say to keep it simple!

If the dual electro magnet affair works as hoped then it would be possible to add remote unlocking. Remote locking could be more challenging, however.

Thinking about a pull on the front door to close it, I realised that as I have a penchant for large size keyrings, I could put a small hook on the outside of the door and use my keyring to pull it shut. Thus I would also be more certain of not locking my keys in the bus!

Saturday, October 17, 2015

How disheartening!

Today I went to the bus with the intention of painting the roof. It seems the Rustoleum on the roof is now beginning to peel. More areas of the sides are peeling too. Clearly there's something amiss with the Rustoleum. Indeed, I contacted Rustoleum and they agreed it shouldn't be peeling and bubbling and announced they were sending some form of refund. Obviously they must know something about that batch for them to be sending a refund.


That was pretty disheartening. I have a small pot of grey Rustoleum that I was planning to use to complete the roof painting. Having seen all that, I've decided I'm not going to waste my time putting more Rustoleum up if all its going to do is peel. Clearly at some point I'm going to have to repaint the whole bus. It kinda spoils the effect but I need the bus completed, paint is something that can be left til last.

Meanwhile, my battery powered shower unit arrived as did my Harley Davidson ignition switch. They're waiting on my unlocking gizmo and my completing the plumbing.

The water tanks are proving troublesome to obtain. It seems to cost $20 a tank for shipping. Secondhand 15 gallon tanks seem to be $20 which is ludicrous for something that's only $40 brand new. I have a feeling I'll end up driving to the manufacturer in Georgia to get brand new tanks. It's 200 miles in each direction. At 19mpg and $2 per gallon, that's going to cost $42 or the cost of shipping two barrels.

Given the ludicrous cost of standard water tanks, even with the ludicrous shipping costs and having to buy new barrels they still work out cheaper.

A few days ago, I bought a lot of cheap 10-24 nuts and bolts. Those might be good enough to hold the forthcoming battery compartment together if enough are used. They're each apparently capable of 55 kilograms. Its hard to find good figures for bolt strengths online. So many sites are such unreliable garbage. I'm sure I have a mechanical handbook somewhere. There's no rush though as I haven't cut all the steel yet.

Speaking of cutting steel, that was another task that never got done today. In order to paint the roof, I had to move the bus. In order to move the bus, I had to start the engine. Oops! Flat battery. Clearly either I have a bad battery or something is draining it. Thus, the battery is currently on charge.

So, the sum total of today is nothing. I got depressed and that's about it. With luck, tomorrow should be better.

Sunday, October 11, 2015

C'est la vie!

Today I pulled out the grit blaster and attempted to use it on the flaked paintwork. First in went sugar. I pulled the trigger and had nothing bar air. Putting my hand over the filler cap, there was suction. Figuring the sugar might be too thick, I replaced it with baking soda. Again, suction and a good blast of air but no soda. In the end I put it away and got the electric drill with a wire brush attachment. Probably an hour later, I had all the loose paint off. Oddly enough, the soda blasting hadn't been terribly effective the previous time.

As far a returning the grit blaster is concerned, it'd take an hour of driving in each direction plus nearly 3 gallons of gasoline. It's just not cost efficient. That is, of course, without mentioning I'd have to pass over the rickety Lake Murray dam.

So, having scraped the affected paint off, I cleaned away the debris and set to work painting. I had thought of using the sprayer but I was done in an hour using just a paintbrush. I'd have been done earlier if I'd not messed about getting the air compressor set up only to have to put it away again. That Harbor Freight cheap stuff is very hit and miss. Mostly its OK but sometimes you get a real dog.

I scraped the ends of the two leaky seams on the roof and sprayed rust killer. Later I applied silicone caulk. In theory, that should be the end of the unexpected repairs. It's becoming very clear that I have to start working on the front door unlocking gizmo. Climbing in and out through emergency exits with the aid of a stepladder is definitely for the birds!

I'm sure you'll admit that looks better. Despite having scraped the loose paint very thoroughly, I'm sure I've missed enough to need to do more work later.

For a long time, construction debris has been a source of friction. Today I took steps to remove debris. This will take a while; weeks in fact.

I didn't get to do anything that I wanted to do this weekend as it was all repairs. One thing I did do was to paint over my NSA2011 signs. I figured they might be a hindrance to getting it reregistered as a motorhome. Some nut at the DMV might consider it to be an impersonation of a government vehicle. I can always redo it later though I'm more in favor of anonymity, these days.

The roof never saw a lick of paint. I figure I'll get to that, maybe next week. It really needs a second coat but I want to wait for the silicone caulk to harden first. With luck, there'll be heavy rain tomorrow that should test my weather proofing.

Saturday, October 10, 2015

China wins again!

I've had major issues with US based suppliers of Nema L6-30 FI connectors. They just don't seem to want to sell the product they advertise. Twice I've had my order cancelled by some joker that says I cancelled yet I did not. Then I found a local supplier that wanted $50 for a $15 part. Others wanted $80 for a $15 part. So, the upshot was I went back to eBay and ordered the part from a Chinese supplier. I expect it will be delivered next week. I just don't get why this is such a problem for US suppliers. It's not as though customer service is a challenging skill. Equally US suppliers seem mathematically challenged. Surely its better to sell 100 of an item at $1 profit per item than to sell 1 at $40 profit?

It rained very heavily overnight. Thus when I checked the inside of the bus, I was pleased to note that water ingress where the ingress had been bad was down to a few drops. The bedroom was down too but there was still a small puddle.

Not so welcome was what had happened to my paintwork. It looks like somebody has thrown acid over the paint. I'm pretty sure they haven't but the hood will have to be redone. There's paint peeling off the rub rails too though curiously only in tiny patches and only on the tops. The roof of the bus is unaffected. It can't be the baking soda because that was all over the roof and the roof is unaffected. It's just the hood (where there was no baking soda) and selected areas on one side of the bus. Notably, under a tree but the tree is only by some affected areas.


If it was a problem with my painting Rustoleum over cellulose then surely the paint would have bubbled universally yet it has not. I'll have to load my sprayer with sugar, sugar blast the affected paint (which peels away in big flakes) then repaint with Rustoleum. Perhaps I'll spray this time.

When its dry, I'll head back to the roof and will attend to the questionable seam. Clearly I missed something. I might just as well work on the other seams while I'm up there - adding more silicone.

The rain came down heavily again, putting paid to the motion of more work outside or under the bus. Indeed, even going out to the bus was too much of a challenge. The rain was that heavy!

Friday, October 9, 2015

Turkey day!

No. It's too early for Thanksgiving but not too early for online turkeys. They say things come in threes and I have two so far.

In my work toward completing the bus, I ordered a Nema 6-30P inlet off some twit on eBay. Needless to say, a couple of days after I ordered, I suddenly had a bizarre note to the effect my paid order was cancelled at my request. No such request had been made. I wouldn't mind betting they advertised something they didn't possess!

In my work toward a solar system, my plan is to use rechargeable D cells for my lighting etc, I hunted around online for information. Drawing pretty much a blank, I put a question on a solar power group. Let's just say nobody ever read my question and I won't be back.

Yesterday for $15 I saw a simplistic solar charger in Harbor Freight. It was basically a solar panel and a diode plus an expensive plastic box. Somehow I doubt it'd live up to its claims. I remember trying to charge a cellphone off a larger solar panel. It took a full week to get enough charge for a 15 minute conversation.

The third turkey arrived today. This is why I'm building my motorhome, of course. The positions available in South Carolina don't put food on the table for they all pay 3rd world wages with 3rd world employment conditions. Indeed, South Carolina is a 3rd world country in the middle of the richest country on earth! I'd applied for an admin position on one of the jobs websites. I had an email back...
I got your resume from a job you applied for on Monster.com.  I just wanted to follow up with you to see what you are looking for in your job hunt and to see if I could assist you in your career search.  Please contact me if you are available to come in and meet with me about how I can help you in your search.
That was a bit suspicious. Clearly the position I'd applied for was the same level of fakery as that mysterious Nigerian prince that wants to give me millions of dollars. I played along...
I'm looking for admin/office/clerical, preferably as a manager but I'll take lower positions if it means a job with a future, real wages and full time hours.

I presume the position I applied for was clickbait rather than a real job?

The fellow responded, denying that the position was clickbait while at the same time, proving that it was...
Our job posting usually cover more than one position since they have similar requirements.  Currently we have 12 administrative assistant positions that all have similar requirements, so instead of posting 12 separate opening, we can cover more ground with 5 or 6 postings.  That being said, they are all real jobs.  Please let me know if you would like to come in and meet with me so I could assist you in your hunt.
 
I look forward to hearing from you.

There's all this emphasis on coming into their office for no clearly visible reason. I'm wondering if it's like the college that asked me to interview then appeared to ask for a bribe. I don't do bribes. Maybe that's why I have such problems finding work? Maybe I'm just too honest? Well, I'd rather be honest than compromise my principals! So, I responded...
I'm happy for you to assist. I remain to be convinced that spending time and money on coming to see you will achieve anything that cannot be achieved via email or telephone.

You have seen my resume. I went a little over the top by putting full job duties instead of the main ones but as you can see, I've been doing admin/clerical/office all my life. With 12 vacancies, I would welcome your putting me forward for them.

Needless to say, since I clearly wasn't going to be a cornucopia for the guy, showering him in chocolates, champagne, roses (or God knows what else), I never heard back from him. And agencies wonder why I block their phone numbers!

Meanwhile, an email arrived from my dad suggesting I put a deadline on finding a decent job in the US. Then simply sell everything at the deadline and just write off the US and go back to an equally uncertain future in Britain.

Today I worked more on the roof seams. They all need work. Truthfully, they all need to be sandblasted, painted and caulked professionally. All I can do is to treat the worst and hope for the best. It's going to rain tomorrow so that's all I have time to do.

It was just a case of caulking where I'd sprayed with anti rust etc. Oddly enough, I'd just done that when the sky began to darken. Clearly I finished the caulking just in time, even though rain is not forecast until tomorrow.

When I worked on the roof a few months ago, I painstakingly climbed up and down a ladder. This time, it seems easier to climb up the ladder then on the way down to slide onto the hood then climb down from the hood. In theory I could do that in reverse using a pair of folding step stools. That would take so little room I could make a pair of step stools part of normal equipment.

A small thing done as well was to fasten the CB radio aerial cable into place using silicone caulk. I taped it with aluminum tape while the silicone sets. I must admit it looks tidier. One day I might even get around to replacing the drivers fan!

After that I commenced work on the battery/cable compartment by cutting some of the steel bedframes that were in the bus. The aperture seems to be 24 inches wide so I'm cutting the frame to 29 inches to working space.

The plan is to make the compartment capable of holding a marine deep cycle battery in addition to the breaker box. Dependent upon the size of the battery, I might make space for two.

In other news, I'd ordered a Nema 6-30P inlet from Amazon since the jerk on eBay decided to cancel my order. It must be the same jerk under a different name. He cancelled the order again, claiming again that I cancelled yet I know I did not. Well, perhaps that was for the best because I've had a different idea on how to achieve my goal. I'm rather more in favor of using a standard 5-15 pair of inlets with the 30A cable ending in a Y junction. That would have the effect that I could use a standard household cable to plug into one inlet or a 30a cable to plug into a splitter. As I'm aiming for low power usage, the 5-15 has much merit!

The marine battery specifications are decent enough for low power usage. By that I'm thinking charging D cells, AA cells, phones etc and possibly also using a small electric element for boiling water in a cup etc. It's 105AH, 44lbs and measures 11x10x7. That means I could have two in the compartment in an L formation or even two in there side by side.

I continued cutting the long members for the compartment until I had four the same length. The offcuts are between 18 and 19 inches long. They will be trimmed to 14 inches. That will allow a battery to be seated end on. Looking at the official battery compartment, there is a roof over it. That, presumably, is designed as a fire guard should the battery catch fire. It looks a good idea and since steel is plentiful I'll probably implement something similar.

I am definitely on the home stretch!

Thursday, October 8, 2015

50 miles for what?

Today I took a 50 mile round trip drive to Harbor Freight. Nobody else stocked a grit blaster. It wasn't expensive either. Of course, I paid $2 more to get one with a bigger hopper though in practice it wasn't necessary.

Rather than paying $35 for a huge bag of soda, I went to Walmart and got 3 boxes of soda for $2 each. As it turned out, I didn't even finish one box.

What with driving and so on, I didn't do an awful lot then just after I'd blasted all of the seams that needed attention, the sun went and hid itself. The soda wasn't all that abrasive. Perhaps I might have been better using sugar but all the loose rust and loose paint flakes have gone.

After that, each area was sprayed with rust killing spray. Tomorrow the plan is to repaint each seam with grey Rustoleum and then, when that's dry to go over the affected seams with silicone caulk. Following that, there is a plan to repaint the entire roof since it wasn't fully covered when I rollered it in December.

An area where I had previously used rust killer remained rust free. Clearly the stuff works! The silicone had not stuck well to it so I'll paint and the silicone will stick to paint.

Looking at the steel of the old bed frames, it looks ideal for the battery/cable compartment. I had thought of it as too heavy but it looks good enough. The floor of the compartment might have to be plywood for speed and economy. Unlike the hillbillies, I'll be painting my plywood and keeping it drained and ventilated.

Wednesday, October 7, 2015

The roof

Yesterday I hunted in vain for a tool to use with the compressor to blast the silicone sealant out of the affected seams on the bus. The plan was to use sugar as the blasting compound principally because its more available and cheaper than alternatives.

Proceeding gingerly along the roads, there was little to no sign of flood damage. Indeed, I had to make a detour to see any. Clearly although the flooding has been tragic, the areas I normally visit have been spared. One would not know this, given the constant media coverage. Indeed, I even saw some articulated trucks on the road. Clearly the fears of road instability have been greatly over stated. Indeed this is probably why so many people are ignoring roadblocks.

Visiting store after store, the story was the same at each one. They had grit blasting tools listed but none ever carried in the store despite what the company website claimed. The one place that would have them was Harbor Freight but as visiting them would involve crossing the somewhat suspect Lake Murray dam, I passed on the chance. Instead I shall investigate to see if small areas can be repaired and shall put tape over the affected seams. Maybe after the floods and danger diminish, I can visit Harbor Freight.

The alternative to Harbor Freight is either Northern Tool and a trip across the dam or heating the silicone and scraping it out manually. Had I started that yesterday rather than wasting fuel and hours driving, I could have been done. That would have been today's plan had I not had another fever. It seems I have some kind of rolling virus. I gather others complain of the same virus and how it lasts about a month. That must have been shy yesterday's shopping was do tiring and lackluster.

Today I purchased from eBay a battery powered shower head. The basic plan is to heat water, dump it into my cooler then use that water to shower with. Unlike other shower heads, this one is powered by 4 D cells.

The advantage there is that unlike the rechargeable shower heads with built in batteries, the batteries can be changed. Unlike the 12v plugin shower heads, it runs off a power supply with more possibilities. By that I mean that if I don't have freshly charged D cells, I can use alkaline D cells. Coincidentally, my LED lantern also uses D cells.

That all has me thinking about solar panels to charge AA and D cells. For simple small cell charging, the solar panel need not be gigantic nor expensive. Indeed, 4 D cells might be all that's needed to power my forthcoming front door unlocking system.

Looking at the solar panels available is pretty mind boggling! The whole thing seems vastly complicated. All I want to do is to put a small solar panel on the roof, connect it to a battery charger inside the bus and be done. It's not simple though. As ever, it seems that what I want to do is unusual and not catered toward.

A short term fix for my plumbing came to me this morning. Yesterday while in Walmart I noticed 5 gallon gas cans. My thought is to collect waste water under the bus in a bucket then decant to a 5 gallon gas can for subsequent disposal. For potable water, a few off the shelf camp water containers would work.

Needless to say, these are all inexpensive things that can easily be upgraded at a later stage. Even the cable compartment, rickety as it is, can be upgraded at a later stage. Consideration has to be therefore given to completing the shower plumbing and the interior soft furnishings.

Despite feeling pretty rough, I managed to put a few minutes in, painting the galley floor. It could probably stand more work to attain perfection but it's pretty good. The next thing will be to put a movable vinyl floor covering such as those that protect carpets from mauling by the wheels of swivel chairs.

There are pits and dents in the plywood of the floor. These are due to the plywood the hillbillies laid being of low quality. Still, those sections were in good enough condition not to have to redo which is why they were left. This is probably why they tiled their floor with such disastrous consequences.

Idly I considered visiting the roof. There is an area that needs more grey paint but the paint can is in the middle of the galley workbench which cannot be accessed due to wet paint! Grabbing the ladder, I leaned it against the bus more in hope than anticipation.

As tomorrow is also a non work day, due to the recent floods, I can leave roof stuff until tomorrow. I'll probably just tape the seams with aluminum tape if I can't clearly see any possible leak sites. At least then, it'll all be done. I did look online at a Harbor Freight grit blasting attachment. Online its $17.99 plus $6.99 shipping. Instore it'll likely be the same but a quick calculation showed that gas getting to and from the store was likely to be $4.30 plus a couple of hours time. I think the wear and tear on my car is more than the $2.69 saving. That is, of course, if I opt to clean out the seams instead of taping and painting.

That's what I was going to do. What I really ended up doing was to head to the roof anyway. It took one trip and a look to see the problem. What has happened is rust has lifted the silicone sealant and allowed water underneath.

The three affected seams aren't too bad. It puts paid to my idea of using a wire brush though. I need to get under the seam more than I can with a brush. This looks like it will have to be a grit blaster and the sooner the better! I'll have to hit Harbor Freight tomorrow. For the moment the seams are duct taped against unexpected rain. It looks like I need a lot of rust killing paint and probably some real baking soda since I don't need to blast out silicone. Oddly enough the hard to remove silicone came off easily with a razor blade. I'm glad I caught it before it became too bad. I have no idea what the other seams are really like though they seem OK. The good news is that where I applied rust killer before, without removing any rust, there was very little live rust.