That I might actually achieve something today? The first thing I did was to head to the bus to find the tool needed to change the disk on my angle grinder. That was easy enough. I think after hunting through six big, fully loaded cardboard boxes I'd had enough but fortunately it was right in the bottom of the sixth box. Tidying up the other day had the unfortunate effect of concealing the things I need to find!
Having changed the disk - a task of mere seconds as opposed to the hour or so trying to find the tool - I decided to cut some steel for the back door. Just the other end of the property lies a abandoned trailer with an abandoned fridge lying in the yard. That fridge looked to be a very suitable donor!
For some reason, there was an electric cable lying along the length of the yard. Thus, angle grinder in hand I went to the fridge, expectantly. Well, that's where it all went to pot! There was no power to the cable. Undaunted and beginning to swelter from the oppressive spring heat, I traced the cable back and found it wasn't attached to the main cable. I attached it then tried again. Still no power. I unattached the cable and tried the grinder on the main cable. Nothing. I traced the main cable back to its origin which happened to be a pile of leaves. That was odd and there was no visible socket anywhere nearby. I have seen that cable in use though.
Undaunted and no longer in the mood to mess about, I went to the shed and pulled out m'lady's Harbor Freight 800w generator. It was a struggle but I carried it down to the fridge. Reading the instructions it was a case of putting the power switch into the on position, setting the choke and pulling the cord. I pulled and pulled and pulled and pulled some more. Now I know why the electrical cable has been in use. The generator just would not start!
Frustrated and exhausted, I put the generator back in the shed. Sure - it had fuel and I'd followed the instructions. There definitely was compression. It just wouldn't bloody well start. At that point I decided enough had gone wrong to merit not attempting any further work. It was the kind of day when nothing would work out and in my experience, it's better to miss a day than to make mistakes that cost yet more time and or money to fix.
My mind flitted to conversion discussions I'd read when I was a member of those silly bus conversion forums. One fool wanted to change the dual wheels at the back to single wheels just in order to cut down on tyres. The fact that the vehicle had been designed to use dual wheels did not enter into the silly person's head. Another individual wanted to change over to a different type of tyre. Instead of using the standard 10R22.5 he wanted to use something weird. The point is this is a bus. It will always be a bus no matter how it is retitled. The parts will cost exactly what bus parts cost. Yes the tyres are expensive. This is what you get when you buy a bus and people don't understand that. Honestly though, I suspect the vast majority of forum users that claim to have a bus actually do not. I recall one person swearing blind they lived in an old school bus but looking at their photos, they lived in a bus body that had been dismounted off the chassis. It was immobile and thus not a bus any more.
Having thought about things overnight, I have decided to go with the original plan for the drums in having them mounted crosswise. Instead of having a pair of drums under the shower, I decided to go with a single drum on each side. The steel chain I bought will hold 450lbs and since there will be 3 chains holding each barrel, that's 1,350lbs of holding power. I don't think a 125lb tank is going to go aywhere or that any one chain will break. I will still take precautions though!
By 3pm the sky was still very overcast and grey. The humidity was off the charts and work outside was just unpleasant. It was time to come inside and abandon the day in the hope that tomorrow will be a better day.
I would have put the microwave on the ground since it doesn't now look safe to use and put a few bullets though it, taken a picture and joked about the microwave being "shot" but what with the weather, I just didn't feel like it. My humble appologies - I'll do better next time!
Showing posts with label door. Show all posts
Showing posts with label door. Show all posts
Sunday, March 27, 2016

Sunday, March 20, 2016
What happened to the Playboy Bunny-girl?
Today was a bit of a mish-mash day that actually ended quite successfully. The day dawned rather too early which was not welcome. In fact, I was probably awake before 5am after having hit the sack about 1am. At 7am the alarm clock kicked me out of bed. That was followed by a rather lengthy trip to Walmart and Lowes (hiss, spit).
The overall aim of the morning's trip was to do the month's grocery shopping. While there, I took advantage of the fact that Walmart's garage was open (on a Sunday) and had them give my car a much needed oil change. While that was going on, m'lady and her mother went to do the grocery shopping and I nipped across the parking lot on foot (shock, horror - somebody in America daring to walk somewhere) into Lowes (hiss, spit) where I managed to get the U bolts I wanted, a replacement drill bit and absolutely no rivets. Lowes (hiss, spit) was totally out of 3/16 rivets!
Returning to Walmart, I picked up my car and then rejoined m'lady and her mother to discover that one of the Walmart minimum wage serfs had been insanely rude to them. Given that both m'lady and her mother are inoffensive people, that was totally inexcusable. No point in complaining though. Walmart's solution would just be to fire the disposable minimum wage serf rather than to fix the demonstrable problem with their staff's attitudes.
While in Walmart, I noted the aisles were full of Easter merchandise. I think this is probably about the closest I'm going to get to a Playboy Bunny though!

Having completed the shopping and returned home, it was time to catch up with my missing kip. So, a couple of hours later I headed to the bus and checked the running lights. Initially one of the tail lights was out but the bulb was OK so after wigglimg the bulb, the light lit. One of the top red markers is out as is one of the right hand amber markers. I'll get to those in due course.
Entering the bus, I looked around and my eye alighted on a small packet in my tool box. Yesterday I had hunted through that tool box several times looking for rivets. Incredibly, there was the packet of 3/16 rivets that I needed. Thus, I set to work.
The last two of my cheap self-adhesive paper blinds were stuck up very well. They took quite some pulling to remove. Given that the other 3 had simply fallen down under their own weight, I don't for one instant believe that they would have withstood the test of time. Thus, the two blinds in the bathroom were replaced.
The caribinas made moving the shower curtain very easy. It was just a case of unclip, reclip and done.Sadly the caribinas were too small to use with my lantern. That's not a problem though - I can always get a bigger caribina.
Slowly, things are coming together. I need to put the water tanks underneath, themain breaker box in, a method of securing items in the back closet, a method of opening the front door from outside and to secure the lower window of the back door.
The overall aim of the morning's trip was to do the month's grocery shopping. While there, I took advantage of the fact that Walmart's garage was open (on a Sunday) and had them give my car a much needed oil change. While that was going on, m'lady and her mother went to do the grocery shopping and I nipped across the parking lot on foot (shock, horror - somebody in America daring to walk somewhere) into Lowes (hiss, spit) where I managed to get the U bolts I wanted, a replacement drill bit and absolutely no rivets. Lowes (hiss, spit) was totally out of 3/16 rivets!
Returning to Walmart, I picked up my car and then rejoined m'lady and her mother to discover that one of the Walmart minimum wage serfs had been insanely rude to them. Given that both m'lady and her mother are inoffensive people, that was totally inexcusable. No point in complaining though. Walmart's solution would just be to fire the disposable minimum wage serf rather than to fix the demonstrable problem with their staff's attitudes.
While in Walmart, I noted the aisles were full of Easter merchandise. I think this is probably about the closest I'm going to get to a Playboy Bunny though!
Having completed the shopping and returned home, it was time to catch up with my missing kip. So, a couple of hours later I headed to the bus and checked the running lights. Initially one of the tail lights was out but the bulb was OK so after wigglimg the bulb, the light lit. One of the top red markers is out as is one of the right hand amber markers. I'll get to those in due course.
Entering the bus, I looked around and my eye alighted on a small packet in my tool box. Yesterday I had hunted through that tool box several times looking for rivets. Incredibly, there was the packet of 3/16 rivets that I needed. Thus, I set to work.
The last two of my cheap self-adhesive paper blinds were stuck up very well. They took quite some pulling to remove. Given that the other 3 had simply fallen down under their own weight, I don't for one instant believe that they would have withstood the test of time. Thus, the two blinds in the bathroom were replaced.
The caribinas made moving the shower curtain very easy. It was just a case of unclip, reclip and done.Sadly the caribinas were too small to use with my lantern. That's not a problem though - I can always get a bigger caribina.
Slowly, things are coming together. I need to put the water tanks underneath, themain breaker box in, a method of securing items in the back closet, a method of opening the front door from outside and to secure the lower window of the back door.
Saturday, January 30, 2016
How much work was done today?
Well, it doesn't sound like a lot but decisions were made which makes for big advances. Physical progress was limited to derusting and painting two pieces of steel from the ends of the roller shutter assembly I dismantled a while ago.

The ends had been held on by two very rusty bolts. When I took the main steel from it, I didn't undo the bolts - I just cut the top of the steel fairly close to the ends and let the ends drop off. Today I had to remove the bolts. Rather than fight with them, I simply cut them off with the angle grinder. Then I derusted the ends with the rust/paint stripping brush in the pistol drill and painted them with Rustoleum primer for rusty metal. One side got painted anyway. The other side needs painting now.
That all followed on from an investigation I carried out earlier into the prospect of putting a small compartment to replace the rather large hillbilly compartment. I'll probably have to get some 1/32 welding rods as my 1/16 might be too thick to weld bodywork steel. I'll try with my 1/16th first though. There is some air conditioner ducting lying around and if I can successfully weld that then I can successfully weld the bus steel.
The plan is to put a much smaller door on the bus for the compartment. As far as electrical power goes with a small battery, I'm not sure that I really want to weld a compartment there. Instead I'm thining I might just put a couple of straps and strap a steel ammunition box underneath containing my previously mentioned solution of using AA batteries, battery trays and a charge regulator. Basically, I'm going lightweight with pretty much everything.
While I was looking around underneath the bus, I found the reversing horn and was intending to test it but never actually got that far. I did notice that there was a sign on the chassis that said "Do not weld to nor drill into the flanges". The body is held on with steel clamps. I looked at the I girder the hillbillies had put on. That was welded via a spacer to the flange on the bottom of a chassis cross member. That was really close to a very readable sign that tells people not to do that! Let's just say that nothing the hillbillies did surprises me! That girder must be removed for two reasons.
Firstly the girder is unlikely to make a good trailer hitch since it is tack welded to the rear bumper and to the chassis cross member which makes it rather unlikely to be all that strong. Secondly, in the event of a rear collision, the chassis cross member could get bent. That would be a horribly difficult and expensive fix.
I put up self-adhesive blinds in the bathroom over two windows. That was quite easy. I stopped off at Walmart later and picked up three more in order to finish putting blinds on all the windows. The bathroom door window didn't have enough room to put a blind so I decided to get some opaque shower curtain material and attach it with velcro. It was then that I realised I could do exactly the same thing with the shower curtain over the shower.
I considered looking at replacement plates and dishes but didn't because I'm not quite ready to go there yet. At the moment I'm finishing getting the inside 100% habitable and getting the breaker box compartment completed. I'll do a lot of welding for that and am hoping my exisiting long steel rivets will work to attach the new compartment. The compartment will be a welded unit, riveted into position. I figure it would be better for rivets to be sheared in a collision from the side than for steel supports to be bent.
While I was out, I picked up a small set of steps. Those will be handy if not esential now that I have to remove the I girder. My way of ingress has to date been via the back door. The girder was in the right place to use as a step. Without that girder, steps will be needed and Walmart had just what I needed at a price I was prepared to pay.
Tomorrow the plan is to work toward constructing and installing the breaker box compartment. I will also press on with putting up the last of the blinds and consider putting up the shower curtain too. If there's time - which there could well be since I have to apply layers of paint then I'll probably have a go at removing the I girder. That's attached so poorly to the back bumper that cutting that weld should be very easy. The other end, I'll just cut the spacer as close to the top of the spacer as possible.
Once the breaker compartment is installed, the rest of the old cable compartment will be closed up. Following that, I'll have to install the new power connector. I bought a socket box and some extenders for it. That way I can install the new power connector. I had thought of making my own socket box but don't really have a suitable steel box and am not that confident about my welding ability.
Actually, having all the stuff as light as possible has two benefits - firstly it puts less stress on the skeleton and secondly, if it broke loose and fell off then it's less likely to be such a disaster when I'm driving. There is a third benefit that it makes the bus lighter and thus less thirsty on diesel.
Out of curiosity I have been playing with old vegetable oil. For most of the last six months I've been pouring old used vegetable oil into a 5 gallon bucket. Looking at it the other day, it all seems to have solidified. Clearly not quite what it's cracked up to be and not quite suitable for use in a diesel engine. Still, I'll find a use for it even if it's just painting on exposed steel to prevent rust.
That all followed on from an investigation I carried out earlier into the prospect of putting a small compartment to replace the rather large hillbilly compartment. I'll probably have to get some 1/32 welding rods as my 1/16 might be too thick to weld bodywork steel. I'll try with my 1/16th first though. There is some air conditioner ducting lying around and if I can successfully weld that then I can successfully weld the bus steel.
The plan is to put a much smaller door on the bus for the compartment. As far as electrical power goes with a small battery, I'm not sure that I really want to weld a compartment there. Instead I'm thining I might just put a couple of straps and strap a steel ammunition box underneath containing my previously mentioned solution of using AA batteries, battery trays and a charge regulator. Basically, I'm going lightweight with pretty much everything.
While I was looking around underneath the bus, I found the reversing horn and was intending to test it but never actually got that far. I did notice that there was a sign on the chassis that said "Do not weld to nor drill into the flanges". The body is held on with steel clamps. I looked at the I girder the hillbillies had put on. That was welded via a spacer to the flange on the bottom of a chassis cross member. That was really close to a very readable sign that tells people not to do that! Let's just say that nothing the hillbillies did surprises me! That girder must be removed for two reasons.
Firstly the girder is unlikely to make a good trailer hitch since it is tack welded to the rear bumper and to the chassis cross member which makes it rather unlikely to be all that strong. Secondly, in the event of a rear collision, the chassis cross member could get bent. That would be a horribly difficult and expensive fix.
I put up self-adhesive blinds in the bathroom over two windows. That was quite easy. I stopped off at Walmart later and picked up three more in order to finish putting blinds on all the windows. The bathroom door window didn't have enough room to put a blind so I decided to get some opaque shower curtain material and attach it with velcro. It was then that I realised I could do exactly the same thing with the shower curtain over the shower.
I considered looking at replacement plates and dishes but didn't because I'm not quite ready to go there yet. At the moment I'm finishing getting the inside 100% habitable and getting the breaker box compartment completed. I'll do a lot of welding for that and am hoping my exisiting long steel rivets will work to attach the new compartment. The compartment will be a welded unit, riveted into position. I figure it would be better for rivets to be sheared in a collision from the side than for steel supports to be bent.
While I was out, I picked up a small set of steps. Those will be handy if not esential now that I have to remove the I girder. My way of ingress has to date been via the back door. The girder was in the right place to use as a step. Without that girder, steps will be needed and Walmart had just what I needed at a price I was prepared to pay.
Tomorrow the plan is to work toward constructing and installing the breaker box compartment. I will also press on with putting up the last of the blinds and consider putting up the shower curtain too. If there's time - which there could well be since I have to apply layers of paint then I'll probably have a go at removing the I girder. That's attached so poorly to the back bumper that cutting that weld should be very easy. The other end, I'll just cut the spacer as close to the top of the spacer as possible.
Once the breaker compartment is installed, the rest of the old cable compartment will be closed up. Following that, I'll have to install the new power connector. I bought a socket box and some extenders for it. That way I can install the new power connector. I had thought of making my own socket box but don't really have a suitable steel box and am not that confident about my welding ability.
Actually, having all the stuff as light as possible has two benefits - firstly it puts less stress on the skeleton and secondly, if it broke loose and fell off then it's less likely to be such a disaster when I'm driving. There is a third benefit that it makes the bus lighter and thus less thirsty on diesel.
Out of curiosity I have been playing with old vegetable oil. For most of the last six months I've been pouring old used vegetable oil into a 5 gallon bucket. Looking at it the other day, it all seems to have solidified. Clearly not quite what it's cracked up to be and not quite suitable for use in a diesel engine. Still, I'll find a use for it even if it's just painting on exposed steel to prevent rust.
Saturday, January 2, 2016
The mother of all videos!
The quest continued today, despite my back injury to build the front door unlocking mechanism. There were plenty frustrations today! I'm in no way going to throw the towel in on this one. Even if what I come out with costs way more than anybody else's solution, I will perservere.
Today was fraught with difficulty. Yesterday or the day before, I'd reglued the end of my wire to the brass tube. After I'd finished winding the coil, the damn glue failed again! So my nicely wound coil suddenly sprang loose and ended up looking more like a slinky than anything else. Wrapping tape and spraying glue ended up with a loosely wound coil that's definitely not to my liking. I might re-wrap that coil another day.

Next, I connected a pp3 battery clip to the two wires. That was a challenge as the enamel on the wire was extrordinarily thick. Normally it's easy to burn through with a soldering iron. This was most definitey not easy and had to be scraped off.
What I'm trying to do is to rig up a method of lifting the latch that holds the front door closed without going to extremes such as electric garage door openers that require the door to be both opened and closed electrically or other severe methods such as replacing the entire door assemly. This is such a simple thing to do yet is proving to be extraordinarily difficult!

The upshot of today's work (which I'll probably have to redo) is that I did manage to make a rare earth permanent magnet move out of my coil. It had little to no actual power behind it which is a major problem. I'm currently running it off 6v. I'll have to try raising the power to 12v but this is not currently looking promising. I have found that I was correct in using a permanent magnet with my coil however. I suspect I might get more luck with more power and possibly extra coil windings.
As you can see - it's not that powerful even though it is spectacular. It looks to have the right amount of throw to open my latch - just not yet enough power.
Today was fraught with difficulty. Yesterday or the day before, I'd reglued the end of my wire to the brass tube. After I'd finished winding the coil, the damn glue failed again! So my nicely wound coil suddenly sprang loose and ended up looking more like a slinky than anything else. Wrapping tape and spraying glue ended up with a loosely wound coil that's definitely not to my liking. I might re-wrap that coil another day.
What I'm trying to do is to rig up a method of lifting the latch that holds the front door closed without going to extremes such as electric garage door openers that require the door to be both opened and closed electrically or other severe methods such as replacing the entire door assemly. This is such a simple thing to do yet is proving to be extraordinarily difficult!
The upshot of today's work (which I'll probably have to redo) is that I did manage to make a rare earth permanent magnet move out of my coil. It had little to no actual power behind it which is a major problem. I'm currently running it off 6v. I'll have to try raising the power to 12v but this is not currently looking promising. I have found that I was correct in using a permanent magnet with my coil however. I suspect I might get more luck with more power and possibly extra coil windings.
Saturday, November 21, 2015
Haltering progress
As with everything bus, this weekend looks like being little to no progress. Half the things I need have not yet arrived.
Yesterday's shopping trip could have been better and I returned to Home Depot to see whether I could find anything better. I didn't and none of the sales staff seemed to want to do anything other than chat amongst themselves. No point in making a stink about that - they're minimum wage dross who probably can't find a real job. There are a lot of people stuck in worthless retail positions because the mythical masses of jobs just don't exist. The US is still in a very deep depression while the leaders are pretending its not so.
The plan was to bury my cable in conduit. Looking at the ground, although it's sandy, there are an awful lot of tree roots. I had an idea that I should just use a 100 foot 30A extension cable instead. It turned out that would have cost $150. A 20A extension cable 100 feet long was equally costly. While a 15A cable was better priced, it would not have sufficed.
The original plan was thus resurrected. It was suggested to me that rather than digging a trench, I could just lay the cable in a conduit and simply cover the conduit with dirt and rocks. As the conduit would be in an area nobody would work or walk, that would probably work.
Meanwhile, I looked around for the scrap angle iron I'd seen the other day and couldn't find it. That's 100% due to annual inflation in the leaf economy (Autumn). I did find another suitable piece of steel though. I even found steel plate that looked suitable for a battery compartment floor!
Looking around further there was even a rust free carriage bolt that looked usable as the electro magnet I need in order to spring the front door latch. With sufficient coils, the door should open easily. I can't wait to be able to get in and out of the front door.
Today was hindered by a virus. I'm going to take it relatively easily this weekend. Laying cables in overland conduit sounds like a nice light task, the same as making an electromagnet.
Yesterday's shopping trip could have been better and I returned to Home Depot to see whether I could find anything better. I didn't and none of the sales staff seemed to want to do anything other than chat amongst themselves. No point in making a stink about that - they're minimum wage dross who probably can't find a real job. There are a lot of people stuck in worthless retail positions because the mythical masses of jobs just don't exist. The US is still in a very deep depression while the leaders are pretending its not so.
The plan was to bury my cable in conduit. Looking at the ground, although it's sandy, there are an awful lot of tree roots. I had an idea that I should just use a 100 foot 30A extension cable instead. It turned out that would have cost $150. A 20A extension cable 100 feet long was equally costly. While a 15A cable was better priced, it would not have sufficed.
The original plan was thus resurrected. It was suggested to me that rather than digging a trench, I could just lay the cable in a conduit and simply cover the conduit with dirt and rocks. As the conduit would be in an area nobody would work or walk, that would probably work.
Meanwhile, I looked around for the scrap angle iron I'd seen the other day and couldn't find it. That's 100% due to annual inflation in the leaf economy (Autumn). I did find another suitable piece of steel though. I even found steel plate that looked suitable for a battery compartment floor!
Looking around further there was even a rust free carriage bolt that looked usable as the electro magnet I need in order to spring the front door latch. With sufficient coils, the door should open easily. I can't wait to be able to get in and out of the front door.
Today was hindered by a virus. I'm going to take it relatively easily this weekend. Laying cables in overland conduit sounds like a nice light task, the same as making an electromagnet.
Saturday, November 7, 2015
I might recover
Today started with the intention of taking my car for an oil change and getting a few things for the bus. That's when all the trouble started..
Reaching the dog food place I'd been told about, there were plenty empty 30 gallon open top barrels. Sadly they're too big at 18 inches diameter. I need 15 gallon barrels. Resigning myself to having to buy barrels at $40 each plus $20 shipping, I headed to Home Depot.
As normal in Home Depot, nobody could understand basic English so I spent the next hour browsing the plumbing bits. The plan was to sling a barrel underneath the bus using nylon cargo straps. It was then that I had an epiphany... Why not instead of using 15 gallon drums, use a few 5 gallon buckets with lids from Walmart at $2.50 for the bucket and $2 for the lid? I hunted in vain for a threaded tube with nuts that could be used with rubber gaskets to create a waterproof port through the bucket lid. This would have been ideal but bar a product sample display, nothing was available.

Abandoning the bucket or barrel idea, I bought some Allen keys that would allow me to disassemble my Harbor Freight grit blaster head in order to work on it. As 13/64 was the recommended drill size for a 1/4x20 bolt, I also bought two such drill bits with hexagon heads.
Moving on to Tractor Supply, I picked up a handful of nuts and a handful of stop nuts. Then I emptied the 1/4x20 by 1" bolt drawer into a bag. There weren't many left but they're all mine now. Checking for water tanks, they had a 30 gallon tank that looked very nice but it was way too large. I looked and they had better plumbing supplies than Home Depot but nothing that would make my bucket idea work properly. I left after buying just nuts and bolts.
The next step was the garage for an oil change. Sadly I was too late (at 3:00) as they were packing up to go home. Typical! From there I went to Walmart where I intended just to get a soft drink and some batteries. There, I had another epiphany. I realised that under the shower outflow, I could just put a bucket with a lid. Under the bathroom handbasin I could just put a bucket with a lid too. Tanotherr), I purchased three buckets. One for shower water, one for handbasin water and one for the toilet. This Walmart had no buckets.
While in Tractor Supply I had noticed blue plastic 5 gallon Jerry cans for $25 each. Walmart had two of the same blue plastic Jerry cans for $13 each. They don't now!
Moving swiftly on, the next stop was Radio Shack for some electronic gubbins. Four capacitors, two battery holders and a couple of other little things reminded me what an outrageously expensive place Radio Shack is! I should have ordered from China via eBay, waited 2 weeks and paid 10% of what Radio Shyster charged.
Next was fuel. That was a ripoff too. Last time it was $1.75 a gallon. Today it was $2 a gallon! Moving swiftly on after putting $20 in the tank, I visited the next Walmart for something not available at the first - the buckets. In that Walmart I got the three buckets and noticed the blue plastic Jerry cans were $15. Clearly different Walmarts have different prices.
Actually, the three local Walmarts are quite wild. The one in Red Bank has somewhat of a reputation for sleaze and gunfights in the car park. The one in Lexington has ladies of the night doing their shopping. The one in West Columbia closes at 10pm because they get robbed if they stay open later. That's probably the most dangerous Walmart as I've seen cars riddled with bullet holes in their car park.
So, I proceeded home. The first task was to work on the grit blaster gun. I cleared some clogs and enlarged some holes as suggested on the reviews of the grit blaster. If it doesn't work at all now then I haven't lost anything because it didn't work before.
The new plan for bus plumbing is to use the shower just as a shower, the bathroom handbasin as a handbasin and have the handbasin empty into a bucket. A different bucket goes under the shower outflow. That might benefit from extra plumbing in order to make positioning the bucket easier. Fresh water is carried in 5 gallon Jerry cans. There's plenty room to stand them in the shower when the shower is not in use.
The plan for the electrical compartment remains the same. I'll drill out the holes to 13/64 and put 1/4x20 bolts through. Meanwhile, if it turns out I need to cook and don't have electricity, I can simply use a sterno stove on a fireproof pad.

The 5 gallon Jerry cans were somewhat of a brainwave. They stand very nicely by the shower. Another will fit (when I get it) very nicely beside the bucket underneath the handbasin. I'm not too bothered about collecting shower water as I rather suspect that nobody will much notice nor care about it. Besides, I can always say somebody pinched the bucket!

I attacked the problem of the door mechanism next and put 6v from D cells into my electro magnets. They refused to repel each other. Clearly something is amiss there! I'll put those down as being cheap Chinese junk. I have never before encountered an electro magnet that would attract steel and attract another electro magnet but would not repel another electro magnet when the power, hence the fields are reversed or rather, opposing.

Next I put some numbers on the bus. Tractor Supply had the cheapest numbers at 48 cents each. I realise I could have sprayed the bumpers but since the Rustoleum garbage doesn't seem to stick to anything whether the surface has been prepared or not, I just used stick on letters rather than spending time with a stencil and a paintbrush.

Clearly I'm going to have to wind my own electro magnets. This, I can do. I'll have to buy some thick enough bolts but that looks like being the solution.
Plumbing has been downgraded to a much simpler and cheaper affair. Indeed, I wonder whether now, its better on several grounds. The cable compartment as is, kinda works. It's just not safe for a battery. Thus, rebuilding that is a priority.
Thinking about protecting crockery in drawers, another yoga mat could be sliced up in order to make liners and dividers. Clearly I need to tidy and clean the bus. The inside is pretty well done. I just need to clean the floors, put in drawer liners where needed, put up some curtains and shower curtains etc. One problem I had was that my bucket won't fit in the toilet side of my toilet unit. The square kitty litter box will, however. Clearly I need a second kitty litter container. I must have designed it like that and forgotten.
I'm definitely going to have to put some kind of solar panel to maintain the bus batteries. I can't have them going flat all the time! There's probably a power leak somewhere and that'll just be hard to trace!
I'll have to see now about registering the bus as a motorhome.
Reaching the dog food place I'd been told about, there were plenty empty 30 gallon open top barrels. Sadly they're too big at 18 inches diameter. I need 15 gallon barrels. Resigning myself to having to buy barrels at $40 each plus $20 shipping, I headed to Home Depot.
As normal in Home Depot, nobody could understand basic English so I spent the next hour browsing the plumbing bits. The plan was to sling a barrel underneath the bus using nylon cargo straps. It was then that I had an epiphany... Why not instead of using 15 gallon drums, use a few 5 gallon buckets with lids from Walmart at $2.50 for the bucket and $2 for the lid? I hunted in vain for a threaded tube with nuts that could be used with rubber gaskets to create a waterproof port through the bucket lid. This would have been ideal but bar a product sample display, nothing was available.

Abandoning the bucket or barrel idea, I bought some Allen keys that would allow me to disassemble my Harbor Freight grit blaster head in order to work on it. As 13/64 was the recommended drill size for a 1/4x20 bolt, I also bought two such drill bits with hexagon heads.
Moving on to Tractor Supply, I picked up a handful of nuts and a handful of stop nuts. Then I emptied the 1/4x20 by 1" bolt drawer into a bag. There weren't many left but they're all mine now. Checking for water tanks, they had a 30 gallon tank that looked very nice but it was way too large. I looked and they had better plumbing supplies than Home Depot but nothing that would make my bucket idea work properly. I left after buying just nuts and bolts.
The next step was the garage for an oil change. Sadly I was too late (at 3:00) as they were packing up to go home. Typical! From there I went to Walmart where I intended just to get a soft drink and some batteries. There, I had another epiphany. I realised that under the shower outflow, I could just put a bucket with a lid. Under the bathroom handbasin I could just put a bucket with a lid too. Tanotherr), I purchased three buckets. One for shower water, one for handbasin water and one for the toilet. This Walmart had no buckets.
While in Tractor Supply I had noticed blue plastic 5 gallon Jerry cans for $25 each. Walmart had two of the same blue plastic Jerry cans for $13 each. They don't now!
Moving swiftly on, the next stop was Radio Shack for some electronic gubbins. Four capacitors, two battery holders and a couple of other little things reminded me what an outrageously expensive place Radio Shack is! I should have ordered from China via eBay, waited 2 weeks and paid 10% of what Radio Shyster charged.
Next was fuel. That was a ripoff too. Last time it was $1.75 a gallon. Today it was $2 a gallon! Moving swiftly on after putting $20 in the tank, I visited the next Walmart for something not available at the first - the buckets. In that Walmart I got the three buckets and noticed the blue plastic Jerry cans were $15. Clearly different Walmarts have different prices.
Actually, the three local Walmarts are quite wild. The one in Red Bank has somewhat of a reputation for sleaze and gunfights in the car park. The one in Lexington has ladies of the night doing their shopping. The one in West Columbia closes at 10pm because they get robbed if they stay open later. That's probably the most dangerous Walmart as I've seen cars riddled with bullet holes in their car park.
So, I proceeded home. The first task was to work on the grit blaster gun. I cleared some clogs and enlarged some holes as suggested on the reviews of the grit blaster. If it doesn't work at all now then I haven't lost anything because it didn't work before.
The new plan for bus plumbing is to use the shower just as a shower, the bathroom handbasin as a handbasin and have the handbasin empty into a bucket. A different bucket goes under the shower outflow. That might benefit from extra plumbing in order to make positioning the bucket easier. Fresh water is carried in 5 gallon Jerry cans. There's plenty room to stand them in the shower when the shower is not in use.
The plan for the electrical compartment remains the same. I'll drill out the holes to 13/64 and put 1/4x20 bolts through. Meanwhile, if it turns out I need to cook and don't have electricity, I can simply use a sterno stove on a fireproof pad.

The 5 gallon Jerry cans were somewhat of a brainwave. They stand very nicely by the shower. Another will fit (when I get it) very nicely beside the bucket underneath the handbasin. I'm not too bothered about collecting shower water as I rather suspect that nobody will much notice nor care about it. Besides, I can always say somebody pinched the bucket!

I attacked the problem of the door mechanism next and put 6v from D cells into my electro magnets. They refused to repel each other. Clearly something is amiss there! I'll put those down as being cheap Chinese junk. I have never before encountered an electro magnet that would attract steel and attract another electro magnet but would not repel another electro magnet when the power, hence the fields are reversed or rather, opposing.

Next I put some numbers on the bus. Tractor Supply had the cheapest numbers at 48 cents each. I realise I could have sprayed the bumpers but since the Rustoleum garbage doesn't seem to stick to anything whether the surface has been prepared or not, I just used stick on letters rather than spending time with a stencil and a paintbrush.

Clearly I'm going to have to wind my own electro magnets. This, I can do. I'll have to buy some thick enough bolts but that looks like being the solution.
Plumbing has been downgraded to a much simpler and cheaper affair. Indeed, I wonder whether now, its better on several grounds. The cable compartment as is, kinda works. It's just not safe for a battery. Thus, rebuilding that is a priority.
Thinking about protecting crockery in drawers, another yoga mat could be sliced up in order to make liners and dividers. Clearly I need to tidy and clean the bus. The inside is pretty well done. I just need to clean the floors, put in drawer liners where needed, put up some curtains and shower curtains etc. One problem I had was that my bucket won't fit in the toilet side of my toilet unit. The square kitty litter box will, however. Clearly I need a second kitty litter container. I must have designed it like that and forgotten.
I'm definitely going to have to put some kind of solar panel to maintain the bus batteries. I can't have them going flat all the time! There's probably a power leak somewhere and that'll just be hard to trace!
I'll have to see now about registering the bus as a motorhome.
Friday, November 6, 2015
Thinking capacitors and barrels

I don't have any capacitors in my electrical gubbins box. Doing a little light reading, it seems that I could put a capacitor to charge from my 9v battery then discharge through my electro magnets.
Using my key switch, I have two positions. The first can be used to charge the capacitor and the second to release the charge through the magnets.
As I understand capacitors, they remember the voltage put into them and then build up to capacity with power. The 9v battery trickles power out at a low rate. The capacitor can dump it at a high rate. Thinking of it like a dripping tap, dripping into a bucket, the bucket will fill slowly. Emptying the bucket can be done faster. Indeed a bucket of water filled from a tap is my fail proof method of unlocking a blocked toilet!
So, the new idea is to keep on with the 9v battery but to add a capacitor to dump power into the magnets. I have no idea how much power I'll need so I'll have a look in Radio Shack for their biggest electrolytic capacitor. I gather a diode is recommended in order to protect the capacitor so I'll put one, even though the pp3 battery connector is unidirectional.
It could be that I'm barking up the wrong tree with those magnets. They could be junk but it's worth a shot. It's not an urgent task. Worst case scenario, I just say stuff it and wire the magnets via the bus 12v battery and see what happens. Given an adequate fuse, nothing should be that bad!
Meanwhile, I'm going to look for barrels tomorrow. Word has reached me via the grapevine that somebody locally has a pile of 15 gallon barrels for sale. That's tomorrow's task!
Thursday, November 5, 2015
Aha or uh-huh or something like that!
On my way from the treadmill back to my bus, I paused as planned at the dollar store. Navigating around obstacles such as empty boxes, transport dollies, uncooperative customers, spilled nastiness on the floors and collapsed shelving, I located the battery rack.
The battery rack didn't have a great selection of batteries so I chose a PP3 9v battery. This was probably a mistake. I'd probably have been better off with 6 D cells though as yet I don't have a holder for 6 D cells.
The original idea for the magnet was to run two in opposition to lift the latch that locks the bus door. As 9v magnets were available, it seemed sensible to use 9v magnets and run them off a separate battery rather than use the bus battery.
As it turns out, the magnets do repel each other but the pp3 battery does not put out enough power to make the magnets work really well. As grippers, the magnets do an excellent job. They're supposed to be grippers. I need them to repel too though.
The next task will be to get 6 D cells and solder them together. That should provide ample power to work the magnets. Another idea would be to charge a capacitor from the 9v battery and use that to activate the magnets. That would involve fiddling around good a week or two with electronics and no guarantee of success. Keeping it simple seems best.
It might turn out that the magnets just won't work and I'll have to make my own. I'm hoping that's not going to be the case but it might have been better to do that from the start.
So, tomorrow's task is to get a pile of D cells. I can always use D cells for my lantern and my shower pump.
Meanwhile, I've got a slight dampness in the cockpit. I'm not sure where its coming from but I'll have to look at the roof seams again. Speaking of which, Eric mentioned roof flashing repair tape and yesterday I saw quite a selection of tapes available to repair roof seams. Some are quite expensive!
The battery rack didn't have a great selection of batteries so I chose a PP3 9v battery. This was probably a mistake. I'd probably have been better off with 6 D cells though as yet I don't have a holder for 6 D cells.
The original idea for the magnet was to run two in opposition to lift the latch that locks the bus door. As 9v magnets were available, it seemed sensible to use 9v magnets and run them off a separate battery rather than use the bus battery.
As it turns out, the magnets do repel each other but the pp3 battery does not put out enough power to make the magnets work really well. As grippers, the magnets do an excellent job. They're supposed to be grippers. I need them to repel too though.
The next task will be to get 6 D cells and solder them together. That should provide ample power to work the magnets. Another idea would be to charge a capacitor from the 9v battery and use that to activate the magnets. That would involve fiddling around good a week or two with electronics and no guarantee of success. Keeping it simple seems best.
It might turn out that the magnets just won't work and I'll have to make my own. I'm hoping that's not going to be the case but it might have been better to do that from the start.
So, tomorrow's task is to get a pile of D cells. I can always use D cells for my lantern and my shower pump.
Meanwhile, I've got a slight dampness in the cockpit. I'm not sure where its coming from but I'll have to look at the roof seams again. Speaking of which, Eric mentioned roof flashing repair tape and yesterday I saw quite a selection of tapes available to repair roof seams. Some are quite expensive!
Sunday, November 1, 2015
The new plan
Today I went onto the bus and fixed some warped hardboard which had warped due to the water ingress from the leaking roof last month. The door between the cockpit and the galley needed adjustment too. That had been badly warped but now it works correctly.
Thinking about the battery carrier problem, I realised I might have been overreacting. Thus, today I went ahead and got some more tools from Harbor Freight. I'd been in need of a better rivet gun and of some deep sockets so I picked those up. A welder was not on my list this time.

The rivets should have a sheer strength of 900lbs which means plain rivets should work. I'll have to see if the bolt holes are too big. If they are then I'll use 1/4x20 bolts instead. Otherwise, I'll try rivets.
Meanwhile, I'm looking into two other things. The first is super capacitors and the second is thermo electric generators. In order to power a microwave for 20 minutes, I'd need 1200w at 110v. Given the losses from an inverter of around 15%, the power supply at 12v would have to provide 12,650W. Given that my favourite battery would provide 500CCA, I'd need a bank of at least 14 in order not to overload any of the batteries. That would cost at least $1,000, weigh at least 700lbs and take way more space than there is space available.
Super capacitors can provide a lot of power quickly. They're not as energy dense as batteries but the idea is that if they could provide a 20 minute burst of power, they could be backed by just one lead acid battery. The task now is to find a super capacitor setup that can provide sufficient power.
As far as thermoelectric power generation is concerned, I have a feeling that like most non gasoline powered generators, its going to be expensive or worthless in terms of power generated. The two methods under current investigation are Stirling generators and Peltier generators. Stirling generators use magnets and coils together with a closed air system. Peltier generators use heat difference to generate power.
Thinking about the battery carrier problem, I realised I might have been overreacting. Thus, today I went ahead and got some more tools from Harbor Freight. I'd been in need of a better rivet gun and of some deep sockets so I picked those up. A welder was not on my list this time.

The rivets should have a sheer strength of 900lbs which means plain rivets should work. I'll have to see if the bolt holes are too big. If they are then I'll use 1/4x20 bolts instead. Otherwise, I'll try rivets.
Meanwhile, I'm looking into two other things. The first is super capacitors and the second is thermo electric generators. In order to power a microwave for 20 minutes, I'd need 1200w at 110v. Given the losses from an inverter of around 15%, the power supply at 12v would have to provide 12,650W. Given that my favourite battery would provide 500CCA, I'd need a bank of at least 14 in order not to overload any of the batteries. That would cost at least $1,000, weigh at least 700lbs and take way more space than there is space available.
Super capacitors can provide a lot of power quickly. They're not as energy dense as batteries but the idea is that if they could provide a 20 minute burst of power, they could be backed by just one lead acid battery. The task now is to find a super capacitor setup that can provide sufficient power.
As far as thermoelectric power generation is concerned, I have a feeling that like most non gasoline powered generators, its going to be expensive or worthless in terms of power generated. The two methods under current investigation are Stirling generators and Peltier generators. Stirling generators use magnets and coils together with a closed air system. Peltier generators use heat difference to generate power.
Friday, October 23, 2015
Lol. What a load of plonkers!
Out of interest, I had another look at the bus conversion forum online. Yup... They're still mostly plonkers. I put a simple question about paint and had answers from the outlandish to the ridiculous. Not one could name a barrier primer nor the best value economy top coat yet they all claim to have busses and all claim to have repainted them!
Today I visited Tractor Supply. I didn't buy much. In fact I spent less than $10 but in addition to 100 10-24 nuts and two M4 bolts. I got some 1\4x20 bolts, nuts and lock nuts. Thinking about it, I'd probably have been better off buying all my nuts and bolts from Tractor Supply as they sell them by the pound!
The 1\4x20 bolts will carry way in excess of 1200lbs before sheering. Again, looking for the sheer strength online produced very dubious looking figures. My usual go-to source of The Handbook of Chemistry and Physics didn't have anything bar a definition of sheer strength. Perhaps my engineering handbook would but at the moment it cannot be located.

The 4mm bolt did the biz. This screws into my electro magnet nicely. The bolt is a shade too long but I can always space it off with washers or even trim the bolt a shade with my angle grinder. All I need is to bolt one to a steel bracket and the other to the underside of the latch and the bracket to the bulkhead beneath the latch and its a very simple electro unlocking mechanism. They always say to keep it simple!
If the dual electro magnet affair works as hoped then it would be possible to add remote unlocking. Remote locking could be more challenging, however.
Thinking about a pull on the front door to close it, I realised that as I have a penchant for large size keyrings, I could put a small hook on the outside of the door and use my keyring to pull it shut. Thus I would also be more certain of not locking my keys in the bus!
Today I visited Tractor Supply. I didn't buy much. In fact I spent less than $10 but in addition to 100 10-24 nuts and two M4 bolts. I got some 1\4x20 bolts, nuts and lock nuts. Thinking about it, I'd probably have been better off buying all my nuts and bolts from Tractor Supply as they sell them by the pound!
The 1\4x20 bolts will carry way in excess of 1200lbs before sheering. Again, looking for the sheer strength online produced very dubious looking figures. My usual go-to source of The Handbook of Chemistry and Physics didn't have anything bar a definition of sheer strength. Perhaps my engineering handbook would but at the moment it cannot be located.

The 4mm bolt did the biz. This screws into my electro magnet nicely. The bolt is a shade too long but I can always space it off with washers or even trim the bolt a shade with my angle grinder. All I need is to bolt one to a steel bracket and the other to the underside of the latch and the bracket to the bulkhead beneath the latch and its a very simple electro unlocking mechanism. They always say to keep it simple!
If the dual electro magnet affair works as hoped then it would be possible to add remote unlocking. Remote locking could be more challenging, however.
Thinking about a pull on the front door to close it, I realised that as I have a penchant for large size keyrings, I could put a small hook on the outside of the door and use my keyring to pull it shut. Thus I would also be more certain of not locking my keys in the bus!
Sunday, October 18, 2015
The shower sucked!
Again today I moved the bus. It wasn't quite where I wanted it and its still not exactly in the right place but it's good enough. It started though not as easily as yesterday. Clearly I need to put a battery maintaining solar panel in place.
Next I slipped under the bus and loosened the shower pipe nut. Tomorrow I might slip under again to check whether there's any leakage from my plumbing work.
Having loosened the pipe, I went into the bus and took the drain out of my shower pan before adjusting the hole in the floor to better accommodate the nut on the bottom of the shower pan and then adjusted the underside of the pan. There were ridges where the pan would have a waterproof washer. I smoothed those out then reassembled, adding copious quantities of plumbers glue.

Finally the shower base was all tightened down. Some say my $18 rubber shower base won't last long. People fail to realize none of this has to last a long time. It can all be upgraded when finances allow. Right now I'm having to do everything all at once and that's taking all my budget.
Next I tried the battery powered shower unit. It seemed to work well enough though there were two issues. First it didn't lift the water very high. That could be the alkaline batteries. Perhaps it'll work better with rechargeable. Secondly the Chenglish instructions aren't that great.
To get the pump to work I had to pump a manual pump on the bottom of the head unit in order to prime the pump. That should tell you right there that it's not a top quality unit. The good stuff self primes. It's just a weak motor - possibly an impeller.

Having said all that, it worked quite well. It did lift the water about three feet. The reviews of the unit are poor but I really think that for $20 or thereabouts, its not bad. The pump unit can always be replaced with something more powerful. As I said earlier, I'm doing all the construction over about a year. Even though I'm not now paying much rent, $9 an hour doesn't pay for much especially when it's part time. Sadly, that's all I can get at the moment. That's the basic reason for the bus - cheaper accommodation and I can drive to where the work is. Clearly there's none anywhere near Columbia, South Carolina as none is advertised.

This is the key switch I ordered. It arrived a few days ago. This is a high security ignition switch from a Harley Davidson. It has to be switched on then off rather than being the momentary action switch I'd wanted. On the other hand, its not beyond the realm of possibility to make the magnet into a momentary action device. Needless to say, the magnet is now speeding its way from China with the urgency of a retarded snail!
Meanwhile, I have two tasks I can complete. The first is finishing the cleaning then the decor of the bus. There is, of course, the battery compartment. I might investigate how much it would cost to have the brackets welded. That way I can get a couple of dozen 1\4 x 20 nuts and bolts and be done.
Next I slipped under the bus and loosened the shower pipe nut. Tomorrow I might slip under again to check whether there's any leakage from my plumbing work.
Having loosened the pipe, I went into the bus and took the drain out of my shower pan before adjusting the hole in the floor to better accommodate the nut on the bottom of the shower pan and then adjusted the underside of the pan. There were ridges where the pan would have a waterproof washer. I smoothed those out then reassembled, adding copious quantities of plumbers glue.

Finally the shower base was all tightened down. Some say my $18 rubber shower base won't last long. People fail to realize none of this has to last a long time. It can all be upgraded when finances allow. Right now I'm having to do everything all at once and that's taking all my budget.
Next I tried the battery powered shower unit. It seemed to work well enough though there were two issues. First it didn't lift the water very high. That could be the alkaline batteries. Perhaps it'll work better with rechargeable. Secondly the Chenglish instructions aren't that great.
To get the pump to work I had to pump a manual pump on the bottom of the head unit in order to prime the pump. That should tell you right there that it's not a top quality unit. The good stuff self primes. It's just a weak motor - possibly an impeller.

Having said all that, it worked quite well. It did lift the water about three feet. The reviews of the unit are poor but I really think that for $20 or thereabouts, its not bad. The pump unit can always be replaced with something more powerful. As I said earlier, I'm doing all the construction over about a year. Even though I'm not now paying much rent, $9 an hour doesn't pay for much especially when it's part time. Sadly, that's all I can get at the moment. That's the basic reason for the bus - cheaper accommodation and I can drive to where the work is. Clearly there's none anywhere near Columbia, South Carolina as none is advertised.

This is the key switch I ordered. It arrived a few days ago. This is a high security ignition switch from a Harley Davidson. It has to be switched on then off rather than being the momentary action switch I'd wanted. On the other hand, its not beyond the realm of possibility to make the magnet into a momentary action device. Needless to say, the magnet is now speeding its way from China with the urgency of a retarded snail!
Meanwhile, I have two tasks I can complete. The first is finishing the cleaning then the decor of the bus. There is, of course, the battery compartment. I might investigate how much it would cost to have the brackets welded. That way I can get a couple of dozen 1\4 x 20 nuts and bolts and be done.
Sunday, September 13, 2015
Red letter day!
That's an old Chinese thing. In China, a red letter means good luck. Usually on a red letter day, children receive envelopes stuffed with money.
No money for me though. The nearest to a genuine red letter is that my electrics as installed, work. I tested each of the three sockets by plugging in a humble fan. The main breaker box is not yet secured due to my needing to rebuild the hillbilly battery compartment but this is how it looks.


The whole system is earthed and the white and black wires are in the correct places. This is a very simple system with 3 sockets only. There is room for future expansion on the breaker box and, replacing the inlet cable, the system can go to a maximum of 55A. If the cable between the breakers were to be replaced, 100A would be almost possible.
The ratings on my system as installed are:
1. Electrical sockets - 20A
2. Wire betwixt sockets and distribution panel - 30A
3. Distribution panel - 125A
4. Wire betwixt distribution panel and main breaker box - 55A
5. Main breaker box - 70A
6. Wire betwixt main breaker box and plug - 30A
7. Plug - 30A
8. Breakers in distribution panel - 15A (all six)
9. Breaker in main box - 30A - dual breaker.
So, my system can take much higher amperage assuming portions closer to the supply are changed. I regard this as being a safe system. Indeed, if anybody can see a problem, I'd like to know about it!
By the way, for anybody wanting to use 30A solid, 30A flexible and 55A solid wire, yes it is hard to work with! It took a good couple of hours to complete what I just have. Partly this is because I am still not 100% recovered from my virus but also because the wire was hard to work with and I was being very careful to get it right.
My bus electrics are now 100% complete on the 110v side. Next comes the plumbing. For that, I need a few things. As it is, it should pass inspection as a motorhome. And I'm only 8 months, 12 days behind schedule! Mind, my schedule was over ambitious.
What followed the electrics was little short of a miracle. I removed the large pieces of construction debris and stored the surplus materials in a nearby shed. Given that I'm not over my bug, that was a lot of work. I can almost reach the driving seat now.
The hillbilly underbody compartment wasn't quite as bad as it looked. Certainly its badly installed and for that reason alone, needs to be replaced. It is, however made of inch thick marine plywood. I found that out when I drilled a hole through it to allow me to plug my electrical cable in from underneath.
Where the hillbillies went wrong was in not painting their plywood on the inside of the compartment. Having seen that, I'm minded to use plywood for my compartments. Mine, however will be painted white on the inside but with oil based paints rather than latex. Unlike the hillbillies, my compartments will have angle iron on the corners, strengthening and supporting them.
Thinking ahead to a 12v battery system which will power future extraction fans, charging ports etc, I'll have to find how much weight plywood will support to see how much bracing to use to support a battery. I have a feeling that just a single 105ah 12v marine deep cycle battery will provide for most of my needs. Of course, if later I use batteries to power my fridge, I might have to raise that capacity.
Thinking further, until I have sufficient solar and battery capacity to power a microwave, I could perhaps use a cheap generator to provide 800w to run the microwave while taking 240w from batteries to gain the 1040w needed. That would take me squarely into boondocking territory!
Later, after dinner, I returned to the bus and cut the PVC planking to the right size to fit my shower base. In a few days I'll have the base put together and the bus fully cleaned.
My favorite place at the moment is my bathroom as I can sit on the toilet lid and think. There, I had the idea that since my LED lantern has a loop as a handle, I could put screw hooks in the ceiling to hold my lantern. I'll have to see if Lowe's sells 10-24 screw hooks or bigger s-hooks to use with their existing screw eyes.
Some people might see my minimal electricity lifestyle as somewhat quaint. I regard it as practical. I'm just not a great fan of electrical appliances in general. This is why my forthcoming water pump will be manual.
Thinking about night privacy, I looked at my windows and measured them. The bathroom windows I don't give a rip about. I'll put pieces of shower curtain over the windows but that's all. No need for more than that.
The galley windows are doubles measuring 54 wide by 28 high. I figure a wooden dowel with a plastic fabric fastened to it together with a string could act as a roller blind. The problem would be what to use as bearings.
The bedroom windows are 54 wide by 14 high and 26 wide by 28 high. That's just 4 blinds needed. I've had various thoughts but I really like the idea of a DIY roller blind.
Aside from that, there's just the pool noodle needed over the doorway from the cockpit to the cabin and some form of lock on the front door. Well, not really a lock but a way of unlocking the existing door lock from the outside.
As well as that, I have to put my white and grey tanks under the bus and rebuild the hillbilly battery compartment. There's plenty to do and since I'm doing it all on my own, its taking rather longer than I'd like. The big thing is that I'm learning a load of new skills.
It's pretty astonishing how much I've done since I started the project in November.
No money for me though. The nearest to a genuine red letter is that my electrics as installed, work. I tested each of the three sockets by plugging in a humble fan. The main breaker box is not yet secured due to my needing to rebuild the hillbilly battery compartment but this is how it looks.


The whole system is earthed and the white and black wires are in the correct places. This is a very simple system with 3 sockets only. There is room for future expansion on the breaker box and, replacing the inlet cable, the system can go to a maximum of 55A. If the cable between the breakers were to be replaced, 100A would be almost possible.
The ratings on my system as installed are:
1. Electrical sockets - 20A
2. Wire betwixt sockets and distribution panel - 30A
3. Distribution panel - 125A
4. Wire betwixt distribution panel and main breaker box - 55A
5. Main breaker box - 70A
6. Wire betwixt main breaker box and plug - 30A
7. Plug - 30A
8. Breakers in distribution panel - 15A (all six)
9. Breaker in main box - 30A - dual breaker.
So, my system can take much higher amperage assuming portions closer to the supply are changed. I regard this as being a safe system. Indeed, if anybody can see a problem, I'd like to know about it!
By the way, for anybody wanting to use 30A solid, 30A flexible and 55A solid wire, yes it is hard to work with! It took a good couple of hours to complete what I just have. Partly this is because I am still not 100% recovered from my virus but also because the wire was hard to work with and I was being very careful to get it right.
My bus electrics are now 100% complete on the 110v side. Next comes the plumbing. For that, I need a few things. As it is, it should pass inspection as a motorhome. And I'm only 8 months, 12 days behind schedule! Mind, my schedule was over ambitious.
What followed the electrics was little short of a miracle. I removed the large pieces of construction debris and stored the surplus materials in a nearby shed. Given that I'm not over my bug, that was a lot of work. I can almost reach the driving seat now.
The hillbilly underbody compartment wasn't quite as bad as it looked. Certainly its badly installed and for that reason alone, needs to be replaced. It is, however made of inch thick marine plywood. I found that out when I drilled a hole through it to allow me to plug my electrical cable in from underneath.
Where the hillbillies went wrong was in not painting their plywood on the inside of the compartment. Having seen that, I'm minded to use plywood for my compartments. Mine, however will be painted white on the inside but with oil based paints rather than latex. Unlike the hillbillies, my compartments will have angle iron on the corners, strengthening and supporting them.
Thinking ahead to a 12v battery system which will power future extraction fans, charging ports etc, I'll have to find how much weight plywood will support to see how much bracing to use to support a battery. I have a feeling that just a single 105ah 12v marine deep cycle battery will provide for most of my needs. Of course, if later I use batteries to power my fridge, I might have to raise that capacity.
Thinking further, until I have sufficient solar and battery capacity to power a microwave, I could perhaps use a cheap generator to provide 800w to run the microwave while taking 240w from batteries to gain the 1040w needed. That would take me squarely into boondocking territory!
Later, after dinner, I returned to the bus and cut the PVC planking to the right size to fit my shower base. In a few days I'll have the base put together and the bus fully cleaned.
My favorite place at the moment is my bathroom as I can sit on the toilet lid and think. There, I had the idea that since my LED lantern has a loop as a handle, I could put screw hooks in the ceiling to hold my lantern. I'll have to see if Lowe's sells 10-24 screw hooks or bigger s-hooks to use with their existing screw eyes.
Some people might see my minimal electricity lifestyle as somewhat quaint. I regard it as practical. I'm just not a great fan of electrical appliances in general. This is why my forthcoming water pump will be manual.
Thinking about night privacy, I looked at my windows and measured them. The bathroom windows I don't give a rip about. I'll put pieces of shower curtain over the windows but that's all. No need for more than that.
The galley windows are doubles measuring 54 wide by 28 high. I figure a wooden dowel with a plastic fabric fastened to it together with a string could act as a roller blind. The problem would be what to use as bearings.
The bedroom windows are 54 wide by 14 high and 26 wide by 28 high. That's just 4 blinds needed. I've had various thoughts but I really like the idea of a DIY roller blind.
Aside from that, there's just the pool noodle needed over the doorway from the cockpit to the cabin and some form of lock on the front door. Well, not really a lock but a way of unlocking the existing door lock from the outside.
As well as that, I have to put my white and grey tanks under the bus and rebuild the hillbilly battery compartment. There's plenty to do and since I'm doing it all on my own, its taking rather longer than I'd like. The big thing is that I'm learning a load of new skills.
It's pretty astonishing how much I've done since I started the project in November.
Sunday, August 16, 2015
Disaster - the white paint ran out!
At 7pm with just about an hour before dark I'm not going to rush off to Walmart to bug more - not when I'll be right by Walmart tomorrow on my way to and from work!

I started the day, putzing around. The first thing I did was to scrape the frosting spray off the bathroom windows. It took a while and several razor blades but it's done. As the toilet, which I intended to paint, is currently sitting in front of the window it made sense to sit on it to scrape the frosting off. That was better done before painting. I have enough paint on my breeches.

After that I installed the catch plate for my cockpit door. I'd been unable to find it and had used a screw initially. Now it was found, it could be used. Needless to say, I had to space it off the frame with washers. None of my doors are a great fit but then as I keep telling you, I'm not a carpenter. If Jesus were here today, he'd surely roll his eyes at my woodwork! My woodwork is good enough for what I need.

The next thing was to retard one if my drawers. That was a task! I had to keep adjusting and now its 1/32 too low but it slides all the way back. Doing that, I found the bottom drawer also needs adjusting. I didn't do that though. That's a job for another day.
The saloon doors were next on the list. They were carefully given a coat of primer on both sides. Mostly I avoided putting primer on my paintwork. I'll have to touch up where I splashed primer accidentally though. Latex paint splashes are allegedly easy to clean up with a wet rag. That must be on some other planet though where it doesn't start to dry so quickly.
Having painted primer, I broke for lunch but not before taking a huge pile of wood offcuts and tint backing paper to the burn barrel ready for whenever. M'lady is getting restive about debris in her yard!
After lunch I painted the toilet. I'll have to return to that though since I had to paint around the seat. The lid seems stuck down. I might have to apply force to open it!

Following the toilet, most of the saloon doors were painted. The very edges didn't get paint but will later. The fronts were painted first.

Then the backs were painted. I must be some kind of sadist because it would be so much easier to paint them when they're horizontal!
Rather than painting the edges, my attention turned to the kitchen countertop. I'd screwed it down after attending to the top drawer. The bottom drawer needs a little adjustment but it's not bad enough to make it necessary. Seeing as how there was barely half a cup of paint in the pot, I simply poured if on the countertop and spread it around with the brush. By then it was getting pretty dark.

Finishing just before the light vanished, the paintbrush was plopped into a jar of water for later washing. I like that I can do that with latex paint. Tomorrow I shall buy more paint.
As of now, things remaining to do...
1. Finish painting the kitchenette countertop.
2. Finish painting the toilet.
3. Finish painting the saloon doors.
4. Put a protective sheet over the kitchen countertop.
5. Screw down and put a final coat of paint on the dinette countertop.
6. Put a protective sheet over the dinette countertop.
7. Finish putting up privacy film.
8. Put up the closet chain.
9. Touch up lots of areas.
10. Install the shower base mount.
Then it's all electrics and plumbing. I'll probably try to get the registration as a motorhome started before I do much with electrics or plumbing.

I started the day, putzing around. The first thing I did was to scrape the frosting spray off the bathroom windows. It took a while and several razor blades but it's done. As the toilet, which I intended to paint, is currently sitting in front of the window it made sense to sit on it to scrape the frosting off. That was better done before painting. I have enough paint on my breeches.

After that I installed the catch plate for my cockpit door. I'd been unable to find it and had used a screw initially. Now it was found, it could be used. Needless to say, I had to space it off the frame with washers. None of my doors are a great fit but then as I keep telling you, I'm not a carpenter. If Jesus were here today, he'd surely roll his eyes at my woodwork! My woodwork is good enough for what I need.

The next thing was to retard one if my drawers. That was a task! I had to keep adjusting and now its 1/32 too low but it slides all the way back. Doing that, I found the bottom drawer also needs adjusting. I didn't do that though. That's a job for another day.
The saloon doors were next on the list. They were carefully given a coat of primer on both sides. Mostly I avoided putting primer on my paintwork. I'll have to touch up where I splashed primer accidentally though. Latex paint splashes are allegedly easy to clean up with a wet rag. That must be on some other planet though where it doesn't start to dry so quickly.
Having painted primer, I broke for lunch but not before taking a huge pile of wood offcuts and tint backing paper to the burn barrel ready for whenever. M'lady is getting restive about debris in her yard!
After lunch I painted the toilet. I'll have to return to that though since I had to paint around the seat. The lid seems stuck down. I might have to apply force to open it!

Following the toilet, most of the saloon doors were painted. The very edges didn't get paint but will later. The fronts were painted first.

Then the backs were painted. I must be some kind of sadist because it would be so much easier to paint them when they're horizontal!
Rather than painting the edges, my attention turned to the kitchen countertop. I'd screwed it down after attending to the top drawer. The bottom drawer needs a little adjustment but it's not bad enough to make it necessary. Seeing as how there was barely half a cup of paint in the pot, I simply poured if on the countertop and spread it around with the brush. By then it was getting pretty dark.

Finishing just before the light vanished, the paintbrush was plopped into a jar of water for later washing. I like that I can do that with latex paint. Tomorrow I shall buy more paint.
As of now, things remaining to do...
1. Finish painting the kitchenette countertop.
2. Finish painting the toilet.
3. Finish painting the saloon doors.
4. Put a protective sheet over the kitchen countertop.
5. Screw down and put a final coat of paint on the dinette countertop.
6. Put a protective sheet over the dinette countertop.
7. Finish putting up privacy film.
8. Put up the closet chain.
9. Touch up lots of areas.
10. Install the shower base mount.
Then it's all electrics and plumbing. I'll probably try to get the registration as a motorhome started before I do much with electrics or plumbing.
Saturday, August 15, 2015
Saloon Doors - the finalé
After holding up my hardboard to the door, it was obvious that smaller panes would have to be used. Thus, I added two extra bars. Then all the fun started...
The first piece of quarter round wouldn't fit nicely against the wood of the door skeleton and the first piece of hardboard wouldn't fit nicely inside the frame. After drilling a hole in the quarter round to screw it down, the quarter round promptly split. I measured another piece of quarter round and checked my measurements then remeasured and rechecked. Then I cut the quarter round and the blasted thing was too short!
At that point I realised that doing it the cheap ass way was as usual going to be far more expensive. Had I bought a piece of hardboard on Wednesday then I'd not have needed a special trip to go and get it. So my $11 piece of hardboard cost a gallon of fuel on top! Yes - I had to go to Lowe's.
The end result was pretty good and clapping the board on one side of each door ended up taking the warpiness out of the doors. They now both seem to line up. I'd been wondering why two doors the same length didn't line up.

That took me through until dusk. Although I do have a lantern in the bus, its not really good enough to work by. I never got as far as putting the shower base mount together.
Earlier in the day, the privacy film that still wasn't adhering in one corner was peeled off before its glue set hard enough to make it difficult. While I was there, the frosting was scraped off one of the four frosted windows. Once all the frosting is gone, privacy film can be applied. I have no idea why the film didn't stick. It could possibly have been that there was a bit of Windex on that corner rather than just soap and water.
While I was out, I looked into my vinyl tablecloth idea. Vinyl tablecloths are not expensive at $8 apiece. The Velcro was expensive though at just over a dollar a foot. Idly, I costed a vinyl floor covering and that worked out at 74 cents a foot. That looks much more achievable though trickier to cut. I'm more thinking of just slapping paint on the countertops and putting vinyl place mats where needed. Anything to cut the stupid costs!
Thinking about power, I'm still not really decided how I'm going to go about it all. A battery bank still might end up making the most sense.
And now, a view of my saloon door from the other direction...

Another thing I saw at Lowe's was cheap privacy blinds which seemed to be concertina paper. The box advocated cutting to size with a craft knife. If they can be raised and lowered, they have potential!
The first piece of quarter round wouldn't fit nicely against the wood of the door skeleton and the first piece of hardboard wouldn't fit nicely inside the frame. After drilling a hole in the quarter round to screw it down, the quarter round promptly split. I measured another piece of quarter round and checked my measurements then remeasured and rechecked. Then I cut the quarter round and the blasted thing was too short!
At that point I realised that doing it the cheap ass way was as usual going to be far more expensive. Had I bought a piece of hardboard on Wednesday then I'd not have needed a special trip to go and get it. So my $11 piece of hardboard cost a gallon of fuel on top! Yes - I had to go to Lowe's.
The end result was pretty good and clapping the board on one side of each door ended up taking the warpiness out of the doors. They now both seem to line up. I'd been wondering why two doors the same length didn't line up.

That took me through until dusk. Although I do have a lantern in the bus, its not really good enough to work by. I never got as far as putting the shower base mount together.
Earlier in the day, the privacy film that still wasn't adhering in one corner was peeled off before its glue set hard enough to make it difficult. While I was there, the frosting was scraped off one of the four frosted windows. Once all the frosting is gone, privacy film can be applied. I have no idea why the film didn't stick. It could possibly have been that there was a bit of Windex on that corner rather than just soap and water.
While I was out, I looked into my vinyl tablecloth idea. Vinyl tablecloths are not expensive at $8 apiece. The Velcro was expensive though at just over a dollar a foot. Idly, I costed a vinyl floor covering and that worked out at 74 cents a foot. That looks much more achievable though trickier to cut. I'm more thinking of just slapping paint on the countertops and putting vinyl place mats where needed. Anything to cut the stupid costs!
Thinking about power, I'm still not really decided how I'm going to go about it all. A battery bank still might end up making the most sense.
And now, a view of my saloon door from the other direction...

Another thing I saw at Lowe's was cheap privacy blinds which seemed to be concertina paper. The box advocated cutting to size with a craft knife. If they can be raised and lowered, they have potential!
Sunday, August 9, 2015
Space - the final frontier
These are the voyages of the the good bus NSA 2011. Its five-year mission: to explore strange new places, to seek out new life and new civilizations, to boldly go where no Brit has gone before.
Well, I don't know about a 5 year mission but I do know I'm running out of space rapidly. After painting the green paint on the bathroom roof or rather, giving the roof a second coat, it was too soon to consider giving the lower wall a final coat of white as the green was not hard enough to take masking tape.

Clambering around the galley, I constantly tripped over pieces of molding. Thus, it was time to use them and use them I did. The first piece, I glued and nailed but it wasn't that great. The second, I just put the glue and nails away, drilled, countersunk and screwed it in place. Much more satisfactory and a load faster.
I noticed how warped some of my doors are and how off vertical some of my verticals are. All highly unsatisfying but they're good enough that nobody will notice and it'll all work just the same. The green paint could do with another coat in places but its not really enough to merit the time. I have until the 17th to have the bus ready. After that, woirk recommences and further construction will be relegated to weekends.
My biggest challenge right now is rehousing all my construction materials as its becoming somewhat challenging to find space to do anything. I've transferred my paint cans and long wood to the front closet but tools and supplies take up a lot of space.
In order to work in the bathroom, I'd moved the toilet to the bedroom and the shower base to the galley while the handbasin is in the cockpit. Moving two pieces of molding from the galley because I was falling over them to use them in the bedroom meant clambering over the toilet. It would be so nice to be able to do all this in a great big air conditioned garage where I could pile things ready for use!
I washed the somewhat mucky head protector from the emergency exit and replaced it after the paint had dried. There's now no Virgin Exit sign - they all left! http://schoolbushome.blogspot.com/2015/07/virgin-exit.html

I had a feeling I should be doing more painting and painted a cupboard door purple before deciding that my effort would be better employed marking where to put the drawer handles I bought last week at Ace. Thus, the drawers were marked and holes drilled. Now I can install knobs when I've finished the paintwork.

Tomorrow its probably going to be a good idea to paint the lower bathroom walls, washstand and some, if not all of the toilet. That way I can finish the bathroom then move all of the bathroom bits into place. That should give more room in the galley to work on the galley.
The batwing door hinge looks pretty straightforward. Looking at materials, I should have just about enough to complete the doors. They won't be a fancy shape - they'll be square but they'll be there!
I can see all the flaws in my workmanship and that makes me want to do better but honestly, I've done it just about as well as is reasonably practical given I need it completed by August 17th. Apparently I should be starting back to work about then.
Onwards and upwards! Completion is getting incredibly close. I look back to where I was just two weeks ago and progress has been little short of amazing!
Well, I don't know about a 5 year mission but I do know I'm running out of space rapidly. After painting the green paint on the bathroom roof or rather, giving the roof a second coat, it was too soon to consider giving the lower wall a final coat of white as the green was not hard enough to take masking tape.

Clambering around the galley, I constantly tripped over pieces of molding. Thus, it was time to use them and use them I did. The first piece, I glued and nailed but it wasn't that great. The second, I just put the glue and nails away, drilled, countersunk and screwed it in place. Much more satisfactory and a load faster.
I noticed how warped some of my doors are and how off vertical some of my verticals are. All highly unsatisfying but they're good enough that nobody will notice and it'll all work just the same. The green paint could do with another coat in places but its not really enough to merit the time. I have until the 17th to have the bus ready. After that, woirk recommences and further construction will be relegated to weekends.
My biggest challenge right now is rehousing all my construction materials as its becoming somewhat challenging to find space to do anything. I've transferred my paint cans and long wood to the front closet but tools and supplies take up a lot of space.
In order to work in the bathroom, I'd moved the toilet to the bedroom and the shower base to the galley while the handbasin is in the cockpit. Moving two pieces of molding from the galley because I was falling over them to use them in the bedroom meant clambering over the toilet. It would be so nice to be able to do all this in a great big air conditioned garage where I could pile things ready for use!
I washed the somewhat mucky head protector from the emergency exit and replaced it after the paint had dried. There's now no Virgin Exit sign - they all left! http://schoolbushome.blogspot.com/2015/07/virgin-exit.html

I had a feeling I should be doing more painting and painted a cupboard door purple before deciding that my effort would be better employed marking where to put the drawer handles I bought last week at Ace. Thus, the drawers were marked and holes drilled. Now I can install knobs when I've finished the paintwork.

Tomorrow its probably going to be a good idea to paint the lower bathroom walls, washstand and some, if not all of the toilet. That way I can finish the bathroom then move all of the bathroom bits into place. That should give more room in the galley to work on the galley.
The batwing door hinge looks pretty straightforward. Looking at materials, I should have just about enough to complete the doors. They won't be a fancy shape - they'll be square but they'll be there!
I can see all the flaws in my workmanship and that makes me want to do better but honestly, I've done it just about as well as is reasonably practical given I need it completed by August 17th. Apparently I should be starting back to work about then.
Onwards and upwards! Completion is getting incredibly close. I look back to where I was just two weeks ago and progress has been little short of amazing!
Monday, July 27, 2015
Problems, problems and more problems. Days like this stimulate my creative juices!
The first thing I did was to finish putting one drawer together or rather putting the back and sides on. Looking at it, I'll have to move the runners forward about half an inch as it protrudes somewhat. No great rush to do that though.
I didn't start on the drawers that need plywood sides and backs because I had a 20 minute task to do - namely build my cupboard door. Well, it should have been a 20 minute task. It ended up taking all day...
My initial design for the hinge post would have resulted in an oddly shaped door. By the time I had discovered I had no spare 2x4 to redo my post and gone through several redesigns a couple of hours had passed. My final design should work and echoes my design for another cupboard door post.

After that, I took a break to squirt Great Stuff into an air gap between panels. I took the easy route and simply drilled a hole big enough to accommodate the can nozzle and leaned a broom on it so it would keep squirting while I did something else. I finished off one can and put the whole of another in. To be honest, while Great Stuff isn't as bad as DapTex, its really not all that great and I shall not be purchasing any more. It expands when it has a mind to, only.

I installed hinges on the hinge post and commenced building my cupboard door. I really like that I'm running out of supplies and that I have no desperate need to get more. Not feeling very much like fighting the door, I simply glued it together. I can add screws tomorrow if need be. Right now its laid flat on the floor with beams placed across it and a gallon container of antifreeze keeping it pressed down.

As I was on my way out of the bus tonight, I made note of the things I need to buy. I'm out if inch and a quarter drywall screws and need a 16 inch drawer runner. Then I noticed a design cock up!

Can you spot it? It's really obvious! Well, when I built this, I was going to put a hinge on the visible side of the rightmost beam. I can't get in there to put a hinge! All is not lost though.
I measured my hinges and found the thread has a core of 4.5mm and an outer diameter of 5.7mm. Thus, any drill between 4.5 and 5mm should be fine. The solution will be to obtain a drill bit about 8 to 12 inches long and drill through two beams. Alternatively to lift off the cabinet top (which isn't yet secured) and drill the holes from the inside. I don't think this is insurmountable though it's interesting. I'll try drilling from the inside, first, rather than buying a new drill bit.
I didn't start on the drawers that need plywood sides and backs because I had a 20 minute task to do - namely build my cupboard door. Well, it should have been a 20 minute task. It ended up taking all day...
My initial design for the hinge post would have resulted in an oddly shaped door. By the time I had discovered I had no spare 2x4 to redo my post and gone through several redesigns a couple of hours had passed. My final design should work and echoes my design for another cupboard door post.

After that, I took a break to squirt Great Stuff into an air gap between panels. I took the easy route and simply drilled a hole big enough to accommodate the can nozzle and leaned a broom on it so it would keep squirting while I did something else. I finished off one can and put the whole of another in. To be honest, while Great Stuff isn't as bad as DapTex, its really not all that great and I shall not be purchasing any more. It expands when it has a mind to, only.
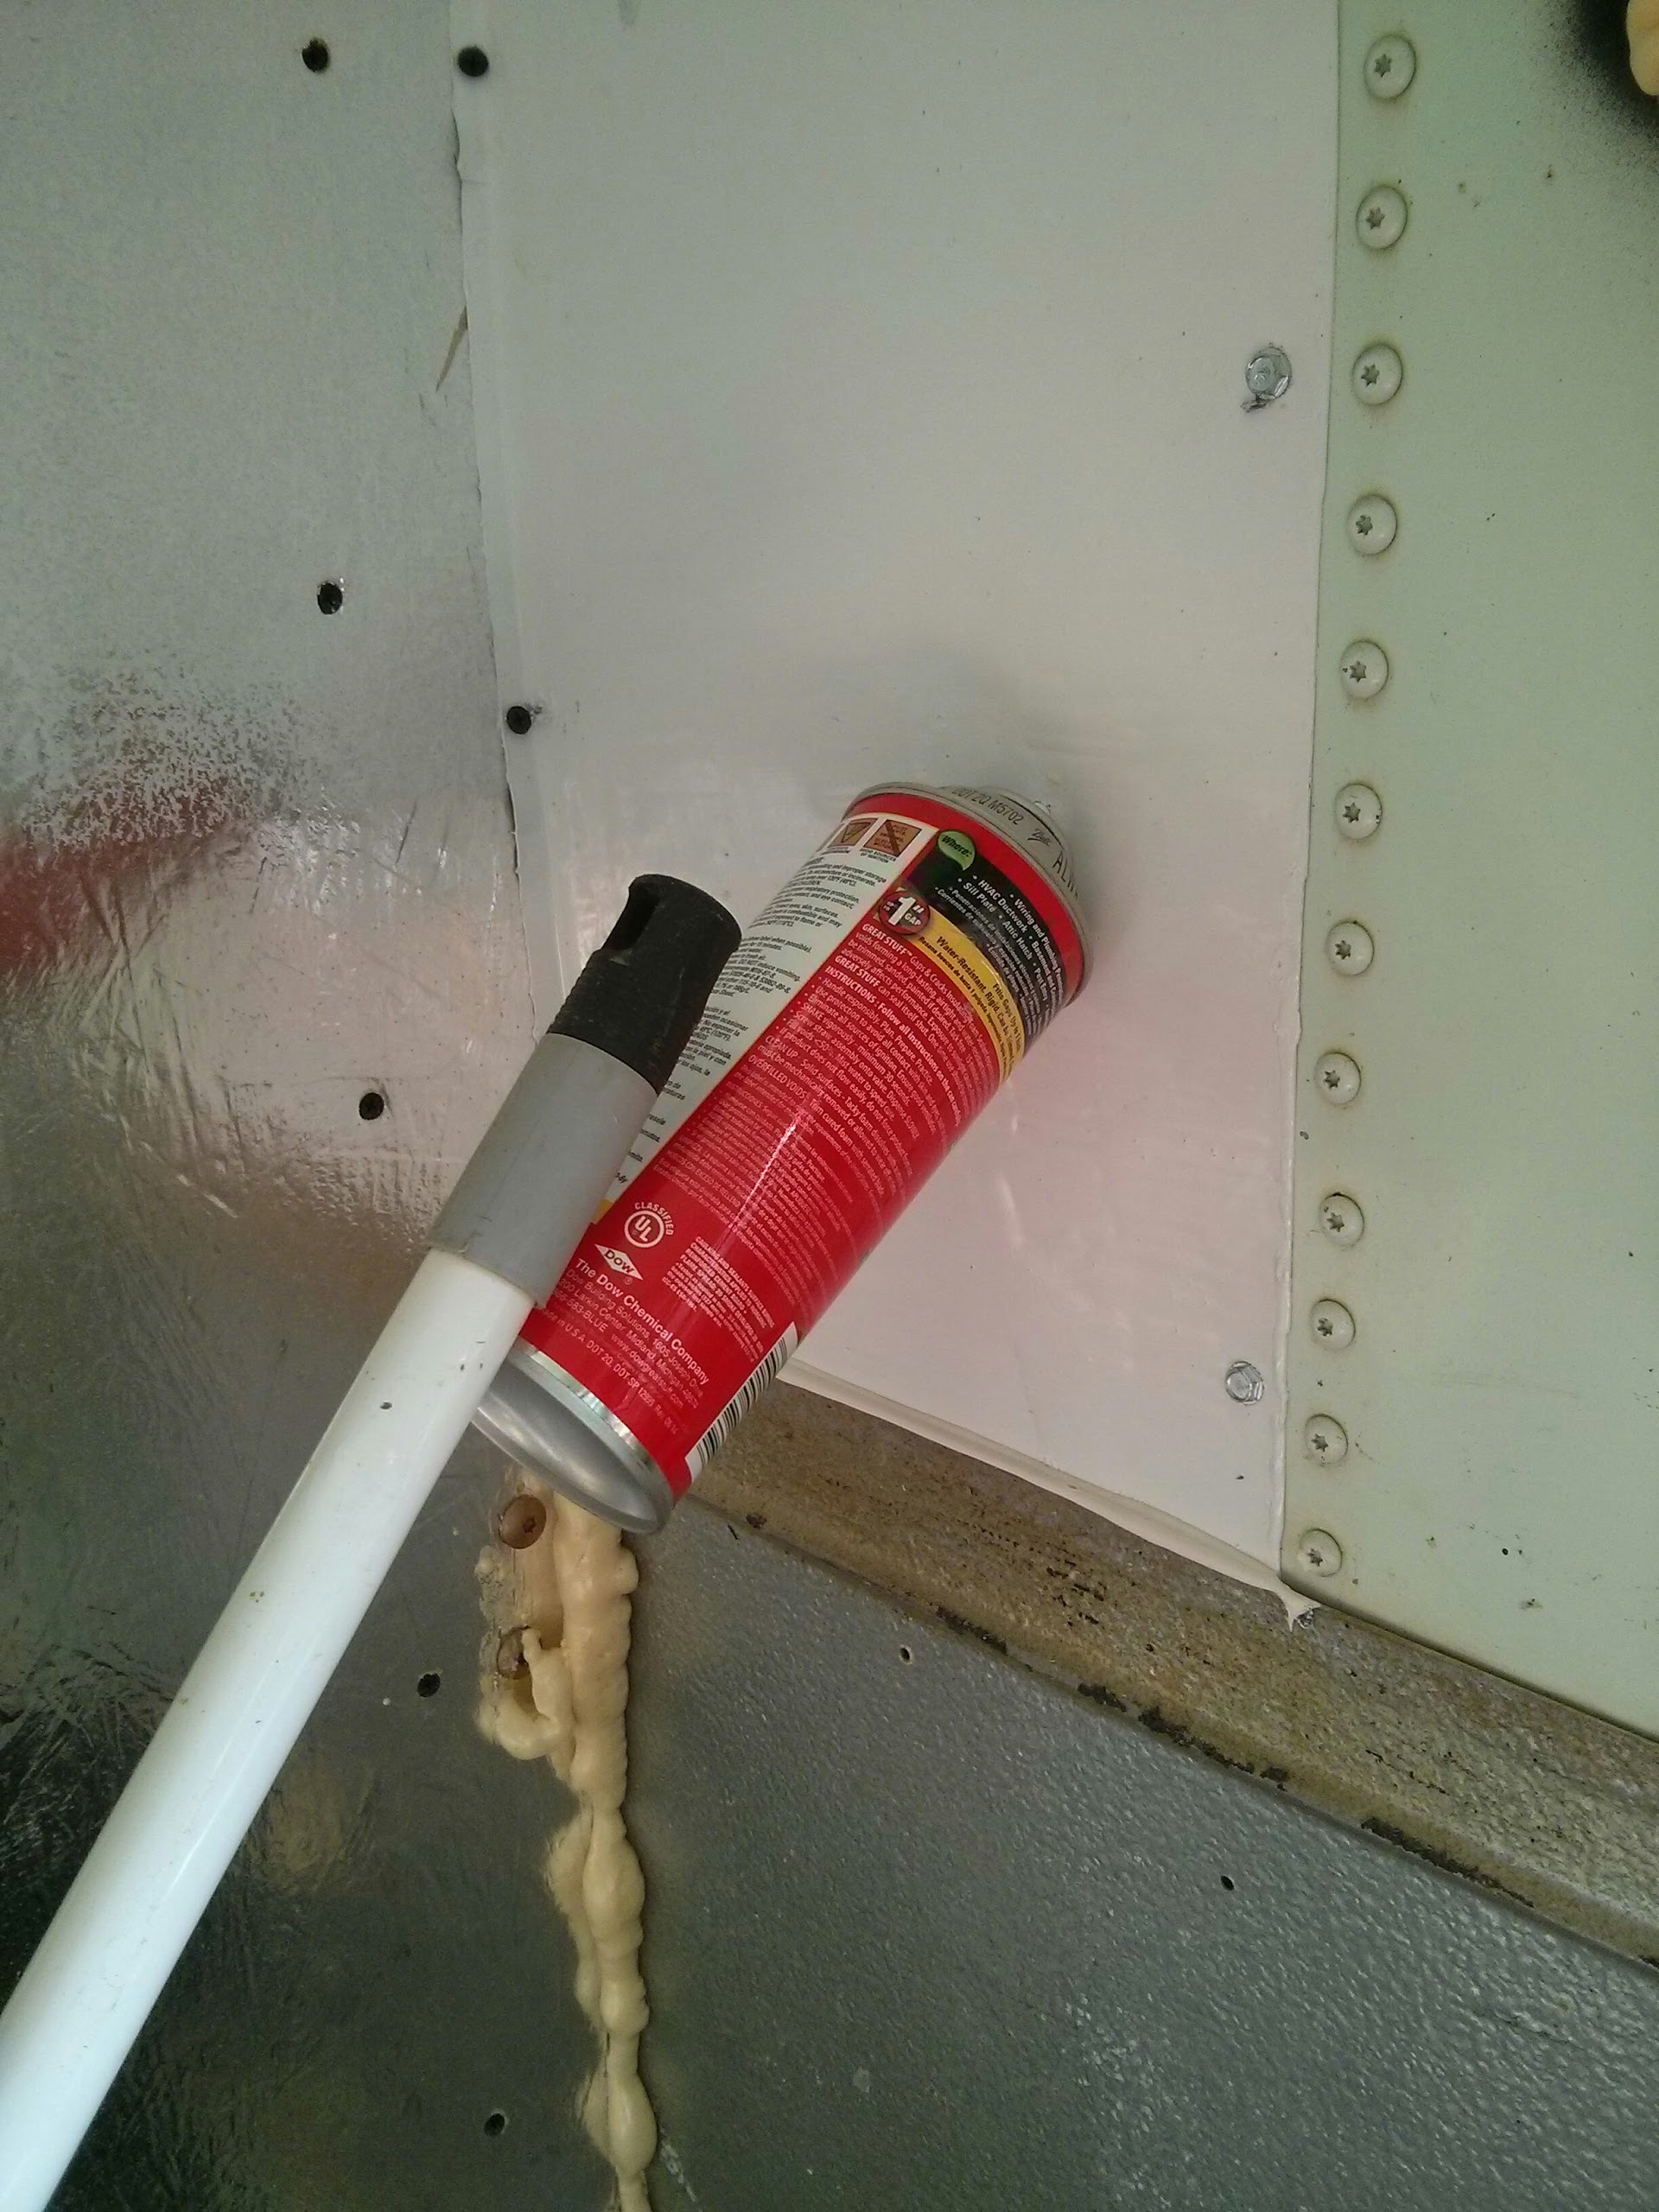
I installed hinges on the hinge post and commenced building my cupboard door. I really like that I'm running out of supplies and that I have no desperate need to get more. Not feeling very much like fighting the door, I simply glued it together. I can add screws tomorrow if need be. Right now its laid flat on the floor with beams placed across it and a gallon container of antifreeze keeping it pressed down.

As I was on my way out of the bus tonight, I made note of the things I need to buy. I'm out if inch and a quarter drywall screws and need a 16 inch drawer runner. Then I noticed a design cock up!

Can you spot it? It's really obvious! Well, when I built this, I was going to put a hinge on the visible side of the rightmost beam. I can't get in there to put a hinge! All is not lost though.
I measured my hinges and found the thread has a core of 4.5mm and an outer diameter of 5.7mm. Thus, any drill between 4.5 and 5mm should be fine. The solution will be to obtain a drill bit about 8 to 12 inches long and drill through two beams. Alternatively to lift off the cabinet top (which isn't yet secured) and drill the holes from the inside. I don't think this is insurmountable though it's interesting. I'll try drilling from the inside, first, rather than buying a new drill bit.
Sunday, July 5, 2015
A lot of work
Today, between squalls I did a lot of little things on the bus. Nothing that in itself amounted to much or was in the slightest noticeable but which adds to the small stuff done before. This bus is a collection of little things that add together to complete the project.
The first thing I did was to trim the remains on the last fridge door to size with my angle grinder. One thing I noticed is that cutting thin steel really burns through cutting disks. I suspect it has something to do with physics and the thin edge that's being cut. I'd love to have done physics or engineering but sadly I know my maths wasn't up to it. It's not that I'm in any way dumb - rather that my junior and high school maths teachers turned me off about the subject. So, having trimmed the steel to fit, I painted the cut edges and the face I didn't paint yesterday with white Rustoleum.
While the Rustoleum was drying, I got on with the inside painting, priming the areas that hadn't been touched by the roller. I did intend to start painting with my purple paint but the paint didn't dry fast enough. One of the downsides of latex paint is that it's not very robust. At the time I started with latex, I couldn't find oil based paint. I spotted it yesterday but I'm using latex now. I hope I don't need to touch up that often!
So, while the latex was drying, I cut off the carrier for the tow hook some moron had welded to the front bumper. That took a long time but didn't burn through the cutting disk. That little $15 Harbor Freight 5 inch angle grinder has been excellent value. Initially I tried to cut the welds but that didn't seem to work too well so I just cut the bulk of the bracket off instead. The welds are pretty bad welds. After cutting, I was left with part of the bracket still attached to the front bumper. I sprayed it with rust preventative just in time because half an hour later it began to rain heavily.

Before the rain started, I picked up my fridge door and fitted it into position then screwed it down. Behind it I packed some Styrofoam. I also injected some Great Stuff. I'm beginning not to be too impressed by great stuff. I squirt it into spaces and it likes to come out of the hole it was put in through but doesn't seem to want to spread much behind the hole. It'll even push a stopper out of the hole and still refuse to spread behind.

Having done all that, I fitted the door catch on the door to the cockpit. The receiver was missing so I improvised with a screw. That worked really well! Because the door is warped, the springiness holds the door against the screw. The next thing was to fit some quarter round against the doorframe. That worked quite well.

Finally, I had time for some fun! Tomorrow, the weather being fine, I shall get on with the purple paint. The walls above countertop height and the ceiling will all become purple. The lower walls and floor will be white though I do have some black plastic I can lay down to keep the floor clean. But back to the fun... Never let a silly sign go to waste!

That sign is about as silly as can be. Villains won't read it and won't care. It doesn't apply to me because its my bus.
In other news, while the lack of Facebook generated hits has reduced overall hits. The needing to keep posting in order to maintain Facebook peoples short attention spans took up rather too much time. I'm rather glad I don't have to deal with such a horrid time soak any more!
The first thing I did was to trim the remains on the last fridge door to size with my angle grinder. One thing I noticed is that cutting thin steel really burns through cutting disks. I suspect it has something to do with physics and the thin edge that's being cut. I'd love to have done physics or engineering but sadly I know my maths wasn't up to it. It's not that I'm in any way dumb - rather that my junior and high school maths teachers turned me off about the subject. So, having trimmed the steel to fit, I painted the cut edges and the face I didn't paint yesterday with white Rustoleum.
While the Rustoleum was drying, I got on with the inside painting, priming the areas that hadn't been touched by the roller. I did intend to start painting with my purple paint but the paint didn't dry fast enough. One of the downsides of latex paint is that it's not very robust. At the time I started with latex, I couldn't find oil based paint. I spotted it yesterday but I'm using latex now. I hope I don't need to touch up that often!
So, while the latex was drying, I cut off the carrier for the tow hook some moron had welded to the front bumper. That took a long time but didn't burn through the cutting disk. That little $15 Harbor Freight 5 inch angle grinder has been excellent value. Initially I tried to cut the welds but that didn't seem to work too well so I just cut the bulk of the bracket off instead. The welds are pretty bad welds. After cutting, I was left with part of the bracket still attached to the front bumper. I sprayed it with rust preventative just in time because half an hour later it began to rain heavily.

Before the rain started, I picked up my fridge door and fitted it into position then screwed it down. Behind it I packed some Styrofoam. I also injected some Great Stuff. I'm beginning not to be too impressed by great stuff. I squirt it into spaces and it likes to come out of the hole it was put in through but doesn't seem to want to spread much behind the hole. It'll even push a stopper out of the hole and still refuse to spread behind.

Having done all that, I fitted the door catch on the door to the cockpit. The receiver was missing so I improvised with a screw. That worked really well! Because the door is warped, the springiness holds the door against the screw. The next thing was to fit some quarter round against the doorframe. That worked quite well.

Finally, I had time for some fun! Tomorrow, the weather being fine, I shall get on with the purple paint. The walls above countertop height and the ceiling will all become purple. The lower walls and floor will be white though I do have some black plastic I can lay down to keep the floor clean. But back to the fun... Never let a silly sign go to waste!

That sign is about as silly as can be. Villains won't read it and won't care. It doesn't apply to me because its my bus.
In other news, while the lack of Facebook generated hits has reduced overall hits. The needing to keep posting in order to maintain Facebook peoples short attention spans took up rather too much time. I'm rather glad I don't have to deal with such a horrid time soak any more!
Friday, June 26, 2015
Who took the fridge door?
Today was another of those blisteringly hot South Carolina days; the kind that saps your strength and has you racing for air conditioning. I had ideas of doing some painting or perhaps some work in the bathroom. As usual, that's not quite what happened.
The day started with a walk around the yard. My eye alighted on a fridge door which had me racing back to the bus for my tape measure. Quickly I measured the windows that I wanted to fill. It transpired that the fridge door would provide the perfect amount of sheet steel and with a very useful angle.

The fridge door was dragged by hand, 200 yards in the intense heat. That was quite enough and a break in the aur conditioning was called for.
Returning, I set to with my angle grinder and began to cut two sections for the windows. Cutting was pretty quick and easy though the cutting disks wore out pretty fast. This must be the downside of small disks.

It took about half an hour to roughly cut two window covers. Shaping them precisely took longer including several fitting sessions. Eventually they were both cut to the right size. This took quite a while due to the necessity for breaks indoors under air conditioning.

Eventually the steel was cut and fitted. The insulation was scraped off with an old chisel. Then it was time to paint the steel. There were rust marks on the fronts but those will be dealt with at a later stage. Right now I painted the backs to keep them rust free. It'll need a second coat, I'll have to treat and paint the fronts as well as smoothing the edges.

For the moment, the metal is stored under the bus while the paint dries. Apparently it's going to rain tonight!
The day started with a walk around the yard. My eye alighted on a fridge door which had me racing back to the bus for my tape measure. Quickly I measured the windows that I wanted to fill. It transpired that the fridge door would provide the perfect amount of sheet steel and with a very useful angle.

The fridge door was dragged by hand, 200 yards in the intense heat. That was quite enough and a break in the aur conditioning was called for.
Returning, I set to with my angle grinder and began to cut two sections for the windows. Cutting was pretty quick and easy though the cutting disks wore out pretty fast. This must be the downside of small disks.

It took about half an hour to roughly cut two window covers. Shaping them precisely took longer including several fitting sessions. Eventually they were both cut to the right size. This took quite a while due to the necessity for breaks indoors under air conditioning.

Eventually the steel was cut and fitted. The insulation was scraped off with an old chisel. Then it was time to paint the steel. There were rust marks on the fronts but those will be dealt with at a later stage. Right now I painted the backs to keep them rust free. It'll need a second coat, I'll have to treat and paint the fronts as well as smoothing the edges.

For the moment, the metal is stored under the bus while the paint dries. Apparently it's going to rain tonight!
Subscribe to:
Posts (Atom)