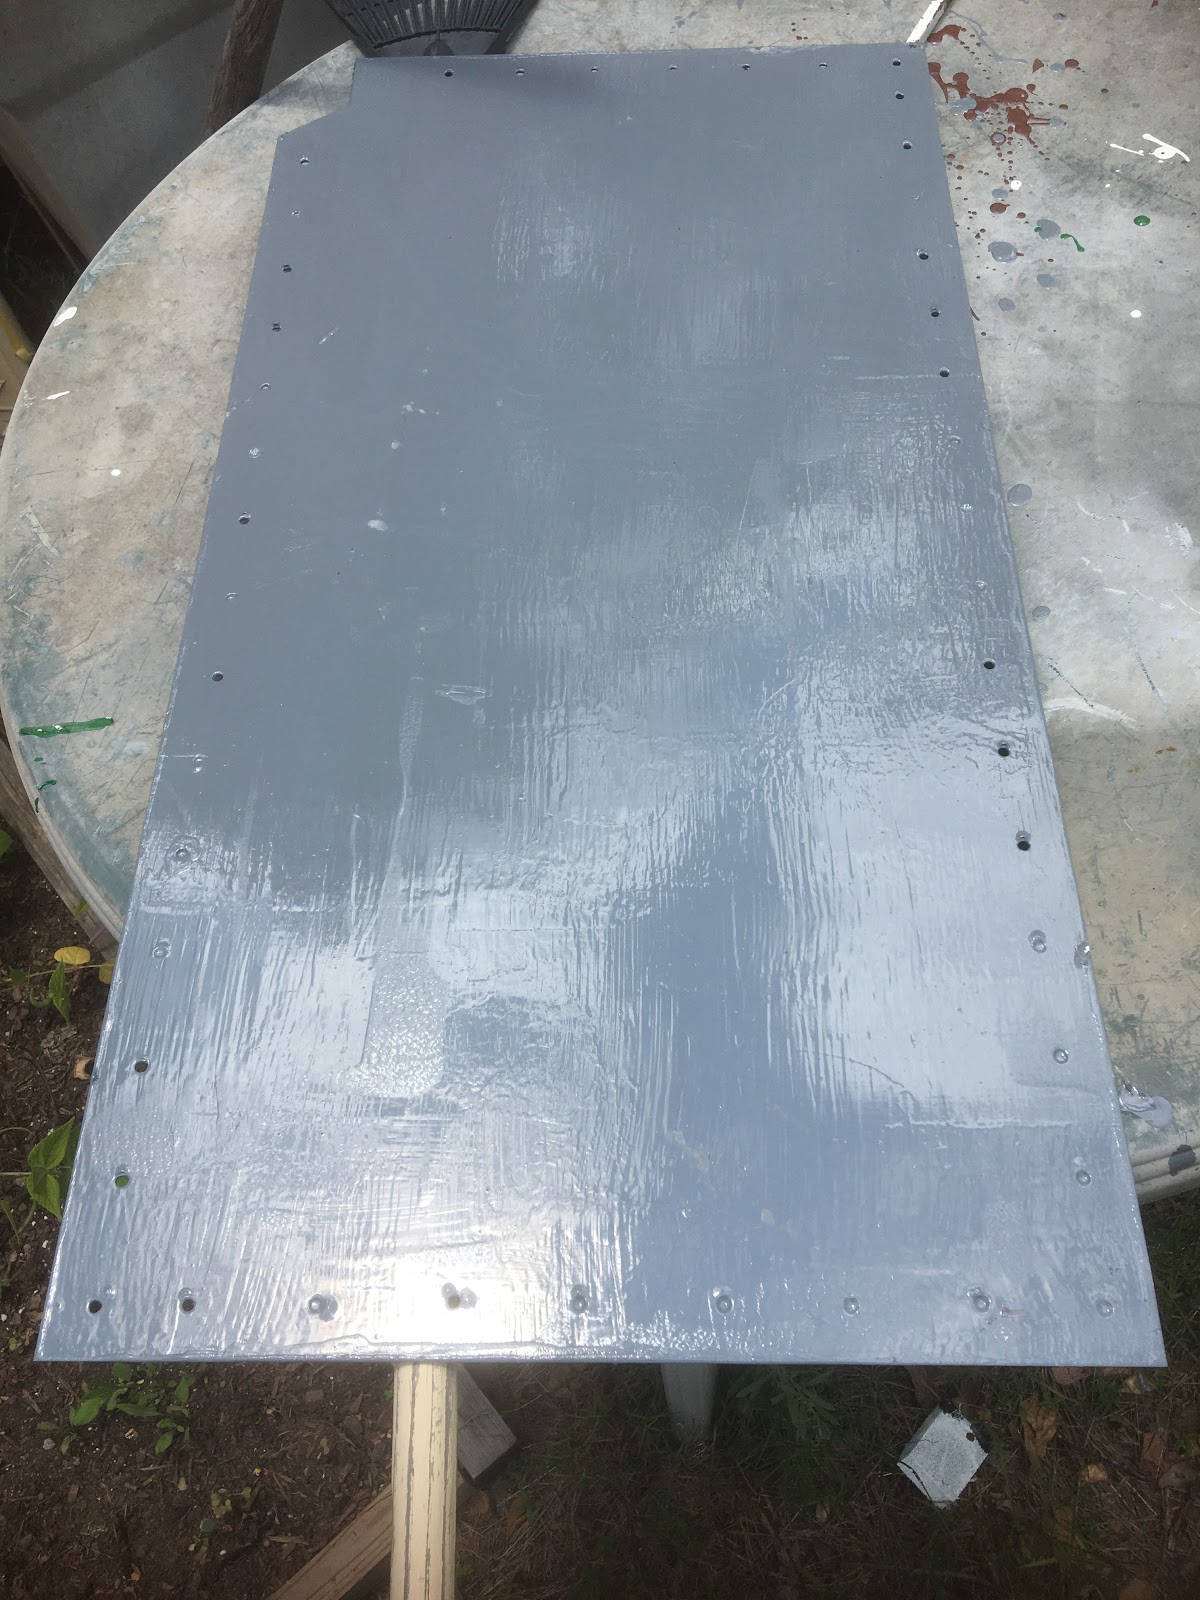
Tuesday, June 30, 2020

Problems, problems and more problems

It seemed like problem after problem today. I did get to roughly where I wanted by the end of the day though. I'd taken yesterday off due to not sleeping and feeling pretty icky anyway. It turned out that my exertions are a bit much in such a hot climate and I'd done what I usually manage to do and got dehydrated. It doesn't take much in South Carolina.
So, at the start of the day I was where I was when I left off two days ago. The welding was mostly ground smooth with the exception being at the top. The eagle eyed among will notice that slightly below and to the left of the door handle are four rivets. A new cutout in the steel sheet had to be made to accommodate the rivets. I wanted the steel sheet to lay flat if possible.
Grinding the outside of the welds freed some parts of the steel sheet I'd welded in. To speed things up, I cut the center of the steel out and worked on the rest. Some of the welds were holding so poorly that merely flexing the steel broke it loose. That's the problem with welding the garbage steel that domestic appliances is made from. 
There was a little rust and a lot of slag in the valley on the door side of the glass retaining ridge. I didn't check the other side. That's a job for another day. I did go all the way along the valley with a sand blaster and got rid of a lot of junk. I had a nice sand shower in the process so sweat and sand combined to provide me with an interesting little paste all over my body. I have to say sand in the hair is about as bad as sand in other places.
So, having sand blasted it was time to slap rust killing primer on. This is the same brown primer that I use for painting the panels. That really didn't take long to dry.
The tools used today were mainly air tools. I have my little air drill which works really well but eats air like there was no tomorrow. It's nice but I think electric beats air in this instance. The angle grinder works well but was getting so much use that I'm afraid it won't last too long. The sand blaster hopper from Harbor Freight is pretty good. I'm around 2//3rds of the way through my box of Harbor Freight sand. The Harbor Freight air riveter - it works better than my Harbor Freight hand riveter or my Harbor Freight long arm riveter. It does jam though. I am so glad it's an easy tool to dismantle and reassemble. About 10% of the time it broke the end off the rivet mandrel rather than break it at the rivet. One rivet, it managed to pull the rivet a bit then push the mandrel in so that it wasn't possible to do anything other than cut it with an angle grinder.  
That was the try-in for the panel. I'd supported it on a nail placed on the hinge so that I wasn't pressed up against the hinge. I didn't get it quite straight but there's only about 1/32 in it.
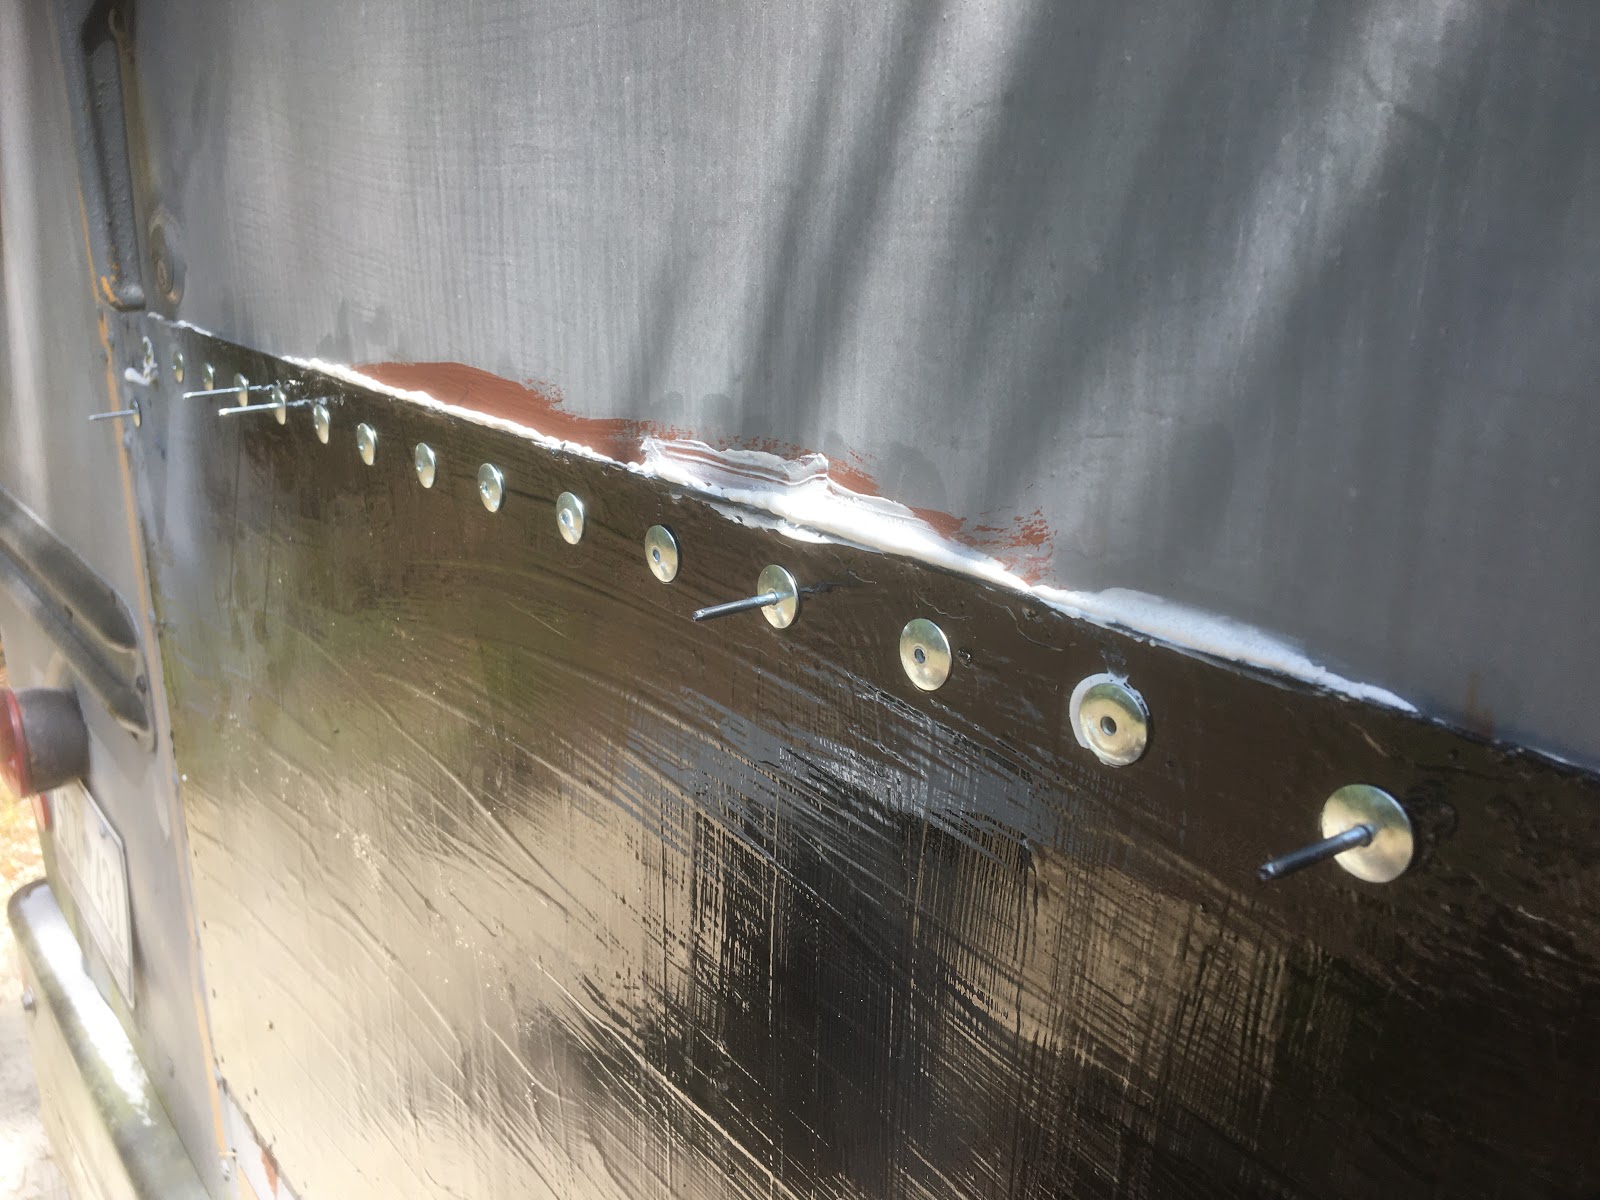
There you see the rivets that the air riveter didn't break off properly. I'm wondering whether it just needs more air pressure. Perhaps the 10 gallon tank is a bit to small? The rivets down the right hand side all had to go in at an angle. Inside the door there's a steel bar on the right. If my holes had been 1/32 to the left then it would all have been fine. I'll have to seal under the canted rivets.
Another issue was that like all my other riveters, it wouldn't release a mandrel. I had to dismantle the riveter several times. Don't get me wrong - it does a fantastic job but not all the time. The failures are probably why the Harbor Freight riveter is $100 cheaper than most other air riveters. Given that I don't need to do more than a hundred or two rivets, there's no point in spending more.
Finally, the panel was on and looks pretty good. I'd been all around it with caulk to try to keep it sealed but I needed to run extra caulk around the edges. Needless to say, I ran out. I'll probably need at least another three or maybe four of these tubes of caulk.
The bonus with this caulk is that it is apparently paintable. The next task with that back panel aside from caulking the edges is to replace the one rivet that I had to cut off half way in, half way out. Then there are two rivet holes that I tried to make which have massively thick steel behind them that I didn't end up penetrating. I'll have to finish those drill holes and put the rivets in place. Finally, I'll have to paint the door grey. That black paint gets scorchingly hot! The grey seen on the panel are grey primer sprayed on where I' scraped the steel as I worked on it.
And finally, these two sheets of steel are for the windows each side of the door. Compared to what I just went though on the bottom of the door, this will be a piece of cake!

As I'm out of caulk, I need to do a shopping run so I might as well pick up a few other things as well. I need the caulk but I should also probably pick up another can of primer. Topcoat can wait a bit. I do have some in grey. I have a lot more in black that will do for the moment. Perhaps some more thinner might help, given the temperature.

I have been threatening to get some 2x3 timber to make myself a frame to stretch a tarp. That would keep the sun off me. I'm not sure I want to spend the money on a luxury or the time building it either.

Saturday, June 27, 2020

The long, hard grind

Today I spent most of the day painting the panel to go over the lower back window. The front side, shown in the photo had not been primed yesterday due to a pop up thunderstorm. Thus, today I primed the side shown. That was quite quick because by the time I'd got to the end of the sheet it was almost dry enough to start over with the second coat. I gave it half an hour then did the second coat.
So, after the second coat of primer was dry, I put on the four coats of topcoat - two per side. As it all dried fairly quickly, that was no big problem. That was the only thing I didn't take a photo of today. The first corner of the first coat of topcoat came from a can of semi-gloss black paint that had enough for just a small amount of paint. That was good - I could get rid of an empty can. Then I started on a half-empty black gloss can. That'll be fine for all sides of the metal sheeting. I can paint the visible parts grey later. The important thing is to protect and install.
Having some spare time left in the day I took out the angle grinder and used a flapper disk to remove the Bondo. That worked a bit but the welds are so blobby and piled up that I quickly shredded the flapper disk. Thinking harder I pulled out the sand blaster and sand blasted the Bondo to almost no effect. That surprised me! I had a nice sand shower though.

Then I put the grinding disk into the angle grinder and started to grind the welds flush. That was an operation that was more successful than anything else. 
During the grinding, the poor adhesion of the weld to the fridge steel became very apparent. I intended to work all the way around but another pop up thunderstorm threatened so having done some of the work (and got a lot of shards of hot ground metal in uncomfortable places), I quit for the day.
With gaps in the welding very apparent, there was a loud metalic pinging noise. I would not be surprised to find that the door has now sprung back to being where it should be, which was really the aim of removing the too thin steel panel. Tomorrow I'll grind more of the bulbous welds flat and might cut the steel out. I realised I don't care if I remove it all or not. I just want to get enough out that I can sand blast any rust then paint thickly with rust-killing primer. Then I can rivet the new panel in place.

The bottom window is getting much closer to being sorted out. I might still need to trim the top right corner because of the rivets filling holes in the body. I'll have to see how that goes though. Once the bottom panel is in place then I shall be a lot happier.

Friday, June 26, 2020

Faster, better, higher

It would have been a dreary and repetitious Thursday today had it not actually been Friday. In fact it was pretty repetitious. I was repeating making the template and the steel panel for the lower window of the back door. Fortunately though I was not making the same mistake. I learned from my mistake last time round.

Fortunately I had enough of the thin plywood that somebody had thrown out to make a very nice template. This is the only window that will need a template. The two side windows I push the panel up to the gutter, slide across to the door frame and it's perfectly in place. The upper window, the bottom part sits on the hinge and on the door handle mount, both of which seem to be perfectly level. No problem there.

It didn't take long to make the template. The first time I cut, I undercut for the hinge cutout. That was no problem. I can always take more off. I can't put it back. Having fixed that, I could see exactly where everything was going to go. The next thing will be to drill holes in the template to match the two holes on the bottom corners of the sheet of steel. That way, when I locate the steel in place I won't have to struggle holding up the weight and drilling holes at the same time.
This was the first time since I landed in the USA that I've needed to use a coping saw. The hinge has a funny little angle that I had to follow. Anyway, having cut the template I marked and cut the steel then tried it in place where it fitted perfectly. I think I deserve a round of applause, a box of chocolates and a bottle of champagne for that! Sadly, nobody is going to produce any of those. The best I could achieve if there had been witnesses is probably a rather feeble raspberry.
Having cut the corner for my hinge, I set up the Harbor Freight drill press. As I did so, putting the 11/64 drill bit that I'd bought for my rivets, I noticed that at the bottom of the drill's travel, the chuck shuddered violently. That is probably why the step bit I used the other day would jam so often. I'll have to grind the unevenness off and put some paint in place. Still, that wasn't important for now.
Marking the holes to drill didn't take all that long. There ended up being 51 marked holes but I didn't mark any around the hinge. Those I'll do after the panel is in place. Last time I drilled using the drill press I used WD40 spray oil as my lubricant. That was messy and got everywhere. Today I used Otter gun oil. I have a couple of gun cleaning kits that I really don't use. The sheet of steel is not clamped down this time. It has enough inertia not to move when I'm drilling. As I'm drilling on the floor, I supported the steel on a sheet of plywood supported by gallon paint cans and raised the drilling platform to correspond.
Because working in a shipping container in heat is unpleasant I had to take several breaks to cool down and rehydrate. I also like to let the drill bit cool after about every 10-15 holes. I oil it to stop it overheating but when I see the oil smoking when I'm drilling, it's time to pause.
Having finished the drilling I wiped the now pretty oily sheet of steel down with paint thinner and a paper towel. That then led to my slapping a coat of primer on. There were gaps but as the primer was dry within about half an hour, I could do a second coat.

As the second coat was going on, the steel lying in the sun on an old plastic garden table, the sky began to darken. Quickly I picked up the steel, wet paint and all and put it in the container to dry. Not much worth in hoping the paint will dry and cure today. Tomorrow, weather willing, I'll prime the other side and maybe get paint on too.

My previous panel I painted smoke grey like the bus. As I don't have an awful lot of grey paint left, rather than painting both sided grey, I might paint them both black for the moment. I found I have several pots of black paint, some half used. The main thing is to protect the steel even though it's galvanized. So, a layer or two of black paint then after all the steel is installed, I can put the grey on.

While I was looking at the back of the bus today, I saw the sad condition of the reflective tape around the back door. That, I'll replace as I have some on order from China. It looks the same but at $2.37 a roll as opposed to $150 a roll, it looks better value. I'll probably put some around the side door too if I have enough. Regular school busses are very visible these days. There's reflective tape around every window and along the sides too. I have to say it works, headlamps really illuminate a bus in the dark. I'm not sure I want to go that far yet though.

One thing I did notice during drilling was how much faster and easier a real drill went through the steel than my step bit. It was also noticeable how much less swarf was hanging from the back side of the drill holes. In fact most drill holes were smooth and needed no attention.

It would be very nice if everything went smoothly and as planned. That way I could get all the rear wall panels done by next weekend. Life being life, I doubt things will go that smoothly though. And the darkened skies turned into a torrential downpour with plenty thunder and some strong winds. It's almost as though the weather has caught a dose of Covid!

Thursday, June 25, 2020

Advances again.

After the debacle of the wrong size of steel sheet, I ordered more. Today I have the message that the steel had been cut and was ready. That meant I had to go out - not something that I really want to do, these days, what with this Covid-19 thing going on. The thought of more steel and getting on with business was too enticing though so I shot out of the house and raced down the road. 

As the steel supply place is on the left going down the road and Lowe's (hiss, spit) was only a little further I went on to Lowe's (hiss, spit). There's a dripping outside tap back at Rancho Covido so I went to the tap shelf and as every time before, found there was a lovely selection of invisible taps. The one in the middle of the top shelf is very fetching! So, getting a tap was yet another bust. I'll have to go to a real plumbing shop another time.
So, not finding what I wanted I went to the drill bits section. As I have a 3/16 rivet that is going to be very hard to push through a 3/16 hole I needed to drill a bigger hole. I'd ordered some drill bits from eBay to help me with this but it must be one of those affairs where the guy orders in bulk and gets it all shipped from China while sitting on my money. The drill bits were ordered on the 19th. Today (the 25th) a shipping label was created. The delivery estimate is July 7 which makes me suspect they're in a shipping container on the way from China. eBay might as well be called cBay (China Bay).
So, in Lowe's (hiss, spit) I bought a pair of 13/64 drill bits. I'm sure a 5mm bit would have been a closer match but as normal, they didn't have anything actually useful. Lowe's (hiss, spit) is like the "cook" at a Soviet Young Pioneer camp I worked for a long time ago. The choice for breakfast was some kind of tasteless, white paste or nothing. If she liked you she would hurl a huge dollop on the plate and the bits that didn't hit the plate, hit you. It's a very surly "if we have it you better buy it" and they just pretend to look things up with no intention nor ability to order anything actually useful. To put it mildly, they're just a box shifter.
Having endured Lowe's (hiss, spit) where most of the staff now seem to be wearing masks, even if almost none of the customers are. I moved on to the steel place where it was very impressive to see a short fellow pick up 60lbs of steel sheet and hold it straight over his head while carrying it to my car. That was another $190 but the other steel will come in handy for something. Not sure what yet but steel is always useful. 
Arriving home, I picked up a couple of the sheets of steel and held them up against the windows. The ones beside the back door were really easy to hold up. Sure - they were heavy but the top could be pressed against the underside of the gutter and the side went against the edge of the door frame. Those are going to be as easy as pie to maneuver into place. The one at the top of the back door will be easy too. The top meets the top of the door and the bottom rests on the hinge and the door handle surround. That one will need a slight bend in the last couple of inches. The one for the bottom window on the back door is the one that needs a template.
Fortunately there was a thin plywood offcut somebody had thrown away and I had rescued from their pile of garbage. It was a mere matter of moments to align the steel sheet with a corner and to mark the two remaining sides. A few minutes later using a hand saw (which reminded me of the time I wrenched my wrist a month or so back) and I had a nice template.
I have to fine tune the template but this time I'll be much more delicate with the template so that I don't just carve out a huge chunk and have to fix it later. Again, this is an easy template to get straight - the edges line up with the edges of the door.

Yesterday I was going to set to and do the roof vent. It was 90F (32.2C) with 50% humidity. I went out for five minutes and it was stifling. No way could I stand that and stand on a bus roof for an hour or so. That was rather fortunate actually because not quite an hour later the wind picked up and the rain came down. It was as though somebody had upturned a swimming pool over me while banging a pair of trashcan lids together.

Yesterday's shower wasn't a brief thing either. It thundered, blew and rained hard all night and half way through the day too. In fact it was only when I had the call about the steel that the weather began to perk up.

In order the windows that will be most involved are the lower door window, the upper door window and then the two side windows. This is why I'm starting with the lower door window. Once that template is right and the steel cut and tried, I can get on and drill all the holes. Now I have real drill bits that should be fairly swift. I'll have to see if I can locate a small oil can though so I can drip chain oil on the drill bit to keep it cutting nicely. The two side window sheets I can just clamp together while I drill.

The bend on the top door window will be interesting. I'll have to make sure the door fits properly - at the moment it's slightly warped. When that's straightened I can rivet that steel on and get it right. Riveting it on when warped will accentuate the warp. Things to ponder!


Tuesday, June 23, 2020

I listened to the idjuts online!

Pride comes before a fall and I was so proud of my nicely cut and painted sheet of steel. It looked so pretty in the bright sunlight and I wanted to locate it where it needed to go for final fitting. I wasn't going to mount it today because of the forecast rain. Needless to say as I write this after stopping work for the day, the rain is coming down in spades.
Knowing there was going to be an issue getting the first sheet level, it seemed a good idea to make a wooden support. That didn't take much time at all and my template was a great help.
As I was going to be working with an angle grinder and sand blaster on the outside, I put my old sheet of fridge steel back on the inside. That looked pretty good and would save me a lot of mess inside or, rather, would help me not make the mess inside worse.
After I put the steel pack on the inside I had a nasty thought that the steel looked bigger than the nicely cut and painted piece. I removed the interior steel and held the new piece of steel up against the window aperture. On the inside I can see the aperture. On the outside I cannot. It turned out that the nicely drilled rivet holes top and bottom went to empty space. That was quite crushing!

I pulled out all the other pieces of steel and held them up against their respective windows. They were fine from top to bottom but side to side they were narrow. The problem was that I had not allowed adequate space to put rivets. The bus body manufacturer put their rivets on 3/4 inch in from the edge of the steel and used 1/2 inch head rivets. Thus, half an inch of steel flat extends beyond the rivet on the edges. While I could use narrow head rivets, I want to keep in line with what the body manufacturer did. That way I know I'm getting a decent construction standard.

So, all the steel sheet is too small. That's $186 of steel BUT all is not lost. I'm nowhere near going broke. Anybody that says school bus conversion is something a pauper can do is fooling only themselves. A service on a school bus is $1,000. Tires are $300 each and that's for cheap tires. The do 8 miles to the gallon. None of that is pauper world.

With all the money I'm saving by not going out and not eating out due to Covid-19 this extra steel isn't costing much. If I spend another $200 then that's about 20 visits to Hardees or Tokyo Grill. It's about six fill ups at the filling station or a combination of those. In fact based on my filling up every 2 weeks normally and visiting restaurants for lunch, it's more like 2 weeks of general living - which I don't need to do due to Covid-19.

So, I've inquired about more steel from the same place. The 14 gauge I have can be used in so many ways. I believe I can weld it but I don't want to weld over windows for fear of more warpage. I was thinking about how much this door has cost so far...

In the beginning I was advised by somebody I thought might be right, online, that a DC stick welder would be the right thing to use. All I had was an AC stick welder. I have to say that the DC stick welder didn't really do the job. That created more problems. Having said that I've used that DC stick welder for other things and it beats the pants off my AC welder. That was $160 reasonably well spent.

Of course as soon as I mentioned the problems with the stick welder, the idjuts online said I needed a wire welder. Thinking it unlikely I did look into it and figured that at $125 the Harbor Freight wire welder wasn't too bad. That, as it turned out, loved to spit balls of steel everywhere. It was pretty much like the AC stick welder on a bad day with a 6011 rod. It also liked to burn through steel which was not what I was expecting. It'd be fine for fixing farm gates but that's about it.

Looking on the bleak side I could say I'm down $285 on welders that won't do the back door (which is what I wanted to do) and $186 on steel that I can't use for the back door. Now the steel is entirely my fault because I measured to fit the apertures and a bit more but didn't allow enough to clear the apertures and allow space for rivets and space the other side of the rivets. So though I'm down near $500 on the back door without a final solution, I'm not despondent. The DC welder is definitely a keeper. The wire welder - well - I've not used that successfully yet and I'm still on the Harbor Freight reel of wire that was supplied with it. Perhaps the other reel will work differently. I'm not going to pull the reel off though just to change reels as the reel would likely get snarled.

The steel - I have wanted decent steel for a while. I can definitely use the sheet steel. While by the time I have done the back door and the windows each side of it, it will have cost in excess of $700 and would have been cheaper for me to go crawling to some backstreet welder dude with BO, an offensive tee-shirt, too many questions and an obvious meth habit but I have done everything on the bus myself so far. It has been my project and at the end of all this I want to be able to say proudly and honestly I did ALL this by MYSELF. Yes, there have been things I've had to do and redo and change but I did them by myself without having any help most of the way.

As far as the welders are concerned, I do regret buying the wire welder. The DC welder is a great improvement over the AC welder in that now I can actually use 3/32 welding rods.

The steel company probably won't put the order through until at least the Thursday so it could be Friday before I get the steel. Thus I'm free now to change the roof vent. I'd been wary about that just in case I needed to put a steel collar under it - who knows what the roof is like sunder it since the vent is rusty. I had no supply of decent steel to put as a patch. Now I do. So, if it's a decent day tomorrow then I might get that done and then wash the bus roof before putting more of the elastometric paint up there. It'll be the first try out for my air riveter.

Building the wooden frame for the support for the back door panel that wasn't to be, my Harbor Freight cordless drill was making a real racket. The jaws opened enough for the drill bit to slide up inside the chuck an amazing distance. When it dies which won't be long now, I might replace it with an air drill. It's getting to the point when I need to mount an air tank under the bus to power tools etc. I'm pretty sure a standard 12v tyre pump with a better air-cooling system would be the compressor. I'll have to give that more thought.

Sunday, June 21, 2020

Getting closer

The general craziness of yesterday did not revisit itself upon me today. Instead, today was a much more productive gentile affair. The plan was to cut the corner of the sheet for the bottom window. I have to say I have not been looking forward to this, perhaps because the fear of making an error even though I'd made a template.

Before I got on with all this, I took the old template I'd made to fit steel in the bottom window of the back door when I was going to weld it in. I'd been asked for a portable backsplash for a portable induction burner. That old template looked to be the ideal size so in a single afternoon, today I managed to paint primer and two coats of topcoat per side. The paint was drying that fast. 
The first order of the day after doing the backsplash was to trim the corner from the steel sheet. Before doing that it was necessary to check the fit. Thus I used the perspex template and the hardboard template. I suspected I'd overcut the allowance for the hinge. I corrected that when cutting the steel on the assumption that it's better to cut too little off and cut more off later. It's rather harder to add back afterwards.

Having cut the steel and having learned from my previous mistakes, I removed the lower backup camera before holding the steel up to the window. Last time I dropped the steel and broke the camera. This time I removed the camera just in case. I was going to have to do that anyway because I changed my mind about the type of camera I'll be putting there anyway.

As it happened, cutting a smaller aperture for the hinge seems to have worked out better. Of course I'll only be able to ascertain how much better when I clean the Bondo off the window and grind the welds off. With luck, the door should spring straight again too. If not then I'm pretty sure once I get to work on the top window, I can bend it back into alignment.
The first side. This is the outside of the panel has now had two coats of primer. Certainly it is galvanized steel but even that should be painted. All vehicles are made of galvanized steel. Before I could do any painting though I had to wipe the sheet down on both sides with paper towels and paint thinner. I'd used WD40 as a lubricant for the drill. I'll use a better lubricant next time and there will be a next time - I have 3 other sheets of steel to use. 
This is the other side - it looks exactly like the first except the cutout is in a different place. Had the cutout been on the same side, I'd have been a bit puzzled!

So the goal tomorrow is to paint both sides of the steel with smoke grey paint to match the bus. That might take one or two coats. I'm so glad I went to the dollar store today. I'm pretty sure I have paintbrushes but couldn't find any. I ended up with a bag of 8 for $2. That's really not too bad. There were two average sized brushes that were great for the backsplash I painted. When it came to the steel sheet I had small or very big. As they were all foam brushes I could just cut the sides off the very big one so that it fitted into my small paint can, which is exactly what I did and what I'll do tomorrow.

I'm dealing with each window in turn. Each will provide its own unique issues that will have to be solved. Once the rearmost windows are sorted out, the back end will be much more secure.  The next thing will be the roof vent. By then, of course, I should be well versed with my air riveter. The new air riveter combined with my new broad-head steel rivets should be a great combination.

Thinking back, if I'd just got these sheets and rivets instead of faffing about trying to weld paper thin fridge steel, I'd have been a lot further along with the bus. People had been on suggesting that rather than use the AC stick welder I should get a DC stick welder. That is certainly better and gives me nicer welds as well as being lighter and more compact. They were wrong when they suggested a mig welder. I did end up getting a mig because the stick welder would burn through the thin fridge steel. As it turned out, so too does the mig welder and I suspect that's because the mig is an AC mig welder, not a DC mig. It certainly does shower the place in little balls of steel. That might be fixable by adding a bridge rectifier inside the mig. That's not exactly high on my list of priorities though, given I solved this problem with bought sheet steel and that I have a ton of welding rods for my DC welder.

That's the way bus construction has gone - try something and it doesn't work so try something else and that doesn't work so try something else. There are plenty that will sound off, saying conveniently after the fact, what should have been done which is invariably claiming credit for the solution I developed on my own. I'm not one for on-the-shelf solutions nor for buying in help. I hate that I had to buy steel as I much prefer foraging and getting stuff free. The fridge steel was free. It was also garbage. I'm well aware that I should spend the least on the bus to get the most out of it.

So, the next stage will be painting the smoke grey paint. After that I'll want to remove the old plate and Bondo off the bus. I really need a wire brush for that but I don't have one. I'll have to use a flapper disk in my angle grinder. If I went to Harbor Freight then I could get one but that's half the day gone. It's a long drive and local drivers are pretty crazy. This is one task that will have me covered from head to toe in white dust. Following that I have to grind as much of the nasty welds away as I can, sand blast the rust and then paint with my rust killing primer. I believe there might be a hole I'll have to fill too. I can fill that with polyurethane caulk or I can fill it using my welding rod. I just hope there's no water inside the door. That would add another complication but one which is solvable.

After the bottom window has been done, there are the other three windows. The top door window requires a bend in the sheet steel. I'll have to see how easy or hard that will be to achieve. It might just be a case of welding a couple of pieces of steel angle together to provide a slit through which I can pass the steel sheet then have another piece at an angle and just clamp the steel in place before beating it with a hammer to bend down to the angled piece of steel.  That's a joy yet to come.

The windows on the sides of the doors have a reflective strip running up one side. That strip will have to be removed. That's an added complication. I'll then want to replace it so I'll probably have to buy more reflective strip. Looking at the local auto parts store, the price was horrendous. eBay had just what I want at a decent price too. I'll have to see how good or bad it turns out to be. The old strips were pretty well worn.

The new thing on modern busses is to have reflective tape around all the windows and around all the doors. On mine, it's just around the back door. It's surprising just how much difference that tape makes in poor light! I'll have to see how good my cheap tape is. It could be as good or just pretty good.

Still to do on the bus - quite a bit inside of sorting out wiring etc. Underneath - wiring in the new rearview camera, sealing around the codebox and passing solar wiring into the battery compartment to enable battery top up. The high-level reversing camera needs urgent replacement and a little roof over the replacement to stop it suffering the same watery fate. The roof vent urgently needs replacement and I need to wash the roof and put the last of my elastometric paint on where the paint has peeled. The internal wiring can be done anytime but the rest is best done now. I'll also have to go and get new tires - the old ones were old when I bought the bus and that was 6 years ago!



Saturday, June 20, 2020

Things went pear shaped!

When things start to go pear shaped, time to quit and quit I did. I'd been in the shipping container drilling the holes in the steel ready for the rivets. That went fine. Then I had to go to make a more precise mask for where I'd have to cut the steel sheet to make room for the door hinge.  As it so happened, the hillbillies that owned the bus before me had clearly broken a couple of windows, just taken them out and replaced with plexiglass. That plexiglass has been sitting around in the yard for the past 5 years since I removed it and replaced the missing windows with solid aluminium sheet. 

Looking at the plexiglass, there were two sheets - one was clear and the other smoked. The smoked sheet was too dark to use which was fortunate as it was pretty badly broken. The other was perfect so I cut a chunk out with the intention of marking the hinge with my sharpie that I'd located earlier. Of course, when it came time to mark the plexiglass there was no sign of the sharpie anywhere. I retraced my steps, hunting everywhere that I'd been. After half an hour frantically hunting for my sharpie, I happened to put my hand in my pocket. It was there - which was strange because I'd looked at my pockets earlier and thought it was just my phone and my keys.

Well, the plexiglass was marked and compared to the marking I'd put on the steel from before which was just a rough outline guestimated and drawn from where the markings I'd put on my sheet of hardboard had been. I'd overcut the cutout in the hardboard horribly. Well, putting the plexiglass against the freehand guestimation I found I'd been bang on. That was somewhat of a relief, I can tell you!
The cutout on the right on the now fully drilled sheet is where the bottom door hinge is located. The sheet is way bigger than the window but that's perfectly fine. It gives me plenty space to rivet and seal. I don't like marginal clearances. As they say - better too big and have to trim than too small and have to buy more. Since I'd already had something go amiss I left the steel for another day. It's all pretty greasy with WD40 so I might have to wipe it down with paint thinner after I cut the hinge cutout.
When I went out to the bus this morning, the battery was at 47% according to the infamous Renogy MPPT charge controller. Thus I put my Harbor Freight panel out to collect additional sunlight. That thing is pretty darned heavy, I can tell you!
After a while I put out my three 10W panels that were destined to be replacements for the 15W Harbor Freight panel. They take up vaguely the same space but produce double the power and weigh half as much.
I had full sunlight and with the Harbor Freight 15W panel aimed upward I had around 10.1W, not the claimed 15W. I can get better than that with the three panels!

While I was thinking about it - I'd already connected the three 10W panels with the cheap new connectors I'd bought on eBay. I have to say I quite like these new connectors. I had two more 10W panels and two more connector pairs. I sat in the sun on the bus step and connected the remaining pair and coupled them to an SAE connector for compatibility with the bus system. So at the end I had two panels with the new connector jacks and short leads and two leads with connectors going into an SAE connector.

While I was working on this, I pulled the covers off the connectors on the back of the solar panel where I found Aleko quality control was sadly lacking. Both panels had strain relief clamps that were not clamping anything. The outer sleeve of the cable was outside the connector box which meant the clamps had nothing to grip. It didn't take long to slide the outer sleeve into the connector box.
So it came time to test the wiring. I have a policy of testing everything multiple times and on multiple occasions. Better to test than to have a disaster. I spent quite a while working with the two panels before coming to the conclusion that the reason my connection wasn't working was because I had a faulty connector. One of my pack of 10 connectors was faulty. Current is not passing through. I didn't check which side wasn't working but the screws were both conducting correctly - it just wasn't getting through to the pin. That was a bummer! I've had to order more. I do have a pair of 20W panels that could do with being brought into use.

On the way from China are some more SAE connectors. I figure with both sets of connectors I should be all set as far as solar power is concerned. I have to say that I really don't much care for the Harbor Freight panel so that might get used domestically rather than on the bus.

Taking stock of what I have in panels...
2 x 10 mounted on the back of the bus above the door.
5 x 10w (two brands) that can be placed in the sunlight.
2 x 20W that can be placed in the sunlight
2 x 30W that I put in the windscreen when needed.
1 x flexible 10-15w panel (not sure quite what it is)
1 x epoxy 5w panel
1 x 15w Harbor Freight panel.

That's a grand total of 15 panels, none of which cost the earth. All combined, they should provide 200W but I don't need all the panels all the time. The ability to put panels in the sunlight on the end of a cable is very important. Having cheap panels that are easy to replace if lost, damaged or stolen is important too. I have to say I really like the flexible panel because it's so lightweight and because it can be just tied to a rope and hung in the air if needed.

By about 3pm with 55W of panels on the ground in sunshine, two mounted 10W panels facing away from the sun and two 30W panels in the windshield, the batteries were recorded at over 90%. That's a big change from the 47% this morning. I have no idea how low they dropped.