Today being a total washout as far as cutting plastic planks went, I worked on other things inside the bus. The little lantern I bought is a real godsend. Without it I'd have been unable to see to do anything. It really was that dark, what with all the rain.
After putzing around a bit, I started on the closet chain. It was a lot easier than I'd imagined though I had to tip my tool box contents and my supplies box contents into the shower pan in order to find the things I needed. That took some time too.

The closet chain is unfinished because I ran out of screw hooks. I had six and I have 20 rivnuts. Thus, I installed six rivnuts and six screw eyes with s hooks. Then the chain was hung from the s hooks. It's an elegant, lightweight solution. Each hook is 7 inches from the next. I figure that should hold the weight of clothing.

After installing the closet chain, my next project was to fit a handle on the toilet lid so that it can be opened and closed as needed. That was the work of a very few minutes.

The door lock had started being a bit odd in operation and certainly didn't look right as the tongues were hanging at a sloppy angle. I dismantled it and was amazed at how cheap and nasty it looked. Clearly the lock company whose name shall not be mentioned has just sold me any old junk rather than a decent quality lock. Needless to say, I reassembled it as it should have been and remounted it. This time, it worked properly. That's something that it has never done before. My guess is that it was bad from the start!

The hanbdbasin mount was fastened down. That took all of four screws and a few minutes. The hand basin itself is just held into place by gravity. There never were any mounts as such in the original installation. This hanbdbasin came from the hillbilly bus build.
In the background is my thermometer/hygrometer gizmo. Today it was 75F (24C) and 76% humidity. That was very pleasant for working inside the bus. I can see a dehumidifier will be needed.

I tried my breaker box in place. I couldn't fasten it as I'm lacking a main cable and its conduit just as I'm lacking sockets and other cables. Today was a day for visualising the electrical system.
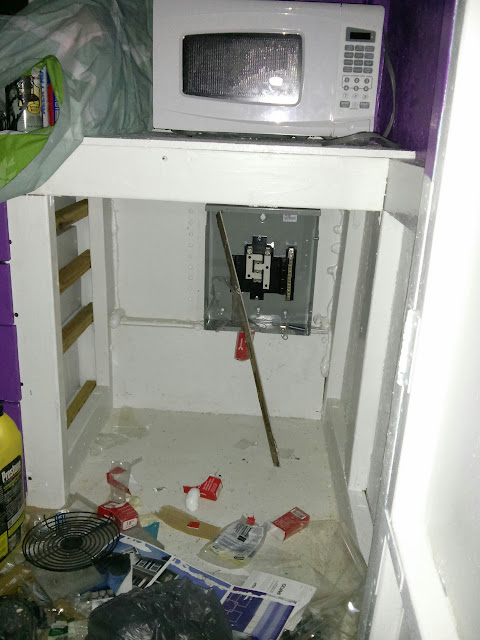
Next, I fished my microwave out of storage and placed it on the countertop. It's a cheap Walmart microwave that I used from November of 2011 until April of 2015 when I moved house. Looking at the setup, it just seems that four surface mount electrical sockets would go very nicely on the front of the beam under the microwave.
As I'm limiting the power input to 50A, I figure two sockets can be 15A and two can be 10A. There will be a main breaker at 30A with a spare breaker at 50A for times when I'll be able to access 50A. For safety, when I'm on a 15A supply as when parked at home, I'll use a 15A main breaker.

Looking inside my microwave showed how horribly rusty it is. M'lady wants me to throw it away but I want to do what my dad did with his rusty microwave. He cleaned it out with steel wool and painted it with anti rust paint. It worked for years after that.
It does show why enameled paint inside a microwave is a sign of a cheapass microwave. The better microwaves are stainless inside. When it dies, I have plans for the components inside.

Mounted on the skirt of the bus, behind the hillbilly compartment (which will house a pair of batteries once I've rebuilt the compartment) will be this socket. The door goes outside the bus skirt. The box goes inside. The cable will be a dryer cable in a conduit from the 50A socket to the breaker box. I'd like to use flexible conduit but I think standard conduit might be cheaper and more practical to install.
On top of the breaker box I'd like to install sockets so that I can just plug my other cables in. It's more expensive but I feel a better solution.
If I can get my closet chain completed this week and the shower base mount then the electrics really won't take long. I'm annoyingly close to being able to apply for the bus to be registered as a motorhome.

My final act was to install a fire extinguisher. This was installed directly opposite the electrical system. This extinguisher is specifically for electrical fires and burning liquids. Ideal for kitchens! Let's just say that First Alert's wall mount for the extinguisher was very troublesome to install. It would be so much better if instead of a nasty plastic strap, a Velcro strap or a solid loop was used. I have no idea whether I'll be able to remove the extinguisher from the nasty strap or whether I'll just have to rip it off the wall if it's ever needed. This is why I'll be installing more extinguishers.
No comments:
Post a Comment